
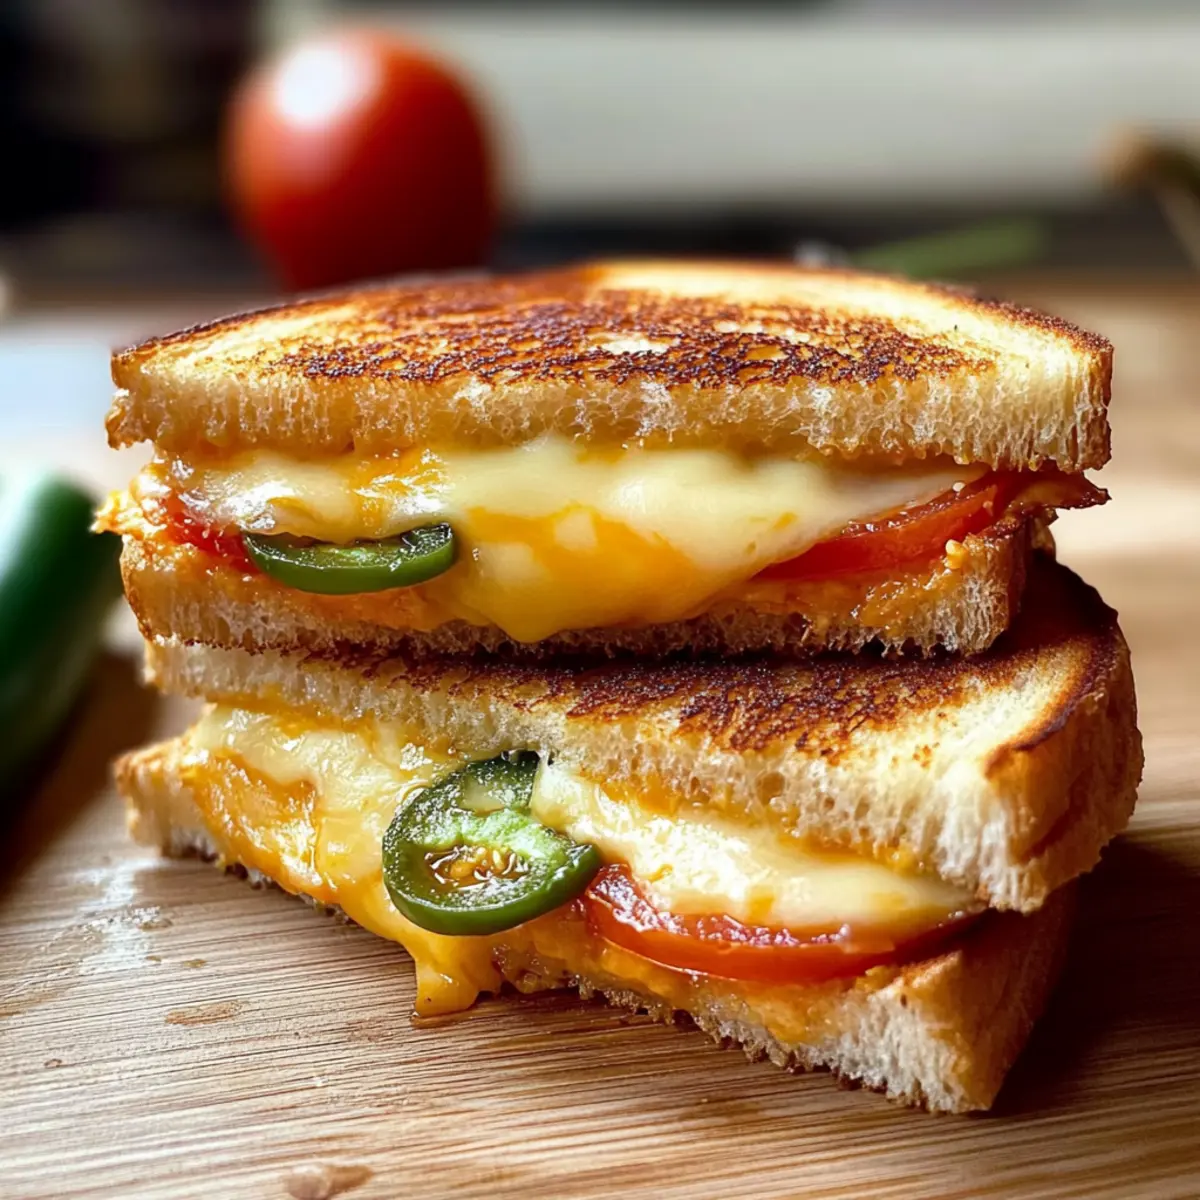
As I stood in my kitchen, the tantalizing aroma of melting cheese mingling with the sharp scent of jalapeños danced in the air, I knew I was in for a treat. This Spicy Grilled Cheese Sandwich isn’t just a meal; it’s a comforting indulgence that transforms a simple lunch into an unforgettable moment. With creamy cheese, vibrant veggies, and that perfect kick of heat, this sandwich checks all the boxes for a quick prep and a satisfying outcome. Plus, it’s a fantastic option for meal prepping—just whip up a batch and store them for busy days ahead. Curious to learn how to master this delightful recipe? Let’s dive in!
Why is this Spicy Grilled Cheese special?
Simplicity at its Best: With just a few wholesome ingredients, making this sandwich is a breeze, perfect for both novice cooks and seasoned chefs.
Flavor Explosion: The melty cheese combined with fresh veggies and a hint of jalapeño creates a mouthwatering flavor that dances on your palate.
Versatile Options: Swap out the cheese or add in extras like avocado or spinach for a creative twist that caters to your taste and dietary needs.
Meal Prep Friendly: These sandwiches store beautifully—prepare them in advance and enjoy a quick, hearty meal on those busy days.
Crowd-Pleasing: Whether for a family lunch or surprise guests, this Spicy Grilled Cheese is a hit that satisfies everyone! Plus, pair it with a simple side salad or a light soup for a complete meal!
Spicy Grilled Cheese Sandwich Ingredients
For the Spread
• Butter or Margarine – Essential for achieving that golden-brown crust; try olive oil for a lighter alternative.
For the Bread
• White Bread – A classic choice that holds up well; switch to gluten-free options for dietary needs.
For the Cheese
• American Cheese – Provides creaminess that’s hard to beat; feel free to use cheddar or a vegan cheese for a twist!
For the Veggies
• Roma (Plum) Tomato – Adds juicy flavor; any ripe tomato will do if Romes aren’t available.
• Onion (Chopped) – Brings a crunchy texture and sweetness; shallots are a great substitute for a milder flavor.
• Jalapeno Pepper (Chopped) – Delivers that spicy kick; omit for a milder sandwich or swap with bell pepper for a sweeter touch.
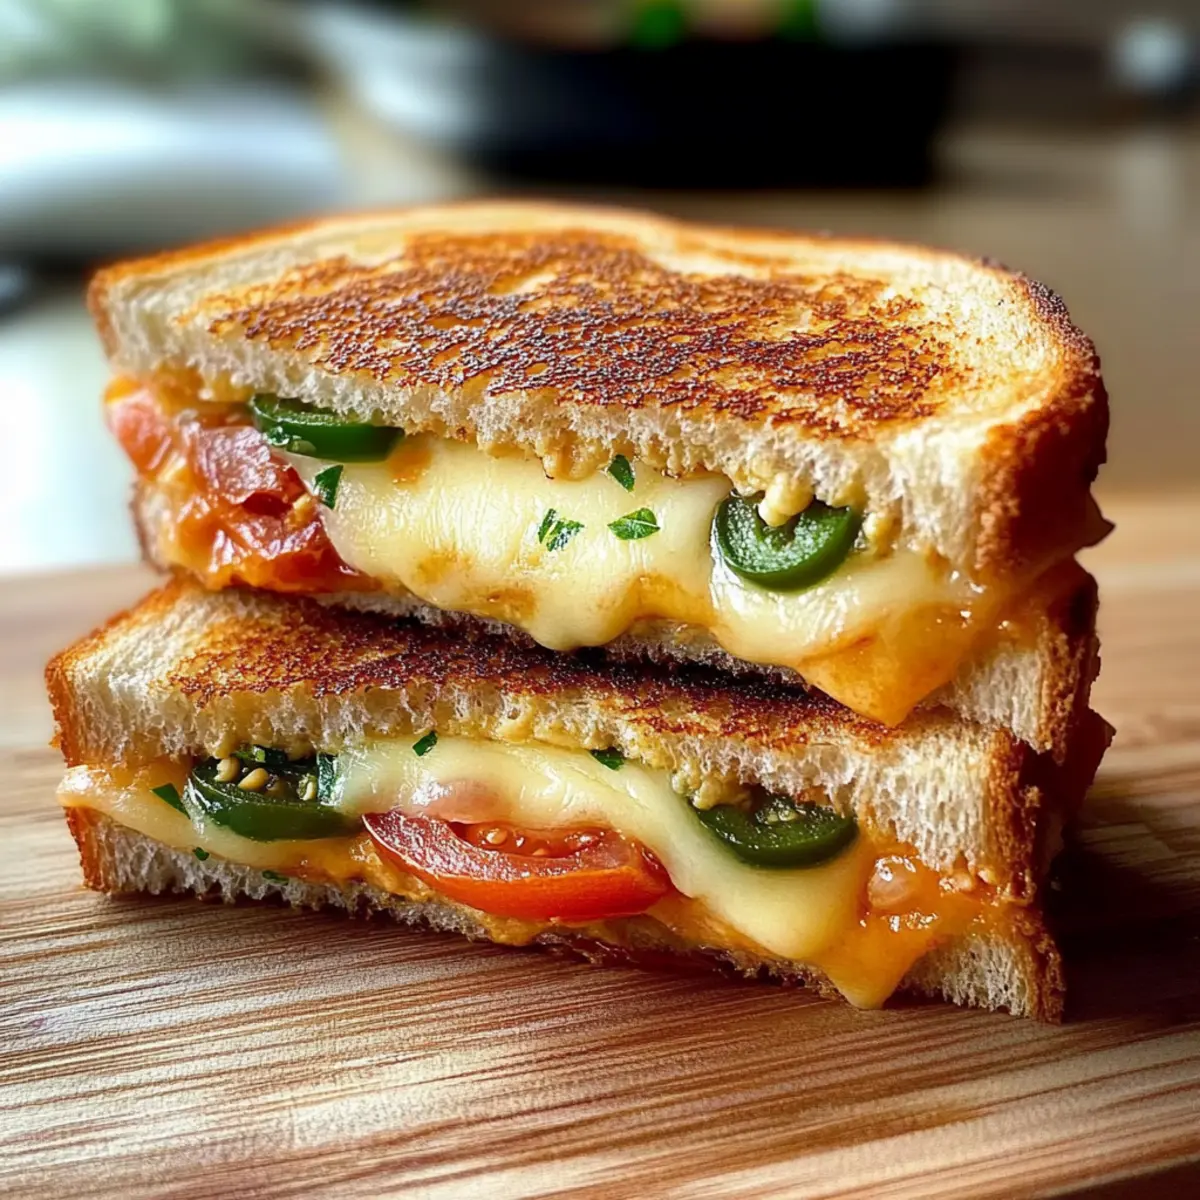
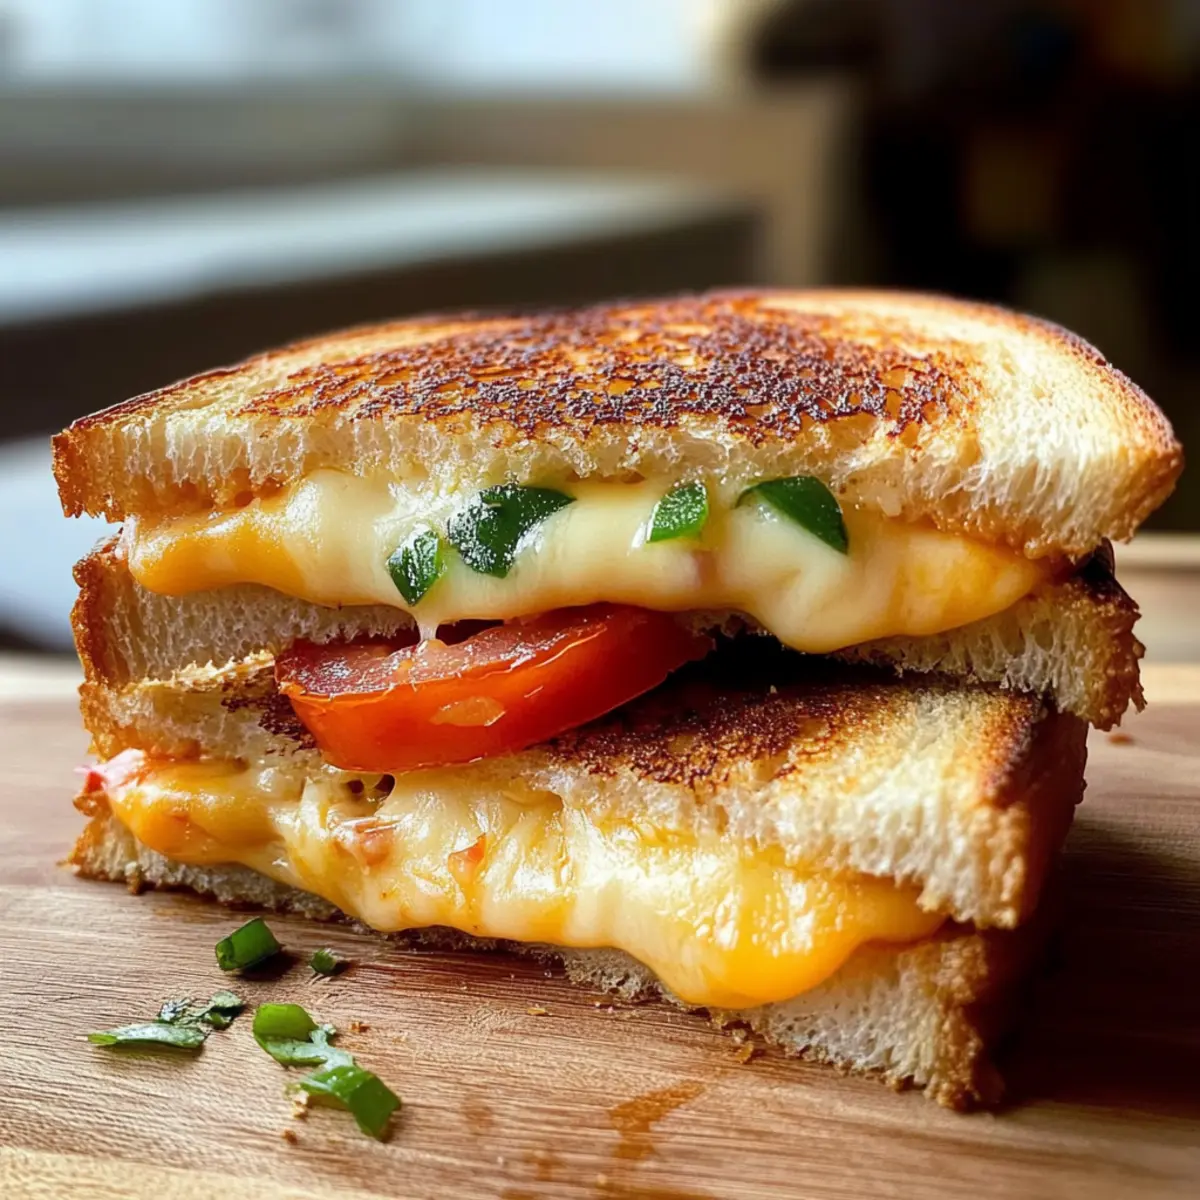
This Spicy Grilled Cheese Sandwich combines delightful flavors and textures, perfect for both a cozy lunch at home or when you’re on the go!
Step‑by‑Step Instructions for Spicy Grilled Cheese Sandwich
Step 1: Heat the Skillet
Begin by heating a large skillet over low to medium heat for about 2 minutes. This gentle heat will help you achieve a perfectly golden crust without burning. As the skillet warms, gather your ingredients, allowing you to work smoothly and efficiently when preparing your Spicy Grilled Cheese Sandwich.
Step 2: Prepare the Bread
Spread a generous layer of butter or margarine on one side of two slices of bread, ensuring even coverage. Carefully place these slices buttered side down into the heated skillet. You’ll hear a gentle sizzle as they make contact with the warm surface, indicating it’s time to build the delicious base of your sandwich.
Step 3: Add the Cheese
Layer a slice of creamy American cheese on each piece of bread in the skillet. Watch as the cheese begins to soften and melt slightly from the heat below. This melty goodness is essential for the rich flavor profile of your Spicy Grilled Cheese Sandwich, so take your time to ensure it’s well distributed.
Step 4: Layer the Veggies
Next, evenly distribute slices of Roma tomato, chopped onion, and jalapeño pepper on top of the cheese. Allow the fresh colors and textures to create a vibrant topping, enhancing both the flavor and appearance of your sandwich. Take a moment to appreciate how the fresh ingredients elevate your Spicy Grilled Cheese Sandwich.
Step 5: Top It Off
Butter one side of the remaining two slices of bread and gently place them buttered side up over the assembled sandwich. The buttered sides will create a beautiful crispness when cooked. Make sure everything is stacked neatly to ensure all ingredients meld perfectly during cooking.
Step 6: Grill the Sandwich
Cook the sandwich for about 4-5 minutes, or until the bottom slice of bread is golden brown and crispy. Use a spatula to gently press down on the sandwich for even cooking. You’ll want to keep an eye on it, as the perfect grilled cheese should be golden and inviting, just like your Spicy Grilled Cheese Sandwich!
Step 7: Flip and Finish
Carefully flip the sandwich using your spatula, being cautious not to let the filling spill out. Continue to cook for another 3-4 minutes, until the opposite side is equally golden and the cheese is beautifully melted. The irresistible aroma should fill the kitchen, indicating that your Spicy Grilled Cheese Sandwich is nearly ready to enjoy.
Step 8: Serve and Savor
Once both sides are perfectly toasted, remove the sandwich from the skillet and let it rest for a minute. This step allows the cheese to set slightly, making it easier to cut. Slice it in half and serve warm, relishing each bite of the melty, flavorful goodness packed in your Spicy Grilled Cheese Sandwich.
Make Ahead Options
These Spicy Grilled Cheese Sandwiches are perfect for busy meal prep enthusiasts! You can assemble the sandwiches (without buttering) up to 24 hours in advance and refrigerate them to keep all the flavors intact. To maintain quality, wrap each sandwich tightly in plastic wrap or store them in an airtight container. You can also prepare the chopped vegetables (onions, jalapeños, and tomatoes) a day ahead to save even more time. When you’re ready to enjoy your sandwich, simply butter the bread and grill it for about 4-5 minutes on each side until golden and crispy. This way, you’ll savor a delicious, homemade meal with minimal effort on those hectic days!
How to Store and Freeze Spicy Grilled Cheese Sandwich
Fridge: Store cooked Spicy Grilled Cheese Sandwiches in an airtight container for up to 3 days to maintain freshness and flavor.
Freezer: For longer storage, tightly wrap the sandwiches in foil or plastic wrap and freeze for up to 3 months. This prevents freezer burn and preserves the taste.
Reheating: Reheat frozen sandwiches in a skillet over low heat until warm, ensuring the cheese melts nicely without burning the bread. Alternatively, use an oven at 350°F (175°C) for about 10-15 minutes.
Room Temperature: Avoid leaving sandwiches at room temperature for more than 2 hours to ensure they remain safe to eat.
What to Serve with Spicy Grilled Cheese Sandwich
Elevate your Spicy Grilled Cheese Sandwich experience with these complementary dishes that enhance the meal’s delightful flavors and textures.
-
Crispy Side Salad: A mix of fresh greens and crunchy vegetables balances the richness of the sandwich, keeping the meal light and vibrant.
-
Tomato Soup: A classic pairing that adds warmth and comfort, complementing the spicy flavors of the sandwich with a creamy, soothing touch.
-
Sweet Potato Fries: Their natural sweetness and soft texture counteract the spiciness, providing a satisfying crunch that makes every bite enjoyable.
-
Pickle Slices: Tart and crunchy, pickles enhance the savory profile of your sandwich, adding a delightful contrast that invigorates the palate.
-
Roasted Veggies: Carrots, bell peppers, and zucchini provide a nutritious side, bringing a smoky flavor that adds depth to the meal.
-
Sparkling Lemonade: A refreshing drink that cleanses the palate while the zesty flavors perfectly contrast the richness of the Spicy Grilled Cheese Sandwich.
-
Chili: For those who love a kick, a bowl of chili echoes the spice in the sandwich, creating a hearty and comforting feast.
-
Chocolate Chip Cookies: End your meal on a sweet note with these warm treats that add a comforting finish to this savory sandwich experience.
Expert Tips for Spicy Grilled Cheese
• Heat Control: Use low to medium heat for cooking. High heat can burn the bread before the cheese melts, ruining your Spicy Grilled Cheese Sandwich.
• Lid for Melting: Cover the skillet with a lid while grilling. This helps melt the cheese evenly and fast, ensuring a gooey center.
• Even Spreading: Make sure to evenly spread the butter on the bread. Uneven spreading can lead to burnt spots or undercooked areas in your sandwich.
• Freezer-Friendly: Wrap sandwiches tightly in foil or plastic wrap before freezing. This prevents freezer burn and keeps your Spicy Grilled Cheese delicious later.
• Ingredient Variations: Don’t hesitate to mix up your ingredients! Try different cheeses or add veggies based on what you love for a unique twist every time.
Spicy Grilled Cheese Sandwich Variations
Feel free to add your own twist to this beloved sandwich and explore exciting alternatives!
-
Dairy-Free: Use a vegan cheese substitute for a delightful non-dairy version that everyone can enjoy.
-
Gluten-Free: Switch to gluten-free bread to accommodate dietary restrictions without compromising flavor.
-
Add Avocado: Incorporate creamy avocado slices for a rich texture and nutritious boost that pairs beautifully with the melty cheese.
-
Flavor Boost: Experiment with different cheeses like pepper jack or gouda for varied flavor profiles that keep things interesting.
-
Extra Veggies: Toss in fresh spinach or sautéed mushrooms for a hearty addition that enhances the overall sandwich experience.
-
Spicy Variations: For a fiery kick, consider adding sriracha or spicy mustard to your spread, ensuring each bite packs a punch!
Want even more delightful ideas? You can enjoy this sandwich alongside a hearty simple side salad or pair it with a light soup like a warm tomato basil for a comforting meal. Each variation turns your Spicy Grilled Cheese Sandwich into a unique experience!
Spicy Grilled Cheese Sandwich Recipe FAQs
What is the best type of bread for making a Spicy Grilled Cheese Sandwich?
The best bread for a Spicy Grilled Cheese Sandwich is one that can hold up to toasting while providing a nice texture. White bread is classic and crunchy, but you can also choose whole grain for extra fiber or gluten-free varieties if you have dietary restrictions. If you’re feeling adventurous, a sourdough or ciabatta can add unique flavors!
How should I store leftover Spicy Grilled Cheese Sandwiches?
You can store cooked Spicy Grilled Cheese Sandwiches in an airtight container in the refrigerator for up to 3 days. Make sure they are cooled before sealing to prevent condensation, which can make them soggy. For best results, reheat them in a skillet over low heat to regain that glorious crunch!
Can I freeze Spicy Grilled Cheese Sandwiches?
Absolutely! To freeze your Spicy Grilled Cheese Sandwiches, let them cool completely, then wrap each sandwich tightly in foil or plastic wrap. Place the wrapped sandwiches in a freezer-safe bag or container. They can be stored in the freezer for up to 3 months. When you’re ready to enjoy, reheat in a skillet or oven as detailed earlier.
What can I do if my grilled cheese bread is burning before the cheese melts?
If you find that your bread is burning before your cheese has fully melted, try cooking your Spicy Grilled Cheese Sandwich on lower heat. Start at medium to low heat and cover the skillet with a lid. The lid helps trap steam inside, allowing the cheese to melt effectively without overcooking the bread’s exterior.
Is this recipe safe for pets?
While a Spicy Grilled Cheese Sandwich is a delightful treat for humans, it’s generally best to keep it away from pets. Ingredients like cheese can be high in fat, and jalapeños are not safe for dogs or cats, as spicy foods can upset their stomachs. Always check what’s safe for your furry friends before sharing any food!
What are some healthy ingredient swaps for the Spicy Grilled Cheese Sandwich?
You can swap regular butter for olive oil or a plant-based spread for a healthier option. Consider using whole grain or gluten-free bread. Instead of American cheese, try using low-fat cheese or vegan alternatives like nutritional yeast for flavor without the calories. Add more veggies like spinach or bell peppers for extra nutrition!

Irresistible Spicy Grilled Cheese Sandwich You’ll Crave Daily
Ingredients
Equipment
Method
- Begin by heating a large skillet over low to medium heat for about 2 minutes.
- Spread a generous layer of butter or margarine on one side of two slices of bread, then place them buttered side down into the skillet.
- Layer a slice of American cheese on each piece of bread in the skillet.
- Evenly distribute slices of Roma tomato, chopped onion, and jalapeño pepper on top of the cheese.
- Butter one side of the remaining two slices of bread and place them buttered side up over the sandwich.
- Cook the sandwich for about 4-5 minutes until golden brown and crispy.
- Carefully flip the sandwich and cook for another 3-4 minutes until the opposite side is golden and the cheese is melted.
- Remove the sandwich from the skillet, let it rest for a minute, then slice and serve warm.
Leave a Reply