
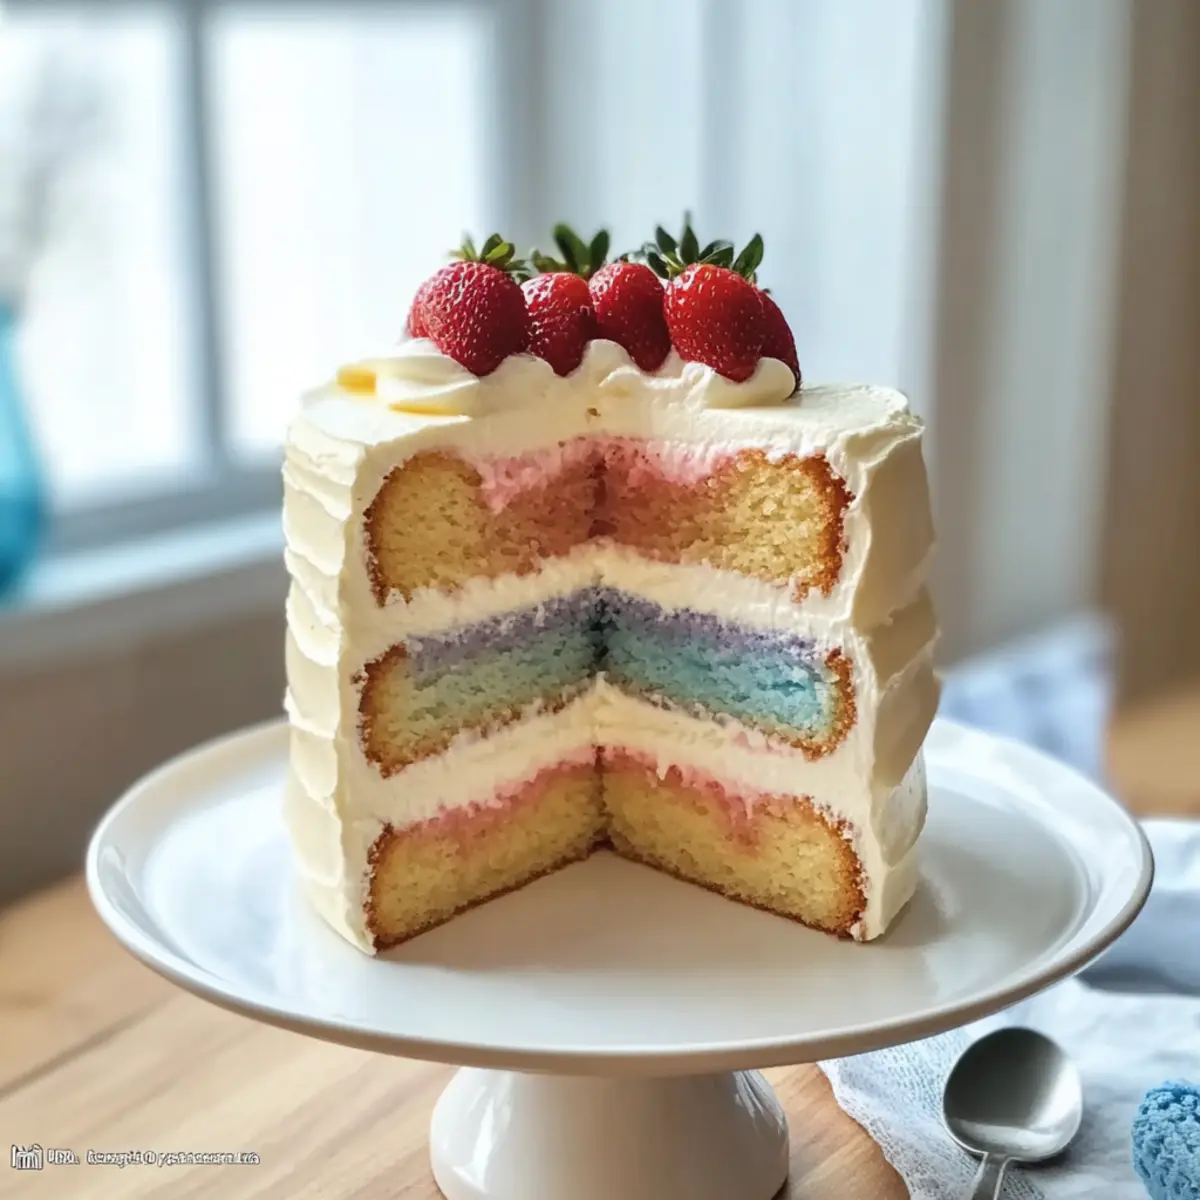
As I stood in my kitchen, watching the vibrant colors swirl together in the mixing bowl, a wave of nostalgia washed over me. The Rainbow Vanilla Layer Cake is my go-to recipe for Mother’s Day, capturing all the joy and love I feel for the incredible women in my life. This simple yet elegant cake not only brings a playful touch of spring to your dessert table, but it’s also a crowd-pleaser that’s easy to whip up, even for those busy weekends. Imagine layers of fluffy vanilla cake, each adorned with a different hue and topped with a light frosting—what’s not to love? Plus, this cake caters to various dietary preferences, so everyone can indulge in a slice. What flavors and colors will you choose to make this cake uniquely yours? Let’s dive into this delightful recipe!

Why is Rainbow Vanilla Layer Cake a Must-Try?
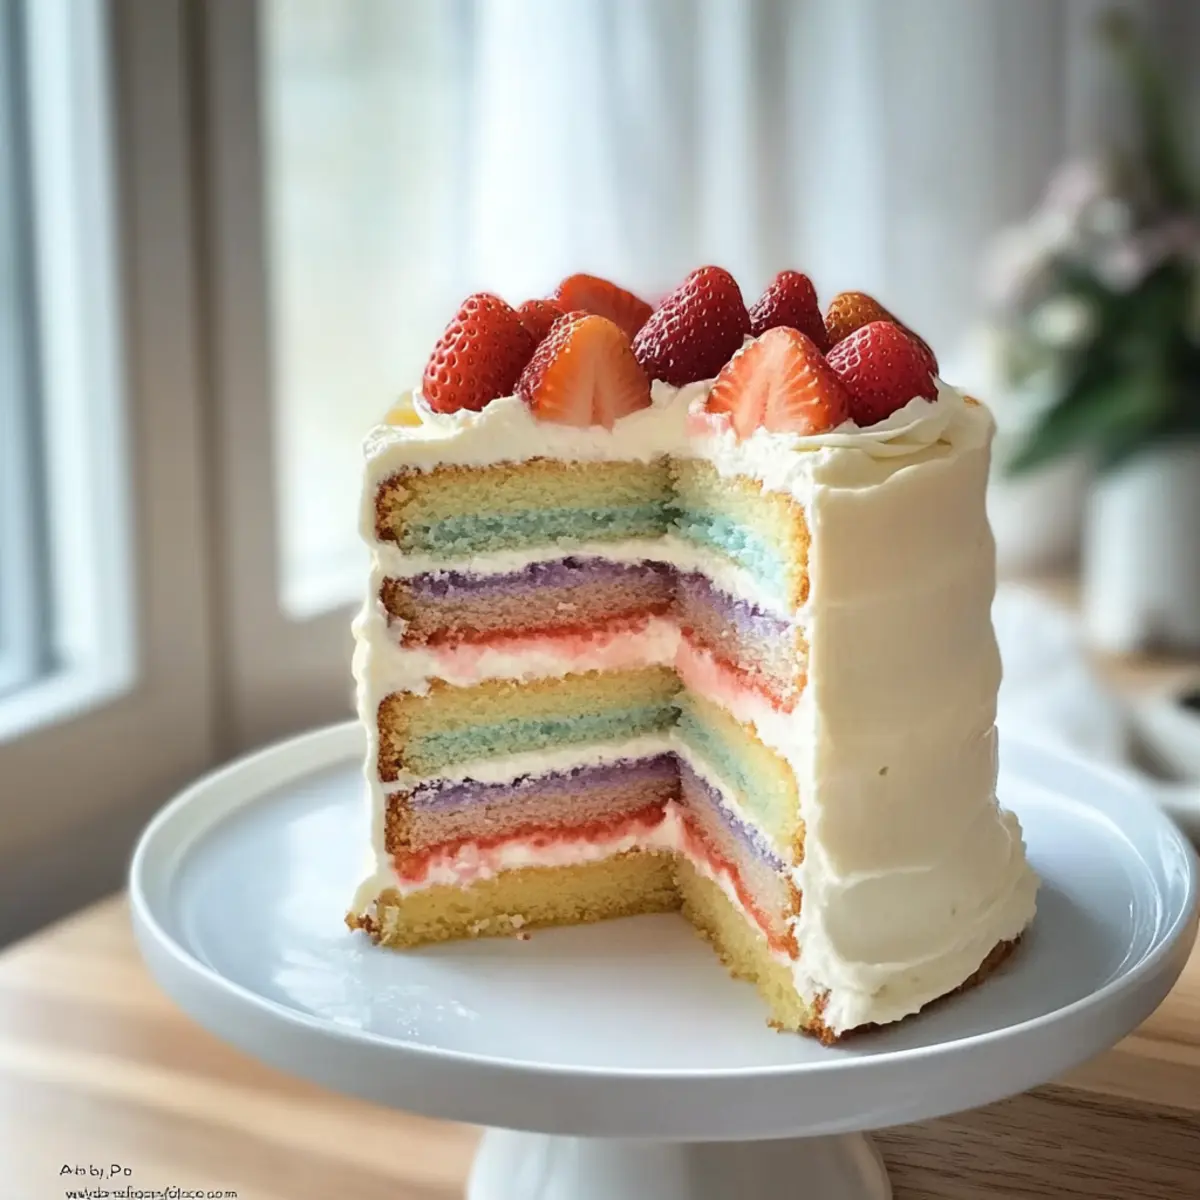
Vibrant Colors: Each layer bursts with cheerful hues, making this cake a stunning centerpiece for any celebration. Simplicity: The recipe is straightforward, perfect for bakers of all skill levels, ensuring that even busy schedules won’t hinder your baking spirit. Versatility: Customize flavors and colors to match personal preferences or themes, like substituting with fresh lemon zest or experimenting with pastel shades. Crowd-Pleaser: Everyone will be clamoring for a slice, making it ideal for family gatherings or parties. Dietary Friendly: This cake can be made gluten-free or dairy-free, allowing everyone to join in the celebration. Treat your loved ones with this delightful creation that blends charm and whimsy in every bite!
- Rainbow Vanilla Layer Cake Ingredients
## Rainbow Vanilla Layer Cake Ingredients
For the Cake
• All-Purpose Flour – Essential for structure, but can be replaced with a gluten-free blend if needed.
• Granulated Sugar – Sweetens the cake; feel free to adjust based on your sweetness preference.
• Baking Powder – Ensures the cake rises beautifully; make sure it’s fresh for the best results.
• Salt – Enhances the sweetness, balances flavors, and prevents the cake from tasting flat.
• Unsalted Butter – Adds richness and moisture; substitute with vegan butter for a dairy-free option.
• Eggs – Binds ingredients for a fluffy texture; try flax eggs for a vegan alternative.
• Vanilla Extract – Infuses the cake with warm flavor; use high-quality extract for the best taste.
• Milk – Moistens the batter, but almond or oat milk can be swapped for a dairy-free option.
For the Frosting
• Powdered Sugar – Creates a light and fluffy frosting; easy to adjust sweetness.
• Unsalted Butter – Gives the frosting a creamy texture; vegan butter works as a suitable substitute.
• Heavy Cream – Helps achieve the right consistency; use coconut cream for a dairy-free version.
• Vanilla Extract – Adds flavor to the frosting, enhancing the overall taste of the cake.
For Coloring
• Food Coloring – Choose gel for vibrant hues that won’t alter the cake’s texture; mix colors for unique shades.
Your beautiful Rainbow Vanilla Layer Cake will not only be a treat to the tastebuds but also a feast for the eyes!
Step‑by‑Step Instructions for Rainbow Vanilla Layer Cake
Step 1: Prepare Your Baking Pans
Preheat your oven to 350°F (175°C). Grease and flour three 8-inch round cake pans, ensuring the bases are also lined with parchment paper. This will make it easier to release the Rainbow Vanilla Layer Cake once baked. Set the prepared pans aside while you mix the batter, creating a seamless baking experience.
Step 2: Mix Dry Ingredients
In a large mixing bowl, whisk together 2 ½ cups of all-purpose flour, 2 ½ teaspoons of baking powder, and a pinch of salt. This step is crucial for a light, airy cake texture. Make sure there are no lumps, ensuring an even rise once baked. Set this bowl aside and shift your focus to the wet ingredients for your Rainbow Vanilla Layer Cake.
Step 3: Cream Butter and Sugar
In a separate bowl, beat 1 cup of unsalted butter with 2 cups of granulated sugar until the mixture is light and fluffy, usually about 3-5 minutes on medium speed. The color should turn pale, and the texture smooth. This creates a rich foundation for the cake layers. Add in 4 large eggs one at a time, along with 2 teaspoons of vanilla extract, ensuring each is well incorporated before moving forward.
Step 4: Combine Wet and Dry Ingredients
Gradually add the dry flour mixture to the wet ingredients, alternating with 1 cup of milk. Begin and end with the dry ingredients, mixing on low speed until just combined to avoid overmixing. The batter should be thick and creamy, ready to be divided into portions for coloring. This is the heart of your Rainbow Vanilla Layer Cake, so mix gently!
Step 5: Color the Batter
Divide the batter into six bowls for a full spectrum of colors. Use gel food coloring to achieve vibrant hues—think red, orange, yellow, green, blue, and purple. Start with a few drops, mixing until the desired color is reached, then ensure each bowl is covered while you work. This added step will make your Rainbow Vanilla Layer Cake visually stunning and fun!
Step 6: Layer and Bake the Cakes
Spoon each colored batter into the prepared pans, layering them evenly. You should aim for smoothness and equal distribution, which will create beautiful stripes inside the cake. Place the pans in the preheated oven and bake for 25-30 minutes, or until a toothpick inserted in the center comes out clean. Keep an eye on them; your cake layers should have a slight golden hue.
Step 7: Cool the Cakes
Once baked, remove the pans from the oven and let them cool for about 10 minutes. Gently run a knife around the edges, then turn the cakes out onto wire racks to cool completely. This step is vital to prevent any sogginess while preparing your frosting and assembling your Rainbow Vanilla Layer Cake.
Step 8: Prepare the Frosting
In a mixing bowl, cream together 1 cup of unsalted butter and 4 cups of powdered sugar until light and fluffy. Gradually add in 2-4 tablespoons of heavy cream and 1 teaspoon of vanilla extract, mixing until you achieve a smooth, spreadable consistency. This frosting will envelop your Rainbow Vanilla Layer Cake beautifully and add a creamy richness to every slice.
Step 9: Assemble the Cake
Begin with the first layer on a serving plate, spreading a generous layer of frosting on top. Repeat this process with the remaining layers, frosting on each, until the Rainbow Vanilla Layer Cake is fully assembled. Use the remaining frosting to coat the sides and top of the cake, smoothing it with an offset spatula for a professional appearance.
Step 10: Add Decorative Touches
If desired, pipe some decorative swirls on the top of your cake or sprinkle some colorful sprinkles around the edges for added flair. This is your chance to let your creativity shine! Chill the Rainbow Vanilla Layer Cake for about 20 minutes to set the frosting before slicing and serving, ensuring every piece is beautifully intact.
Make Ahead Options
Planning ahead with the Rainbow Vanilla Layer Cake is a breeze, making it the perfect choice for busy home cooks who want to impress without the last-minute stress! You can prepare and bake the cake layers up to 3 days in advance; simply allow them to cool completely, wrap them tightly in plastic wrap, and refrigerate. For the best flavor and texture, frost the cake on the day of serving. If needed, you can also prepare the frosting up to 24 hours ahead; store it in an airtight container in the fridge. Just give it a quick whip to bring back its creamy texture before assembling your cake. With these make-ahead steps, you’ll have a stunning Rainbow Vanilla Layer Cake ready to enjoy with your loved ones!
Storage Tips for Rainbow Vanilla Layer Cake
-
Room Temperature: The cake can be kept at room temperature for up to 2 days if it’s stored in an airtight container, minimizing moisture loss while maintaining its softness.
-
Fridge: If you’ve frosted your Rainbow Vanilla Layer Cake, store it in the refrigerator for up to 5 days. Just be sure to cover it to keep the frosting fresh and prevent it from absorbing any fridge odors.
-
Freezer: You can freeze the un-frosted layers of the cake for up to 3 months. Wrap each layer tightly in plastic wrap and then in aluminum foil to prevent freezer burn.
-
Reheating: To enjoy a slice of frozen cake, simply thaw it in the refrigerator overnight before serving. If you’re in a hurry, you can use the microwave on low settings for a few seconds, but be cautious not to overheat the cake.
Expert Tips for Rainbow Vanilla Layer Cake
- Color Mixing: Start with small amounts of gel food coloring; you can always add more to achieve vibrant hues without altering the cake’s texture.
- Check for Doneness: Bake until a toothpick inserted in the center comes out clean; for even layers, rotate the pans halfway through baking.
- Chill the Cake: After frosting, let the Rainbow Vanilla Layer Cake chill briefly; this helps the frosting set and makes slicing easier.
- Avoid Soggy Layers: Ensure cake layers are completely cooled before frosting—warm layers can cause the frosting to melt and become runny.
- Allergy Swaps: If you’re making substitutions for dietary needs, like gluten-free flour or flax eggs, trust the process for the same delightful results!
What to Serve with Rainbow Vanilla Layer Cake?
Indulging in a slice of this vibrant cake is a delightful experience, but let’s elevate your celebration with the perfect accompaniments.
-
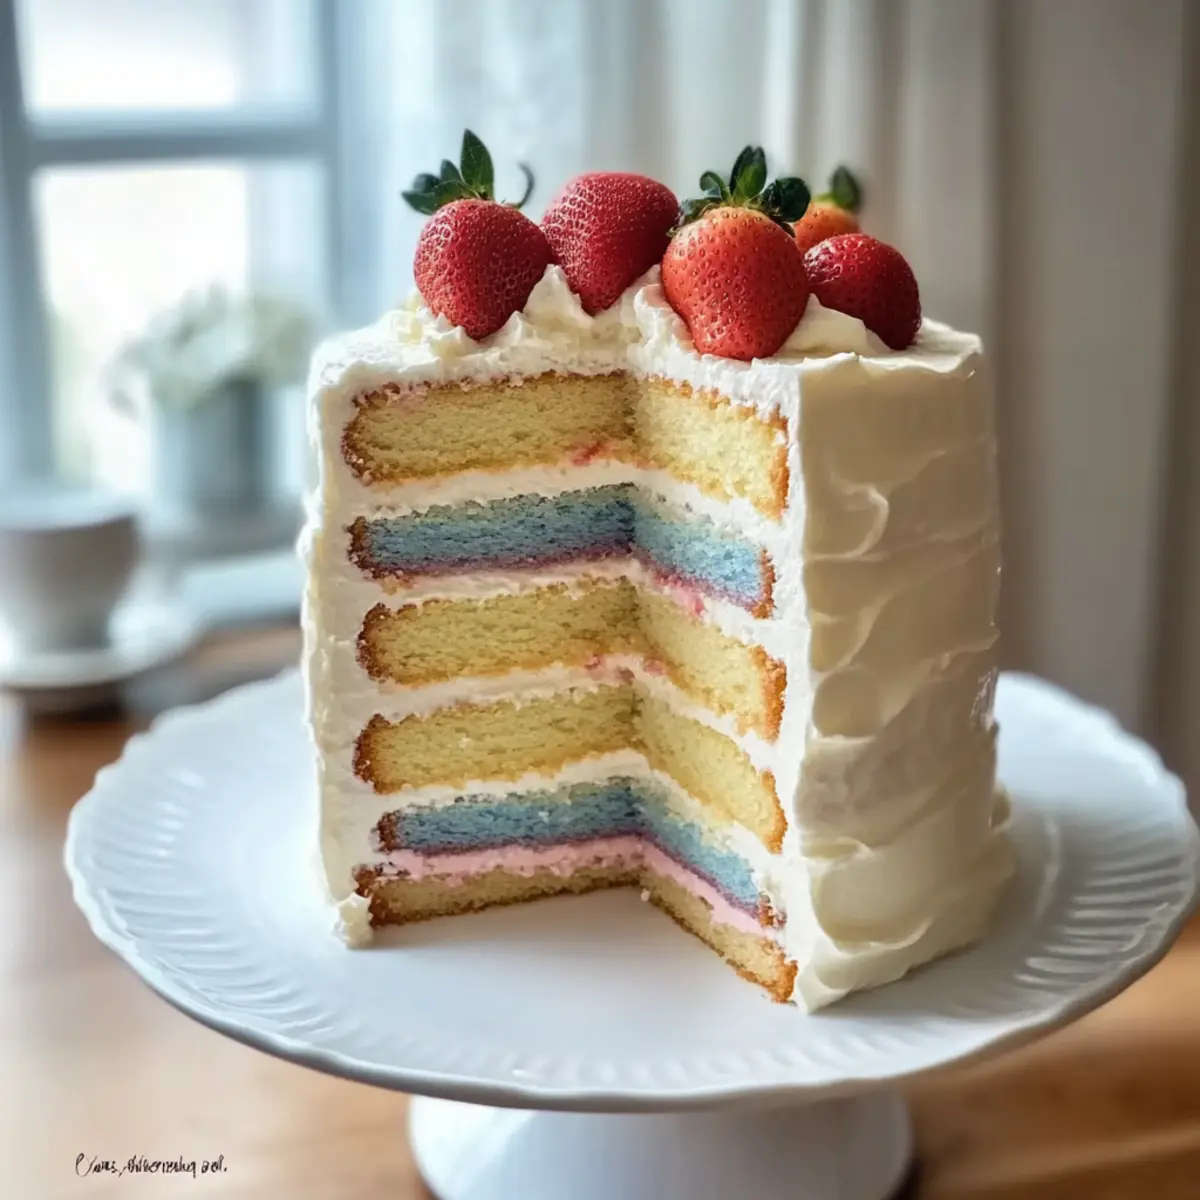
Fresh Berries: Juicy strawberries or blueberries add a refreshing burst that complements the cake’s sweetness. Their natural acidity balances the rich frosting beautifully.
-
Whipped Cream: A dollop of lightly sweetened whipped cream will enhance the creamy texture of the frosting, making each bite even more luxurious. It’s a classic addition that never disappoints.
-
Ice Cream: Pair a slice with a scoop of vanilla bean or strawberry ice cream for a delightful contrast of temperatures and textures. The creaminess of the ice cream perfectly complements the fluffy layers of the cake.
-
Sparkling Lemonade: This zesty beverage adds a fun and fizzy touch to any gathering. Its brightness will cut through the richness of the cake, making for a refreshing sip in between bites.
-
Coffee or Tea: Serve alongside a warm cup of coffee or herbal tea for a cozy finish. The warmth of the drink enhances the cake’s flavors, creating a comforting dessert experience.
-
Colored Sprinkles: To mirror the joyful aspect of the cake, sprinkle some colorful bits on your dessert plates. Not only do they enhance the presentation, but they also bring a playful touch to your gathering.
-
Chocolate Ganache: For a touch of decadence, drizzle warm chocolate ganache over a slice. This rich addition creates a beautiful contrast with the vanilla layers and brings extra depth of flavor.
Choose one or a combination of these delightful options to create a memorable dessert experience alongside your Rainbow Vanilla Layer Cake!
Variations & Substitutions for Rainbow Vanilla Layer Cake
Feel free to play around with this cake recipe and create something uniquely yours!
- Gluten-Free: Use a gluten-free flour blend instead of all-purpose flour for a cake everyone can enjoy.
- Dairy-Free: Substitute unsalted butter with vegan butter and milk with almond or oat milk to make this cake dairy-free.
- Vegan: Replace eggs with flax eggs and use coconut cream in the frosting for a completely vegan treat.
- Flavor Twist: Add citrus zest, such as lemon or orange, to the batter for a refreshing zing that complements the vanilla beautifully.
- Colorful Fillings: Sandwiched between layers, consider adding fruit preserves or whipped cream to give extra flavor and surprise!
- Different Frosting: Try cream cheese frosting instead for a tangy touch, which pairs deliciously with the vanilla layers.
- Fun Decorations: Top the cake with edible flowers or fresh fruit for a stunning finish that makes a vibrant statement.
- Layer Variations: Create unique colors by mixing pastel shades or a monochromatic palette for a stylish look that suits any theme.
If you’re inspired by colorful desserts, why not try your hand at making Vanilla Pecan Pralines or a festive Pineapple Rum Cake? The possibilities are endless—get baking and enjoy!
Rainbow Vanilla Layer Cake Recipe FAQs
How do I select the best food coloring?
Absolutely! When choosing food coloring, opt for gel-based colors as they provide vibrant shades without thinning the batter. Liquid colors can alter the cake’s consistency, so start with just a few drops and mix until you achieve your desired hue. You can always add more for deeper colors, but remember that less is often more!
How should I store leftover Rainbow Vanilla Layer Cake?
For best results, store your Rainbow Vanilla Layer Cake in an airtight container at room temperature for up to 2 days to maintain its moisture. If it’s frosted, move it to the fridge where it can last for up to 5 days; just be sure to cover it well to keep that creamy goodness intact!
Can I freeze the Rainbow Vanilla Layer Cake?
Very! You can freeze the un-frosted layers for up to 3 months. Wrap each layer tightly in plastic wrap, followed by aluminum foil to avoid freezer burn. When you’re ready to enjoy a slice, thaw the layers in the refrigerator overnight before assembling or frosting them for that fresh taste.
What if my cakes domed during baking?
Don’t worry! If your cakes rise with a dome, simply level them off with a serrated knife once they are completely cool. This will ensure even layers for perfect stacking. Also, rotating your pans halfway through baking can help achieve uniform layers in the future.
Can I make substitutions for dietary restrictions?
Absolutely! You can easily make this Rainbow Vanilla Layer Cake gluten-free by using a 1:1 gluten-free flour blend. If you need to make it dairy-free, substitute unsalted butter with vegan butter and use almond or oat milk instead. For egg replacements, try using flax eggs—mix 1 tablespoon of ground flaxseed with 2.5 tablespoons of water for each egg required, allowing it to sit for about 5 minutes before using.
What should I do if my frosting is too runny?
If your frosting seems too runny, keep it chilled and add more powdered sugar gradually, beating until you reach the desired thickness. If it’s too thick, incorporate a little bit of heavy cream or milk, one teaspoon at a time. The perfect frosting should be creamy enough to spread smoothly but firm enough to hold its shape nicely on your Rainbow Vanilla Layer Cake!
Rainbow Vanilla Layer Cake: A Sweet Celebration of Color
Ingredients
Equipment
Method
- Preheat your oven to 350°F (175°C). Grease and flour three 8-inch round cake pans, lining the bases with parchment paper.
- Whisk together the flour, baking powder, and salt in a large mixing bowl until well combined.
- In a separate bowl, beat the butter and sugar until light and fluffy. Add in the eggs and vanilla extract, incorporating well.
- Gradually mix the dry ingredients into the wet ingredients, alternating with milk until just combined.
- Divide the batter into six bowls and color each with gel food coloring.
- Layer the colored batters in the prepared pans and bake for 25-30 minutes until a toothpick comes out clean.
- Allow the cakes to cool for about 10 minutes before transferring them to wire racks to cool completely.
- Cream together butter and powdered sugar, adding heavy cream and vanilla until smooth for the frosting.
- Assemble the cake by layering, frosting between each layer, and covering the entire cake with frosting.
- Decorate with sprinkles or piping as desired, and chill for 20 minutes before serving.
Leave a Reply