
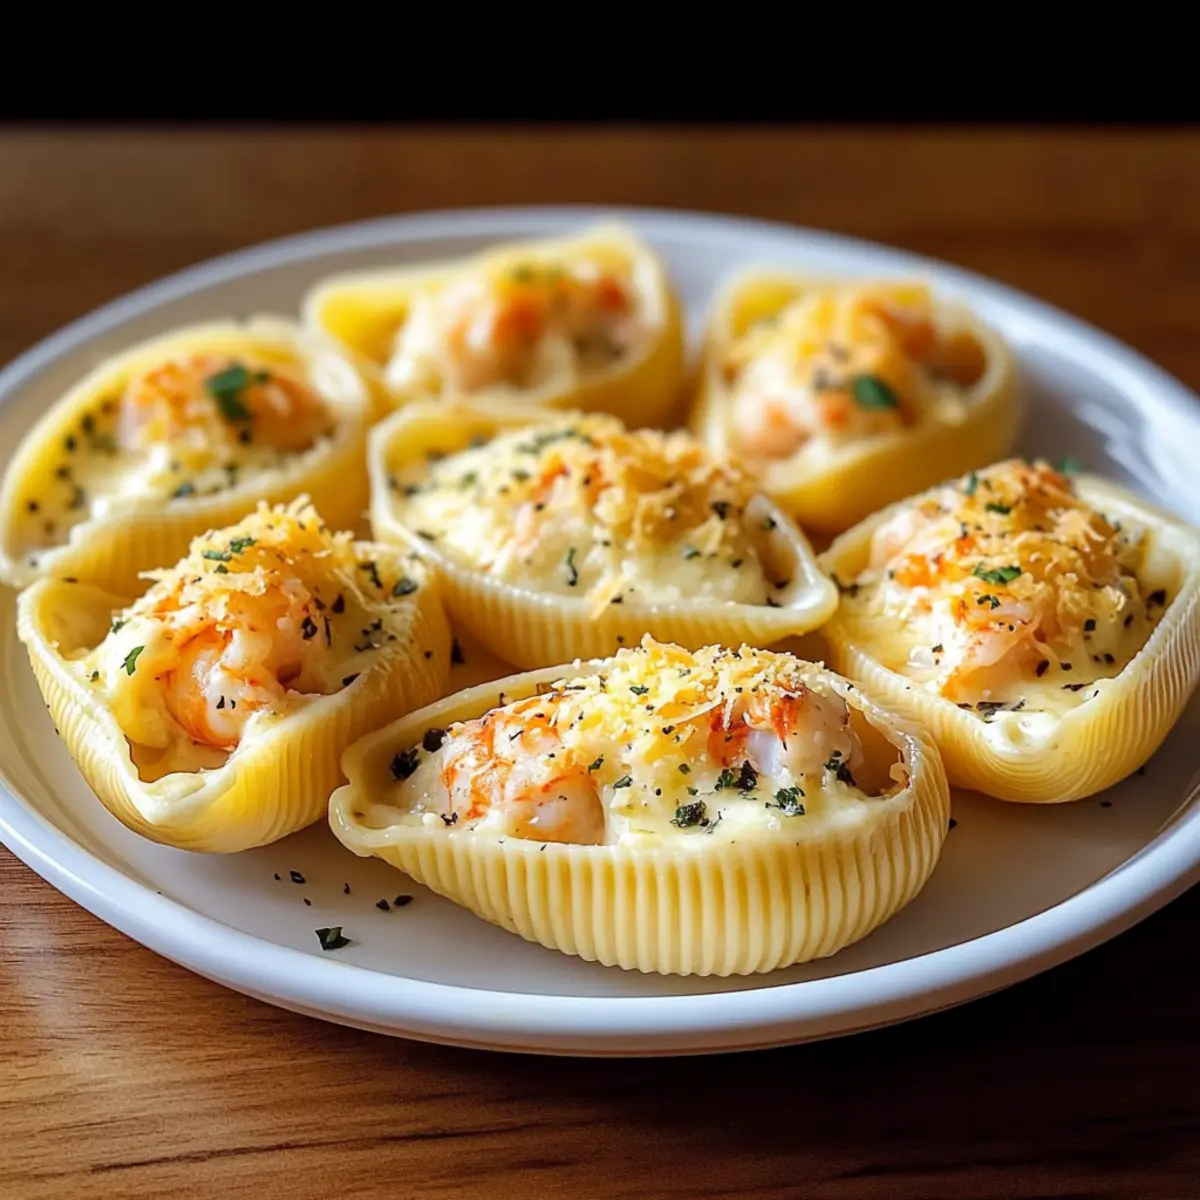
The kitchen was filled with the comforting aroma of melting cheese and savory seafood, beckoning everyone to gather. These Ultimate Creamy Seafood Stuffed Shells are not just a meal; they’re a luxurious experience that’s surprisingly simple to create! With just a bit of prep, you can whip up a dish that delights the senses, making it perfect for both special occasions and cozy family dinners. This recipe is a fantastic way to enjoy hearty comfort food while indulging in nutrients from fresh seafood, all wrapped up in tender pasta. Plus, it’s adaptable—whether you’re using scallops or shrimp, each bite can feel like a new adventure. So, are you ready to dive into a dish that’s as rich as it is satisfying? Let’s get cooking!
Why Are Creamy Seafood Shells Irresistible?
Decadent flavors: The delightful mix of seafood and creamy cheese creates an unforgettable taste that will have everyone coming back for seconds.
Easy to make: With straightforward steps and common ingredients, you can create a gourmet meal without stress.
Versatile option: Customize with your favorite seafood or cheeses, making this a family-friendly dish that pleases every palate. You might even want to try it alongside other favorites, like Seafood Gratin Comforting or a warming Creamy Vegetable Soup.
Perfect for occasions: Whether it’s a cozy family dinner or a celebratory gathering, these stuffed shells look stunning when served and are sure to impress your guests.
Nutritious indulgence: Packed with protein and essential vitamins, this dish is comfort food you can feel good about.
Ingredients for Creamy Seafood Stuffed Shells
For the Pasta
• Large Pasta Shells – The perfect vessel for holding all the luscious filling; if unavailable, manicotti works well too.
For the Seafood Filling
• Seafood (Prawns, Crab) – Adds rich, savory flavors and protein; feel free to swap in scallops or firm white fish like cod.
• Cream Cheese – Creates that irresistible creamy texture; essential for the filling—no replacements recommended.
• Garlic – Adds aromatic depth to the dish; use fresh garlic for brighter flavor or powdered for convenience.
For the Sauce
• Shredded Cheese (e.g., Mozzarella, Parmesan) – Delivers a cheesy finish and delightful golden color; other melty cheeses can be substituted as desired.
• Milk – Forms the basis of the creamy sauce; substitute with half-and-half for a richer consistency.
Each bite of these Creamy Seafood Stuffed Shells will wrap you in comfort while satisfying your taste buds!
Step‑by‑Step Instructions for Creamy Seafood Stuffed Shells
Step 1: Prep Pasta
Begin by boiling a large pot of salted water. Once boiling, cook the large pasta shells for about 9–10 minutes, stopping 1–2 minutes before they reach al dente to ensure they don’t overcook. After draining, rinse the shells under cold water to halt the cooking process and set them aside on a clean kitchen towel, making them ready to be filled later.
Step 2: Make Filling
In a large mixing bowl, combine your cooked seafood—whether prawns, crab, or your seafood of choice—with softened cream cheese. Add minced garlic for flavor, and mix thoroughly until smooth and well incorporated. You want a luscious, creamy filling that clings to the pasta, so take your time combining these essential elements of your Creamy Seafood Stuffed Shells.
Step 3: Prepare Sauce
In a medium saucepan, melt butter over medium heat. Stir in an equal amount of flour, cooking for about 1 to 2 minutes to make a roux, stirring continuously to avoid burning. Gradually add milk while whisking to create a smooth consistency, and continue to stir until the sauce thickens, usually around 5–7 minutes. Season to taste and remove it from heat.
Step 4: Assemble Dish
Preheat your oven to 375°F (190°C). Start filling each cooled pasta shell with the creamy seafood mixture, ensuring they are packed full but not overflowing. Place the filled shells in a greased baking dish, leaving enough space between each shell. Once completed, pour the thickened sauce evenly over the shells and sprinkle with your choice of shredded cheese to create a bubbly, golden crust.
Step 5: Bake
Cover the baking dish tightly with aluminum foil and place it in the oven. Bake for about 25–30 minutes, or until heated through. In the last 15 minutes of baking, remove the foil to allow the cheese to brown and become bubbling. Once ready, the Creamy Seafood Stuffed Shells should look golden and inviting, ready to be served warm to your delighted guests.
Storage Tips for Creamy Seafood Stuffed Shells
Fridge: Store any leftover Creamy Seafood Stuffed Shells in an airtight container in the fridge for up to 3 days. Reheat thoroughly before serving.
Freezer: For longer storage, freeze baked shells in a tightly sealed container for up to 2 months. Make sure to cool them completely before freezing to preserve texture.
Thawing: To enjoy straight from the freezer, thaw overnight in the fridge before reheating in the oven at 350°F (175°C) until heated through, usually about 25-30 minutes.
Make-Ahead: Assemble the dish a day in advance and refrigerate it unbaked for up to 24 hours. Just add about 10 extra minutes to the baking time if it’s cold from the fridge.
Creamy Seafood Stuffed Shells Customizations
Ready to make these stuffed shells uniquely yours? With just a few simple tweaks, you can create delightful variations that cater to your taste and dietary needs!
- Seafood Swap: Use scallops or lobster instead of prawns for a more luxurious filling. Each option brings its own flavor profile, making this dish versatile and exciting.
- Dairy-Free Delight: Substitute cream cheese and shredded cheese with vegan alternatives to create a plant-based version without losing the rich, creamy texture.
- Heat It Up: Add diced jalapeños or crushed red pepper flakes to the seafood filling for a spicy kick. This adds a delightful layer of heat that will tantalize your taste buds.
- Extra Veggies: Incorporate sautéed spinach or artichokes into the filling for added flavor and nutrition. It not only enhances the dish but also adds a lovely color contrast.
- Cheese Variations: Experiment with different cheeses like Gruyère or gouda for a unique flavor twist, or a blend for more complexity. Explore your favorites!
- Fresh Herbs: Enhance the flavor profile by adding fresh herbs like dill, parsley, or basil to the filling. These herbs can create a refreshing taste, brightening up the creamy seafood mix.
- Nutty Crunch: Top with breadcrumbs mixed with parmesan before baking for a crispy topping that adds texture. A sprinkle of toasted nuts can also elevate your dish with crunchiness.
Feeling inspired? These variations can transform your creamy seafood stuffed shells into endless culinary adventures. For other delicious dishes, check out my easy Seafood Casserole Cozy or dive into a comforting Seafood Gratin Comforting. Enjoy the delightful journey!
Make Ahead Options
These Creamy Seafood Stuffed Shells are perfect for meal prep enthusiasts! You can prepare the entire dish up to 24 hours in advance. Simply assemble the shells, filling them with the seafood mixture and covering them with sauce, then store them in the refrigerator. To maintain the rich quality and flavor, be sure to tightly cover the baking dish with foil. When you’re ready to enjoy this comforting meal, simply preheat your oven and bake the shells straight from the fridge, increasing the baking time by about 10 minutes to ensure they’re heated through. This way, you’ll have a delectable, homemade dinner that feels effortless after a busy day!
Expert Tips for Creamy Seafood Stuffed Shells
• Thaw Properly: Ensuring seafood is fully thawed before use prevents excess moisture, which can make the filling soggy.
• Pasta Timing: Avoid overcooking the pasta shells; they should be al dente for easier handling during assembly, ensuring they hold their shape.
• Thickening Sauce: If your sauce is too thin, let it simmer longer or consider using a cornstarch slurry to achieve the desired consistency for your Creamy Seafood Stuffed Shells.
• Cheese Choices: Don’t hesitate to experiment with different cheeses in the filling or topping. Just remember, some might melt better than others!
• Make-Ahead: For convenience, assemble the dish and refrigerate for up to 24 hours before baking. Just adjust the baking time if starting from cold.
What to Serve with Creamy Seafood Stuffed Shells
Indulge in a meal that tickles the taste buds and warms the heart, perfectly paired with comforting appetizers and refreshing sides.
- Garlic Bread: This classic side is a must; the buttery, garlicky flavor complements the creamy filling beautifully, making every bite a delight.
- Fresh Garden Salad: Crisp mixed greens tossed in a light vinaigrette can balance the richness of the stuffed shells, providing a refreshing crunch.
- Steamed Asparagus: Tender asparagus drizzled with lemon enhances the dish’s seafood flavors, offering a lovely pop of color and nutrition.
- Roasted Vegetables: Caramelized seasonal vegetables bring sweetness and texture, adding an earthy contrast to the creamy indulgence of the shells.
- White Wine: A chilled glass of Chardonnay or Sauvignon Blanc pairs perfectly, cutting through the richness and enhancing the meal experience.
- Mango Salsa: A zesty mango salsa adds a tropical twist, bringing sweetness and heat that complements the savory seafood beautifully.
- Lemon Tart: A bright, tangy lemon tart makes a delightful dessert, cleansing the palate and wrapping up the meal with a refreshing finish.
Creamy Seafood Stuffed Shells Recipe FAQs
What kind of seafood should I use for the filling?
Absolutely, you can use a variety of seafood! I typically recommend prawns and crab for their rich flavors. However, scallops or firm white fish like cod work wonderfully too. The more seafood varieties you include, the merrier the dish will be!
How should I store leftover Creamy Seafood Stuffed Shells?
For any leftovers, store your Creamy Seafood Stuffed Shells in an airtight container in the fridge for up to 3 days. Just reheat thoroughly before serving to enjoy them warm and delicious again!
Can I freeze Creamy Seafood Stuffed Shells?
Yes, indeed! To freeze baked shells, cool them completely first. Then, place them in a tightly sealed container and freeze for up to 2 months. When you’re ready to enjoy them, thaw overnight in the fridge before reheating at 350°F (175°C) for about 25-30 minutes.
What if my sauce turns out too thin?
If you find your sauce isn’t thick enough, there’s no need to fret! Allow it to simmer longer on low heat until it reduces and thickens. Alternatively, mix a teaspoon of cornstarch with a tablespoon of cold water to create a slurry and add it to the sauce while stirring to achieve the desired consistency.
Can I make these stuffed shells ahead of time?
Yes! You can assemble the Creamy Seafood Stuffed Shells up to 24 hours in advance. Just cover them and refrigerate unbaked. When you’re ready to cook, add about 10 extra minutes to the baking time if starting from cold.
Is this dish suitable for people with seafood allergies?
Since this recipe revolves around seafood, it wouldn’t be suitable for those with allergies. However, you could adapt the filling using cooked vegetables or a mix of beans for a hearty version that maintains the creamy texture!

Creamy Seafood Stuffed Shells That Elevate Comfort Food
Ingredients
Equipment
Method
- Boil a large pot of salted water and cook large pasta shells for about 9–10 minutes, stopping 1–2 minutes before al dente. Drain and rinse under cold water.
- In a large mixing bowl, combine cooked seafood with softened cream cheese and minced garlic and mix until smooth.
- In a medium saucepan, melt butter over medium heat and stir in flour to make a roux. Gradually add milk while whisking, cooking until the sauce thickens, about 5–7 minutes.
- Preheat oven to 375°F (190°C). Fill each cooled pasta shell with the creamy seafood mixture, place in a greased baking dish, and pour sauce evenly over the shells. Sprinkle with shredded cheese.
- Cover with aluminum foil and bake for 25–30 minutes. Remove foil in the last 15 minutes to brown the cheese.
Leave a Reply