
With a gentle crunch and a savory filling, Classic Crispy Chicken Rice Balls are a delightful twist on comfort food that you won’t want to miss. These little gems marry tender, shredded chicken with seasoned rice, enveloped in a perfectly crispy exterior. Not only are they a fantastic way to utilize leftovers, but they’re also remarkably quick to whip up, making them an ideal choice for busy weeknights or casual get-togethers. Whether you choose to fry, bake, or air-fry them, you’ll have a versatile snack or meal that adapts to your cravings. Ready to add these delicious bites to your culinary repertoire? Let’s get cooking!
Why Will You Adore These Rice Balls?
Quick and Easy: These Chicken Rice Balls come together in just a matter of minutes, perfect for busy weeknights when you need a satisfying meal fast.
Versatility: You can fry, bake, or air-fry them, letting you choose the cooking method that fits your lifestyle and taste preference.
Leftover Love: Transform leftover chicken into a culinary masterpiece, making these rice balls a smart way to minimize waste while enjoying a delicious snack.
Flavor Explosion: With seasonings like soy sauce and ginger, each bite bursts with umami, leaving your taste buds wanting more.
Crowd-Pleaser: Ideal for gatherings, parties, or any occasion where finger foods shine, these bites are sure to be a hit!
For more delightful ways to enjoy rice, check out my recipe for Sticky Chicken Rice or try the exciting flavors in Chicken Shawarma Rice.
Chicken Rice Balls Ingredients
For the Rice Base
• Cooked Chicken – Shredded or finely diced; it’s the savory star of these chicken rice balls! Leftover rotisserie chicken works beautifully.
• Cooked Rice – Short-grain or medium-grain; this acts as a binding agent and day-old rice is preferred for better texture.
• Egg – One large, lightly beaten; this serves as a binder to hold all your ingredients together.
For Flavor Enhancement
• Green Onions – 1/4 cup, finely chopped; adds freshness and a mild onion flavor.
• Soy Sauce – 2 tablespoons; it provides that delicious umami depth we all love in chicken rice balls.
• Sesame Oil – 1 tablespoon; imparts a nutty fragrance and richness to the mix.
• Grated Fresh Ginger – 1 teaspoon; enhances the flavor with a warm and zesty kick.
• Salt and Black Pepper – To taste; basic seasonings that elevate all flavors in your chicken rice balls.
For the Crunchy Coating
• Panko Breadcrumbs – 1/2 cup for coating; these create a perfectly crispy exterior. You can substitute with gluten-free breadcrumbs if needed.
• Oil – For frying; ensure there’s enough for pan-frying or greasing for baking or air frying.
Now that you’re all set with these fabulous ingredients, let’s get ready to create something amazing!
Step‑by‑Step Instructions for Classic Crispy Chicken Rice Balls
Step 1: Mix Ingredients
In a large bowl, combine 2 cups of shredded chicken with 1 ½ cups of day-old cooked rice. Add 1/4 cup of finely chopped green onions, 2 tablespoons of soy sauce, 1 tablespoon of sesame oil, 1 teaspoon of grated fresh ginger, and season with salt and black pepper to taste. Stir until thoroughly mixed and the flavors meld together, creating a fragrant chicken rice ball filling.
Step 2: Add Binder
Pour in 1 large, lightly beaten egg to the chicken-rice mixture. Using a spatula or your hands, mix until the egg is fully integrated, making the mixture moist and cohesive. This binding agent ensures your chicken rice balls hold their shape while being cooked, creating a perfect blend for forming your savory treat.
Step 3: Form Balls
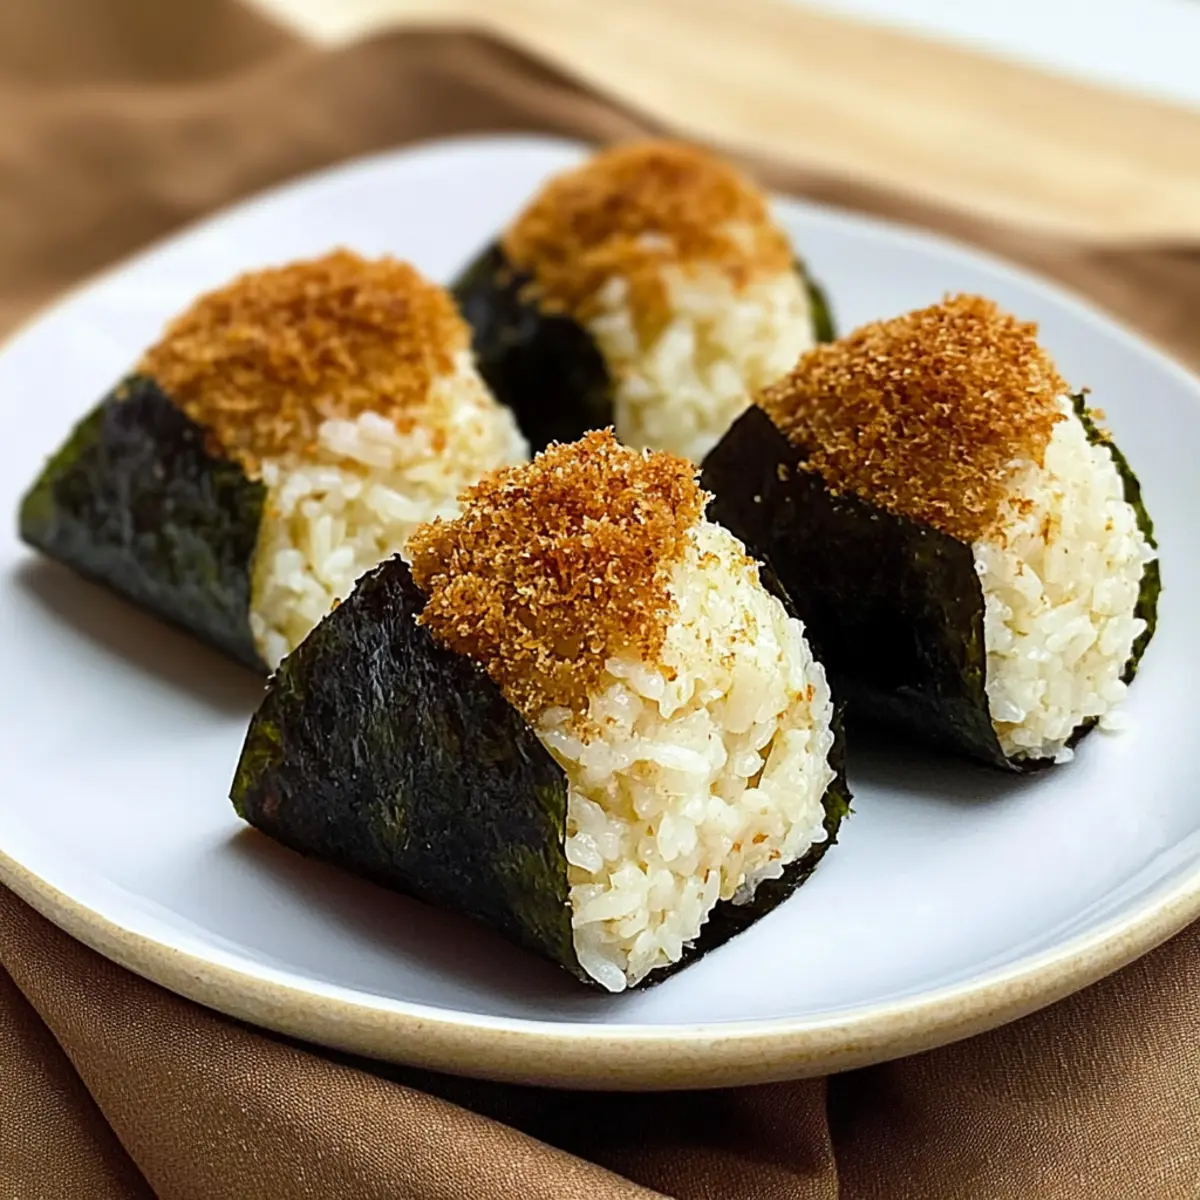
Using an ice cream scoop or your hands, scoop about 2-3 tablespoons of the mixture and roll it into compact balls, approximately 1.5-2 inches in diameter. Ensure the balls are tightly packed to prevent them from falling apart during cooking. Place the formed balls on a parchment-lined tray, ready for coating.
Step 4: Coat
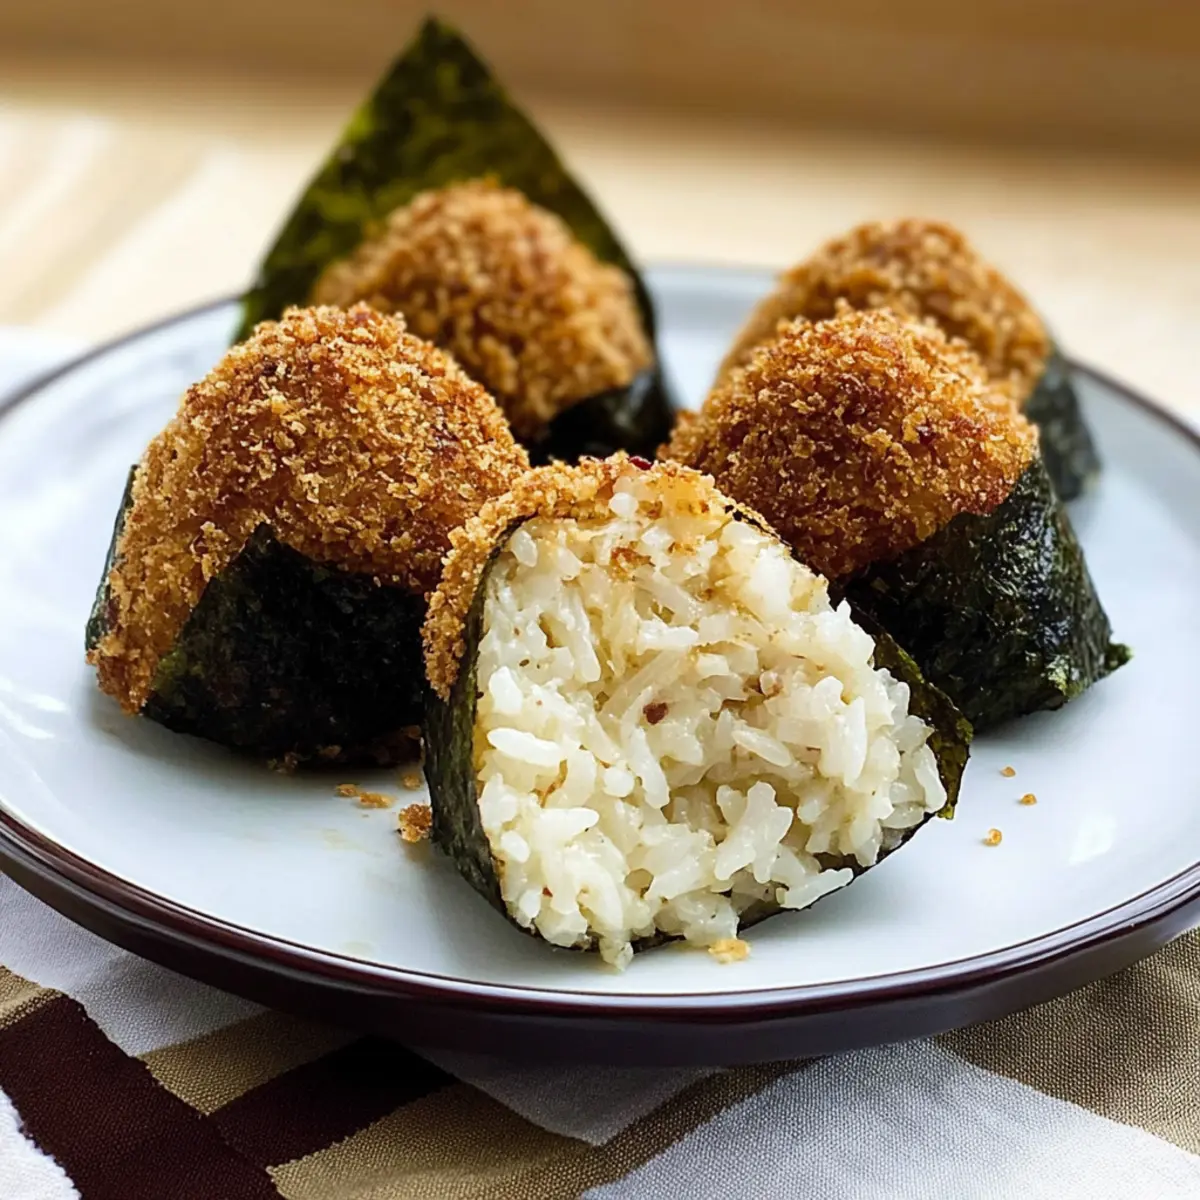
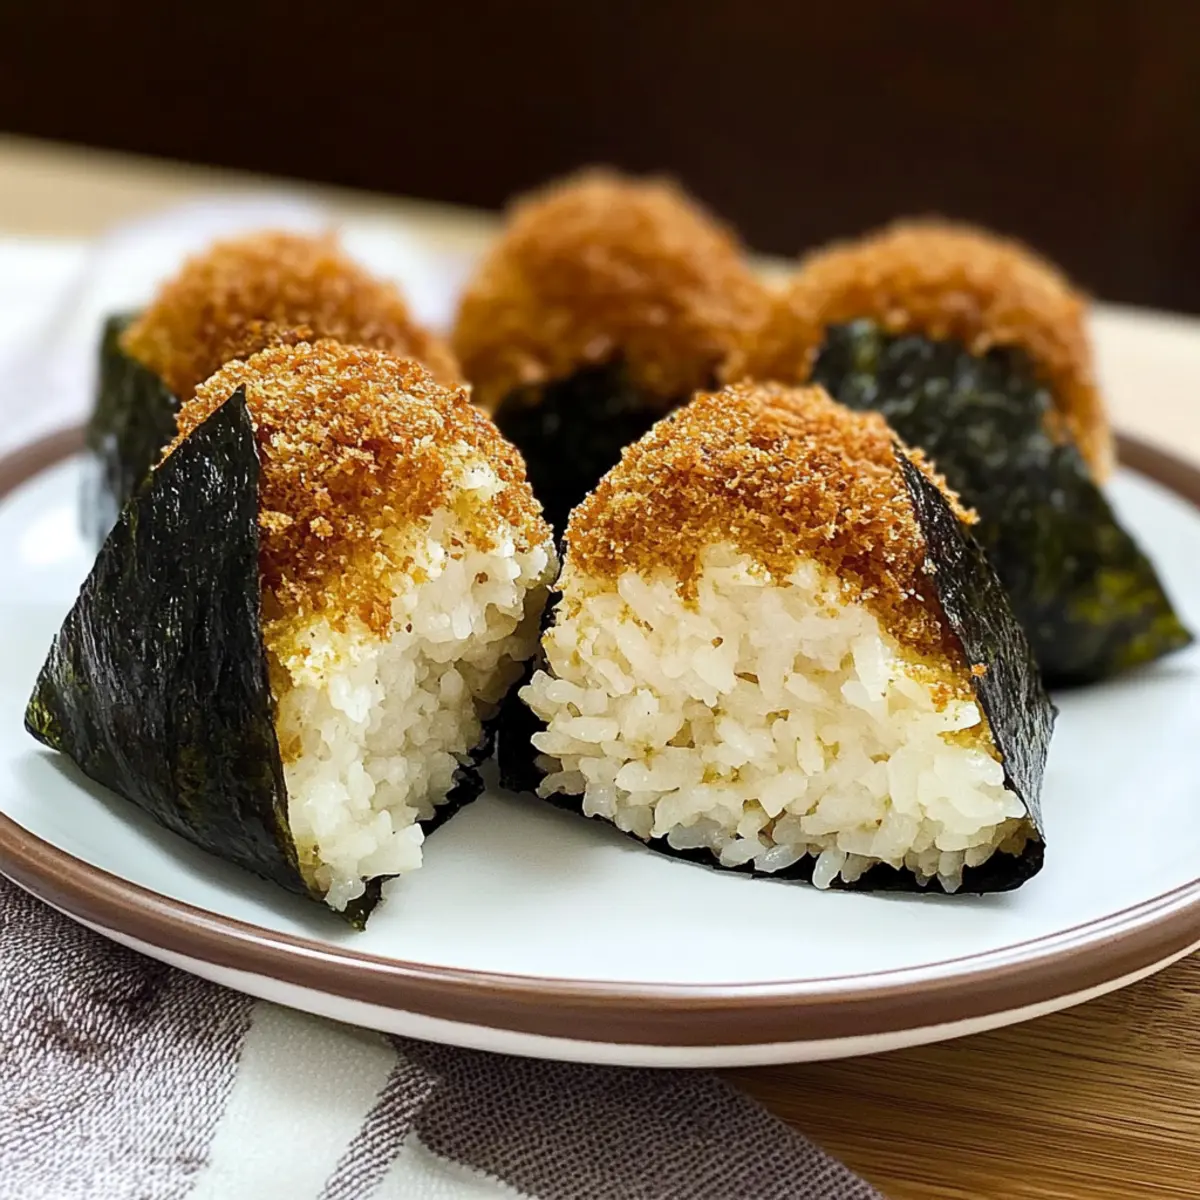
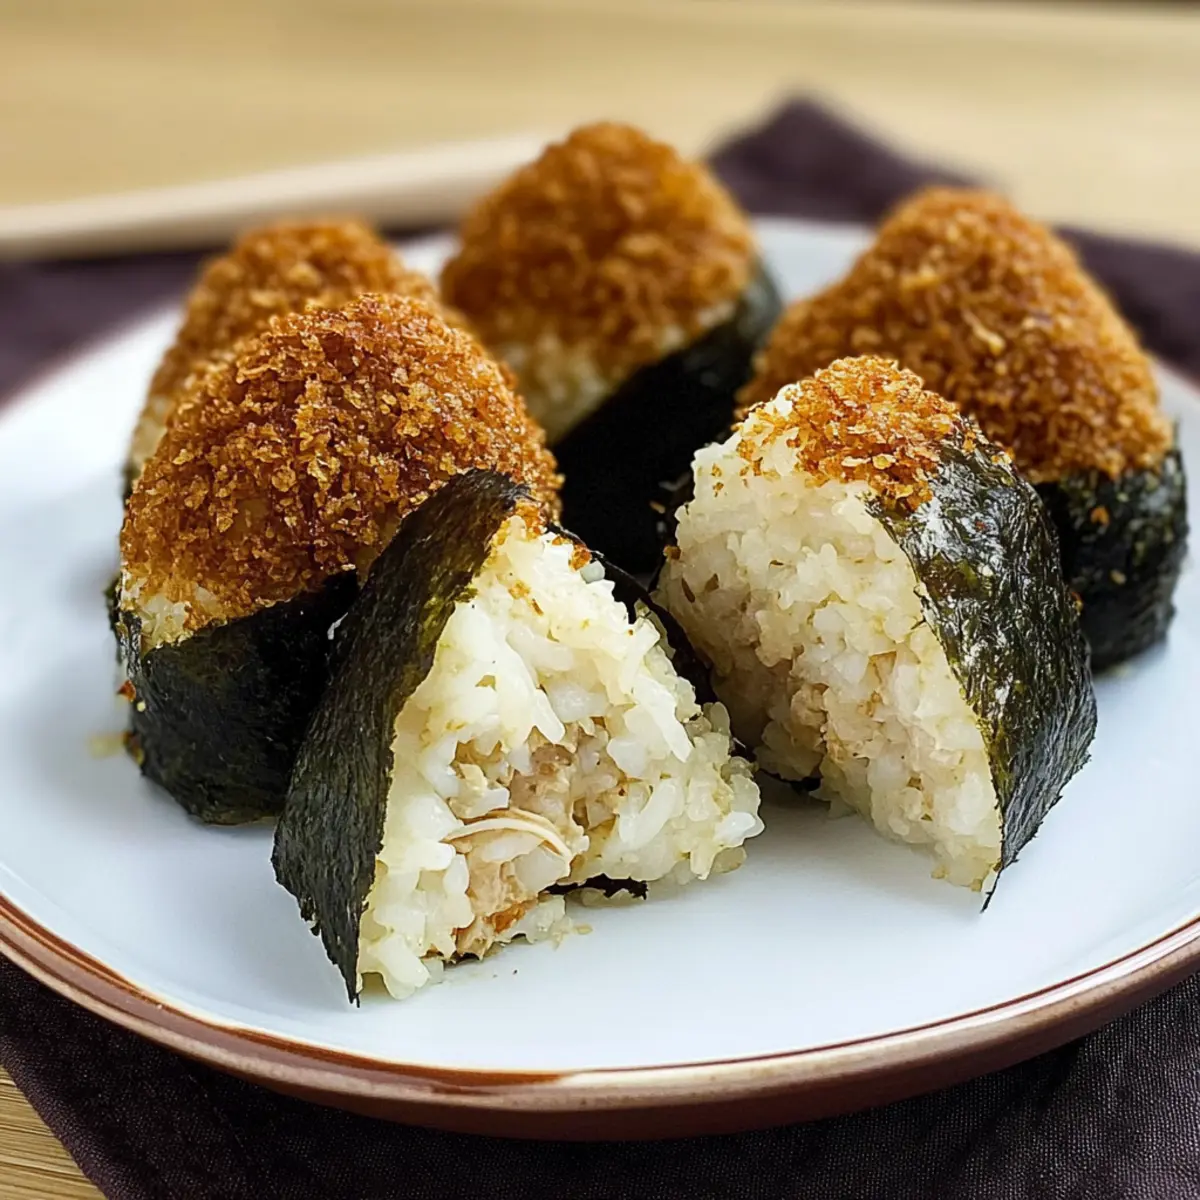
In a shallow dish, spread out 1/2 cup of panko breadcrumbs. Roll each chicken rice ball in the breadcrumbs, pressing lightly to ensure an even coating. This step is essential for achieving that crispy exterior when cooked, so make sure each ball is well-coated before setting them aside on the tray.
Step 5: Cooking Methods
For pan-frying, heat 1/2 inch of oil in a large skillet over medium heat until it shimmers. Carefully place the rice balls into the hot oil, allowing them to fry for 3-5 minutes on each side until they’re golden brown and crispy. For baking, preheat the oven to 400°F (200°C) and arrange the balls on a greased baking sheet; bake for 15-20 minutes, flipping halfway through for even crispiness.
Step 6: Air-Fry Option
If you prefer a lighter option, preheat your air fryer to 375°F (190°C). Place the chicken rice balls in the air fryer basket in a single layer, ensuring space between each ball for airflow. Air fry for 10-15 minutes, shaking the basket halfway through, until they achieve a beautiful golden-brown color and are heated through.
Step 7: Serve
Once cooked, remove your classic crispy chicken rice balls from the heat and let them cool slightly. Serve warm alongside your favorite dipping sauces such as sweet chili, soy-ginger, or creamy sriracha mayo for a delightful appetizer experience. Enjoy sharing these delicious bites with friends and family!
Expert Tips for Chicken Rice Balls
-
Perfect Rice: Use day-old rice for the best texture; it’s drier and helps the balls hold their shape, preventing them from being too mushy.
-
Hot Oil Test: Ensure the frying oil is hot enough before adding the balls—test with a breadcrumb; it should sizzle immediately, ensuring a crispy exterior.
-
Mind the Size: Keep chicken rice balls uniform in size—about 1.5-2 inches in diameter—to ensure they cook evenly, preventing any undercooked or overcooked pieces.
-
Gluten-Free Substitutes: When making gluten-free chicken rice balls, ensure all breadcrumbs and sauces are compliant with your dietary needs to maintain that delightful taste without sacrificing texture.
-
Make-Ahead Magic: Prepare the chicken rice ball mixture ahead of time, refrigerate it, and shape it just before cooking to save time on busy weeknights without losing flavor!
-
Dipping Sauce Delight: Experiment with various dipping sauces to enhance the flavor profile of your chicken rice balls—think sweet chili, spicy mayonnaise, or a tangy soy-ginger sauce!
Make Ahead Options
These Classic Crispy Chicken Rice Balls are perfect for meal prep enthusiasts! You can prepare the chicken and rice mixture up to 24 hours in advance, allowing the flavors to meld beautifully. Simply combine your cooked chicken, rice, green onions, soy sauce, sesame oil, ginger, salt, and pepper, then refrigerate it in an airtight container. When you’re ready to serve, just form the balls, coat them in breadcrumbs, and cook using your preferred method of frying, baking, or air-frying. This prep-ahead approach helps save you time on busy weeknights while ensuring that each bite is just as delicious as if made fresh!
Chicken Rice Balls Variations & Substitutions
Feel free to get playful with these Chicken Rice Balls! Each tweak brings a fresh twist, ensuring your experience is as delightful as the last.
- Brown Rice: Use brown rice instead of white for a nuttier flavor; just add a little extra egg to help bind.
- Herby Boost: Mix in fresh herbs like parsley or cilantro for a bright, fresh note; they add layers of flavor!
- Spice It Up: Experiment with spices like paprika or garlic powder for a savory kick; your taste buds will appreciate the adventure!
- Heat Level: Add finely chopped jalapeños or red chili flakes for a spicy version; the warmth will elevate your standard recipe.
- Cheesy Delight: Incorporate 1/2 cup of grated cheese, such as cheddar or mozzarella, into the mixture for a creamy, cheesy center; it’s a melted surprise!
- Gateway to Gluten-Free: Swap regular breadcrumbs for gluten-free options to keep your Chicken Rice Balls tasty and compliant; they still pack a great crunch.
- Dipping Sauce Variety: Pair with unexpected dipping sauces like tzatziki or a zesty mango salsa for sensational flavor combinations.
- Veggie Twist: Toss in finely chopped bell peppers or carrots for extra color and crunch; it’s an excellent way to sneak in more veggies!
For more flavorsome inspiration, try Peruvian Chicken Rice or indulge your palate with the irresistible Best Smothered Chicken and Rice Recipe. Bon appétit!
What to Serve with Classic Crispy Chicken Rice Balls
Nothing pairs better with these delightful bites than a medley of flavor and texture that completes your meal.
-
Fresh Garden Salad: A light, crisp salad adds a vibrant color and crunch, balancing the richness of the chicken rice balls beautifully. Tossed with a tangy vinaigrette, it brightens up the plate.
-
Sweet Chili Sauce: This serves as the perfect dipping companion, offering a sweet and spicy kick that elevates each bite of chicken rice ball.
-
Garlic Edamame: Served warm, these tender pods bring a pop of flavor and protein, creating a satisfying harmony with the savory morsels.
-
Creamy Coleslaw: The cool, creamy crunch of coleslaw provides a delightful contrast to the crispy texture, making each mouthful an exciting experience.
-
Savory Miso Soup: A comforting bowl of miso soup enriches the meal with umami and warmth, complementing the flavors in the rice balls perfectly.
-
Chilled Soba Noodles: Tossed in sesame dressing, these noodles add a nutty flavor and contrast to the crispy chicken rice balls, providing a delightful twist to your meal.
-
Sparkling Citrus Beverage: Refresh your palate with a bubbly drink, such as lemonade or orange soda, to cleanse the flavors between bites, enhancing your overall dining experience.
-
Chocolate Dipped Fruit: For dessert, juicy strawberries or bananas dipped in chocolate offer a sweet, fruity finish, making it a satisfying treat after these savory snacks.
How to Store and Freeze Chicken Rice Balls
Fridge: Store cooled chicken rice balls in an airtight container for up to 3-4 days. This keeps them fresh and ready for quick snacking or meals.
Freezer: For longer storage, freeze the chicken rice balls on a tray until solid, then transfer them to a freezer bag. They can be kept for 2-3 months without losing their delicious flavors.
Reheating: To bring back their crispy texture, reheat the frozen rice balls in an oven at 375°F (190°C) for about 15-20 minutes or air fry at the same temperature for 10-15 minutes until heated through.
Make-Ahead Magic: These chicken rice balls can also be mixed in advance and stored in the fridge for a few hours or overnight before frying, saving you precious time when you’re ready to cook!
Classic Crispy Chicken Rice Balls Recipe FAQs
How do I choose the best chicken for my rice balls?
Absolutely! When selecting chicken for your rice balls, leftover rotisserie chicken works wonderfully because it’s flavorful and tender. Just shred or finely dice it before mixing. If you’re cooking fresh chicken, I recommend using boneless, skinless thighs for a juicier result. Be sure to season them well before cooking!
What is the best method for storing leftover chicken rice balls?
Very! Store cooled chicken rice balls in an airtight container in the fridge for up to 3-4 days. This keeps them fresh and makes for an easy snack later on. Just reheat them in your oven or air fryer to restore their delightful crispiness.
Can I freeze chicken rice balls, and if so, how?
You can absolutely freeze your chicken rice balls! Here’s how: After forming them, place the rice balls on a tray lined with parchment paper and freeze until solid, about 1-2 hours. Once frozen, transfer them to a freezer bag and store for up to 2-3 months. When you’re ready to enjoy, simply reheat them in the oven or air fryer until heated through.
What should I do if my chicken rice balls fall apart while cooking?
If that happens, don’t worry! It often means the mixture is too wet or lacks enough binder. Ensure that you’re using day-old rice, as it’s drier and binds better. Adding an extra egg or a bit more rice can also help. Always ensure the oil is hot enough before cooking; this helps form a nice crust that keeps the balls intact.
Are these chicken rice balls suitable for people with gluten allergies?
Absolutely! Just make sure to use gluten-free breadcrumbs for the coating and check that your soy sauce is gluten-free as well. As always, read labels carefully to ensure there are no hidden gluten ingredients. Enjoy these tasty bites without worry!
What are some creative serving suggestions for chicken rice balls?
You can amp up the experience! Serve your chicken rice balls on a platter with a selection of dipping sauces like sweet chili sauce, soy-ginger sauce, or a zesty creamy mayo. Pair them with a fresh salad for a light meal, or serve them as a delightful finger food at parties.
Crispy Chicken Rice Balls to Jazz Up Your Home Cooking
Ingredients
Equipment
Method
- In a large bowl, combine shredded chicken with day-old cooked rice, chopped green onions, soy sauce, sesame oil, grated ginger, and season with salt and pepper to taste. Stir until thoroughly mixed.
- Pour in the lightly beaten egg and mix until fully integrated and cohesive.
- Using an ice cream scoop or your hands, scoop about 2-3 tablespoons of the mixture and roll into compact balls, about 1.5-2 inches in diameter.
- Spread panko breadcrumbs in a shallow dish and roll each chicken rice ball in the breadcrumbs to ensure an even coating.
- For pan-frying, heat 1/2 inch of oil in a skillet over medium heat and fry the rice balls for 3-5 minutes on each side until golden brown.
- For baking, preheat the oven to 400°F (200°C) and arrange the balls on a greased baking sheet; bake for 15-20 minutes, flipping halfway.
- For air-frying, preheat your air fryer to 375°F (190°C) and air fry the chicken rice balls for 10-15 minutes until golden brown.
- Let the cooked chicken rice balls cool slightly and serve warm with your favorite dipping sauces.
Leave a Reply