
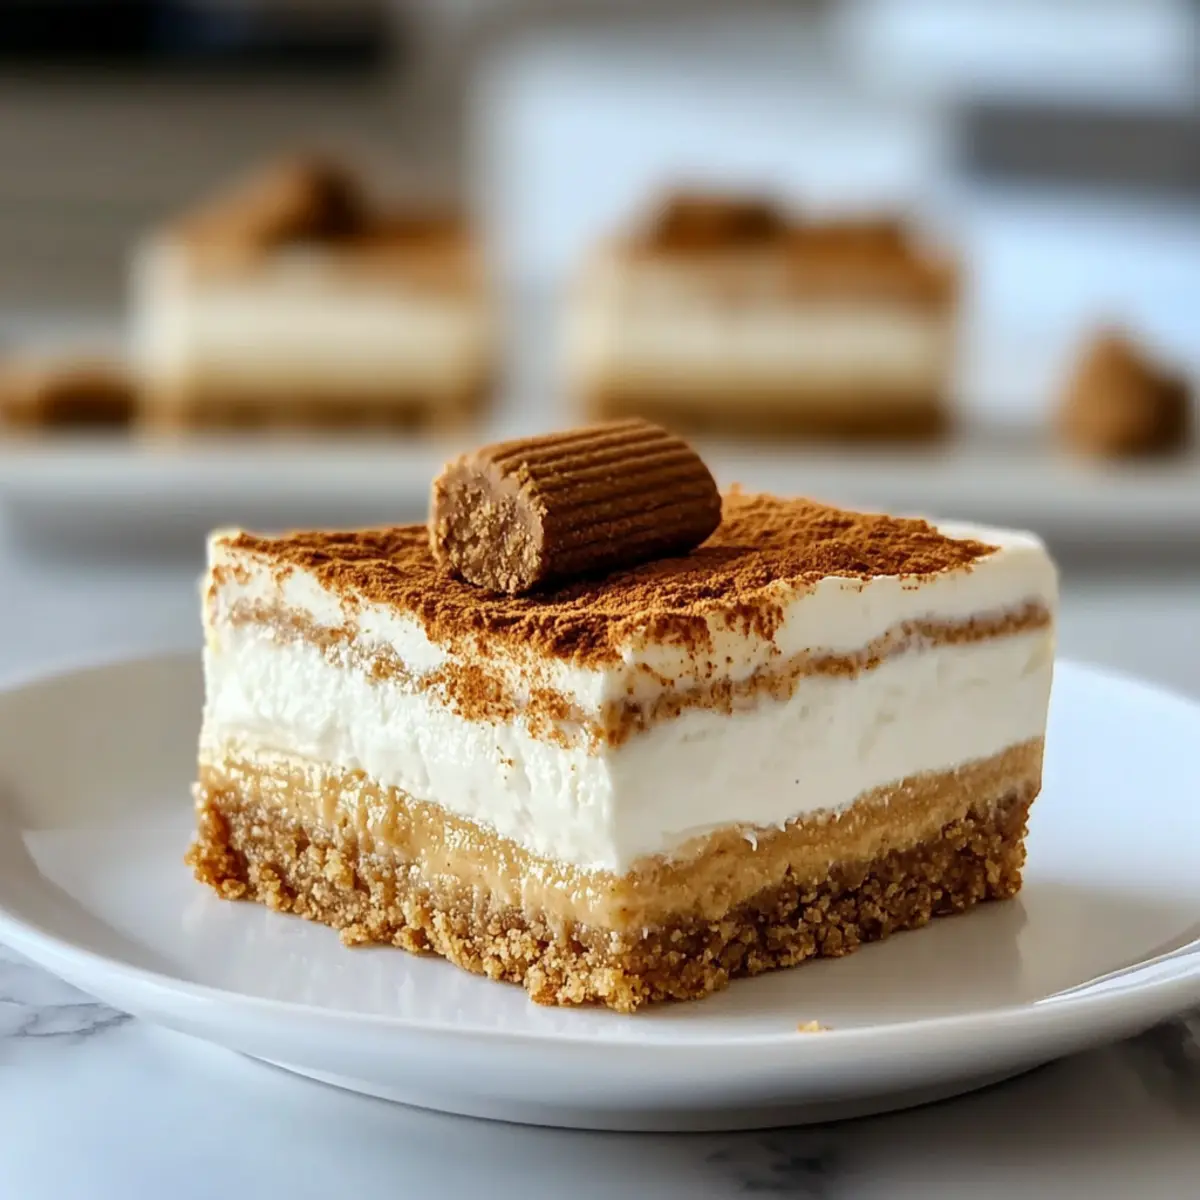
As I scrolled through my Instagram feed one afternoon, a gorgeous picture of creamy No-Bake Biscoff Cheesecake Bars stopped me in my tracks. The combination of velvety cheesecake and the warm, spiced crunch of Biscoff cookies caught my eye, and I knew I had to recreate that blissful moment in my own kitchen! This easy dessert provides the ultimate indulgence without any baking—perfect for those of us who want to impress guests but are short on time. Plus, the make-ahead aspect means you can whip them up in advance and let the flavors deepen as they chill. Are you ready to dive into this effortless bliss? Let’s get started!
Why are No-Bake Biscoff Cheesecake Bars a Must-Try?
Effortless Preparation: These bars require no baking, making them perfect for busy days or last-minute gatherings. Just a few simple steps and you’re ready to chill!
Irresistible Flavor: The combination of creamy cheesecake and spiced Biscoff cookies creates a luxurious treat that’s hard to resist. Savor each bite as the flavors meld beautifully.
Perfect for Any Occasion: Whether it’s a cozy dinner at home or a festive celebration, these cheesecake bars are sure to impress. They cater to both casual snacking and elegant entertaining.
Make-Ahead Convenience: Prepare them ahead of time, allowing the flavors to intensify as they chill—ideal for stress-free hosting!
Variations Galore: Feel free to get creative! Consider delicious variations like adding chocolate ganache or swirling in caramel for an extra special touch.
Each bite is a delightful experience! Try pairing it with a hot cup of coffee for a truly indulgent treat! Don’t forget to check out our recipes like Strawberry Cheesecake Protein or Biscoff Blondies Decadent for more sweet inspirations!
No-Bake Biscoff Cheesecake Bars Ingredients
For the Crust
• Biscoff Cookies – This ingredient forms the base for the crust and provides a spiced crunch. Substitution: Can use graham crackers for a different flavor profile.
• Unsalted Butter – Used to bind the cookie crumbs for the crust and adds richness.
For the Filling
• Cream Cheese – Offers a creamy, tangy filling. Note: Ensure it is softened to room temperature for smooth mixing.
• Powdered Sugar – Sweetens the cheesecake filling for a smooth texture.
• Biscoff Cookie Butter Spread – A key flavor component that adds sweetness and spiced notes to the filling.
• Vanilla Extract – Enhances flavor depth in the cheesecake mix.
• Salt – Balances sweetness and enhances overall flavor.
For the Whipped Cream
• Heavy Whipping Cream – Creates a light, airy texture in the filling. Note: Must be cold when whipped for best results.
• Granulated Sugar – Sweetens the whipped cream, contrasting with the rich filling.
For Drizzling & Garnishing
• Additional Biscoff Spread – For drizzling on top, enhancing flavor presentation.
• Extra Biscoff Cookies – For garnish, adding visual appeal and texture.
These ingredients come together to create unforgettable No-Bake Biscoff Cheesecake Bars that are sure to delight!
Step‑by‑Step Instructions for No-Bake Biscoff Cheesecake Bars
Step 1: Prepare the Pan
Begin by lining a 9×13-inch baking pan with parchment paper, ensuring it overhangs slightly for easy removal later. Lightly grease the parchment to prevent sticking. This step sets the foundation for your delicious No-Bake Biscoff Cheesecake Bars, making them easier to lift out once set.
Step 2: Make the Crust
In a food processor, pulse Biscoff cookies until they resemble fine crumbs. Combine these crumbs with melted unsalted butter in a bowl, mixing until evenly moistened. Press the mixture firmly into the bottom of the prepared pan, creating a solid base. Chill this crust in the refrigerator for about 30 minutes, allowing it to set and firm up.
Step 3: Make the Filling
Using an electric mixer, beat the softened cream cheese in a mixing bowl until it’s smooth and creamy, about 1–2 minutes. Gradually blend in powdered sugar, Biscoff cookie butter spread, vanilla extract, and a pinch of salt, continuing to mix until fully combined. This luscious filling is what makes your No-Bake Biscoff Cheesecake Bars irresistibly creamy.
Step 4: Whip the Cream
In a separate bowl, pour in the cold heavy whipping cream and granulated sugar. Using a handheld mixer, whip the mixture until stiff peaks form, approximately 2–4 minutes. Be careful not to overwhip, as you want to maintain the airy texture. Once ready, gently fold this whipped cream into the cream cheese mixture in thirds, ensuring a light and fluffy consistency.
Step 5: Assemble Bars
Take the chilled crust from the fridge and spread the creamy filling evenly over it using a spatula. Drizzle warmed Biscoff spread on top and use a toothpick to create beautiful swirls. This not only adds visual appeal but enhances the flavor profile of your No-Bake Biscoff Cheesecake Bars.
Step 6: Chill
Cover the assembled bars with plastic wrap or foil and refrigerate for at least 4 hours, or overnight for best results. This chilling period allows the bars to set properly, making them easier to cut and enhancing their flavors as they meld together.
Step 7: Serve
When ready to serve, carefully lift the cheesecake bars using the parchment overhang. Use a warm, sharp knife to cut the bars into squares for clean edges. Garnish each slice with extra Biscoff cookies or a drizzle of Biscoff spread, elevating the presentation of your No-Bake Biscoff Cheesecake Bars.
How to Store and Freeze No-Bake Biscoff Cheesecake Bars
Fridge: Store the bars in an airtight container in the refrigerator for up to 5 days. This keeps them fresh and ready to enjoy at a moment’s notice.
Freezer: For longer storage, wrap the bars individually in plastic wrap and place them in a freezer-safe container. They can be frozen for up to 2 months.
Thawing: To enjoy, simply transfer the bars from the freezer to the fridge and let them thaw overnight. This method maintains their creamy texture and delightful flavor.
Reheating: There’s no need to heat these No-Bake Biscoff Cheesecake Bars; they are best served chilled! Just slice, garnish, and savor the blissful layers.
Expert Tips for No-Bake Biscoff Cheesecake Bars
-
Soften Properly: Make sure the cream cheese is completely softened at room temperature to avoid lumps in your filling.
-
Whip Wisely: Don’t overmix the whipped cream; achieving stiff peaks is crucial for the light, airy texture of your No-Bake Biscoff Cheesecake Bars.
-
Cut with Care: For clean edges, warm your knife between cuts and wipe it clean after each slice to avoid sticking.
-
Make Ahead: These bars can be made up to three days in advance, and they freeze beautifully for up to two months—just thaw overnight before serving.
-
Creative Variations: Experiment with flavors! Add a layer of chocolate ganache, swirl in caramel, or sprinkle fresh berries on top for an added twist.
What to Serve with No-Bake Biscoff Cheesecake Bars
Indulging in these tantalizing cheesecake bars opens the door to creating a delightful meal experience that will charm your taste buds.
- Fresh Berries: The bright acidity of raspberries or strawberries contrasts the rich cheesecake, adding a pop of freshness to each bite.
- Hot Coffee: A warm cup of coffee beautifully complements the spiced flavors of Biscoff, making for a cozy pairing.
- Whipped Cream: A dollop of fluffy whipped cream enhances the bars’ creaminess, balancing the richness and providing a delightful texture.
- Dark Chocolate Shavings: Rich chocolate adds a layer of sophisticated flavor while still allowing the Biscoff notes to shine through.
- Cinnamon-Spiced Nuts: Crunchy, spiced nuts provide a satisfying contrast to the smooth cheesecake—consider roasted pecans or walnuts for added warmth.
- Sweet Dessert Wines: Pairing with a glass of Moscato or Port adds a luxurious touch, elevating the dessert experience and enhancing flavors.
- Caramel Sauce Drizzle: A light drizzle of caramel intensifies the sweetness, creating an irresistible combination that’s perfect for a special treat.
- Chocolate Ice Cream: Serve a scoop of creamy chocolate ice cream alongside for a sumptuous dessert duo that will delight chocolate lovers.
- Mint Sprigs: A fresh mint garnish adds a pop of color and a subtle cooling effect, making each bite feel even more refreshing.
These pairings create a symphony of flavors and textures to elevate your dessert experience and delight your guests!
Make Ahead Options
These No-Bake Biscoff Cheesecake Bars are perfect for meal prep, saving you time on busy days! You can prepare the crust and filling up to 3 days in advance. For optimal flavor, refrigerate the assembled bars overnight before serving, but they can also be chilled for at least 4 hours if you’re short on time. To maintain their decadent texture, cover them tightly with plastic wrap or foil to prevent any moisture loss. When ready to serve, simply cut them using a warm knife for clean edges, and add a final drizzle of Biscoff spread for that extra touch. Enjoy stress-free entertaining with these indulgent treats at your fingertips!
No-Bake Biscoff Cheesecake Bars Variations
Feel free to explore your culinary creativity and make these cheesecake bars uniquely yours!
-
Dairy-Free: Substitute cream cheese with a dairy-free alternative like cashew cream and use coconut whipped cream for the filling.
-
Gluten-Free: Use gluten-free Biscoff cookies or a similar gluten-free cookie for the crust and ensure all other ingredients are certified gluten-free.
-
Chocolate Lovers: Stir in some melted chocolate into the filling or top your bars with a layer of rich chocolate ganache for an extra decadence. Imagine the bliss of each bite melting in your mouth!
-
Seasonal Spice: Incorporate cinnamon and nutmeg to the filling for a warm, cozy twist that’s perfect for fall or winter gatherings.
-
Berry Burst: Top the cheesecake bars with fresh berries, like raspberries or strawberries, to add a pop of color and tangy flavor, enhancing each bite’s freshness.
-
Nutty Crunch: Add a layer of crushed nuts, like almonds or pecans, to the crust for a delightful crunch that pairs beautifully with the creamy filling.
-
Swirling Delight: Create patterns with a caramel sauce or extra Biscoff spread on top before chilling for visual appeal and a burst of flavor in every slice.
-
Biscoff Cookie Butter Swirl: Before chilling, swirl some additional Biscoff cookie butter throughout the filling for an enhanced flavor experience. Each cut will be a surprise!
Embrace these variations to make the recipe fit your taste or dietary needs while still delighting your guests! And for an added treat, check out our delightful Biscoff Blondies Decadent or the refreshing Strawberry Cheesecake Protein for more sweet inspirations!
No-Bake Biscoff Cheesecake Bars Recipe FAQs
How do I choose the right Biscoff cookies for the crust?
Absolutely! When selecting Biscoff cookies, look for those that are fresh and free of dark spots or excessive crumbling. You want cookies that are intact to create a sturdy crust. If you can’t find Biscoff cookies, graham crackers are a great substitute, though they’ll offer a milder flavor.
What’s the best way to store No-Bake Biscoff Cheesecake Bars?
For the freshest taste, store your bars in an airtight container and keep them in the refrigerator for up to 5 days. Be sure to place parchment paper between layers if stacking to prevent sticking. If you’d like to plan ahead, you can also freeze them.
How do I freeze No-Bake Biscoff Cheesecake Bars?
Freezing these bars is super easy! First, wrap each bar individually in plastic wrap to keep them airtight. Then place them in a freezer-safe container or zip-top bag. They will maintain their quality for up to 2 months. When you’re ready to enjoy them, transfer a bar from the freezer to the fridge to thaw overnight.
What if my cream cheese mixture has lumps?
Don’t worry if your mixture isn’t perfectly smooth! Ensure your cream cheese is at room temperature and beat it well before adding the other ingredients. If you still encounter lumps, use a whisk to gently blend them out after incorporating the other components. Aim for a creamy, homogeneous mixture before folding in the whipped cream.
Are No-Bake Biscoff Cheesecake Bars pet-friendly?
No, these bars are not pet-friendly. They contain ingredients like cream cheese and sugar that aren’t suitable for pets, particularly dogs or cats. Always keep desserts like these out of reach of your furry friends for their safety!
Can I make variations of these bars for dietary restrictions?
Very much! For a gluten-free version, use gluten-free Biscoff cookies or a suitable alternative for the crust. You can also substitute dairy cream cheese with a vegan alternative, but do check for compatibility with the whipped cream portion as well. Always experiment based on personal dietary needs!
Decadent No-Bake Biscoff Cheesecake Bars You'll Adore
Ingredients
Equipment
Method
- Prepare the Pan: Line a 9x13-inch baking pan with parchment paper, ensuring it overhangs slightly for easy removal. Lightly grease the parchment.
- Make the Crust: Pulse Biscoff cookies in a food processor until fine crumbs. Mix with melted butter and press into the bottom of prepared pan. Chill for 30 minutes to set.
- Make the Filling: Beat softened cream cheese until smooth. Gradually blend in powdered sugar, Biscoff cookie butter, vanilla extract, and salt until fully combined.
- Whip the Cream: In a separate bowl, whip cold heavy cream and granulated sugar until stiff peaks form. Gently fold into the cream cheese mixture in thirds.
- Assemble Bars: Spread filling over the chilled crust. Drizzle warmed Biscoff spread on top and swirl with a toothpick.
- Chill: Cover and refrigerate for 4 hours or overnight.
- Serve: Lift cheesecake bars using parchment overhang, cut into squares, and garnish with extra cookies or Biscoff spread.
Leave a Reply