
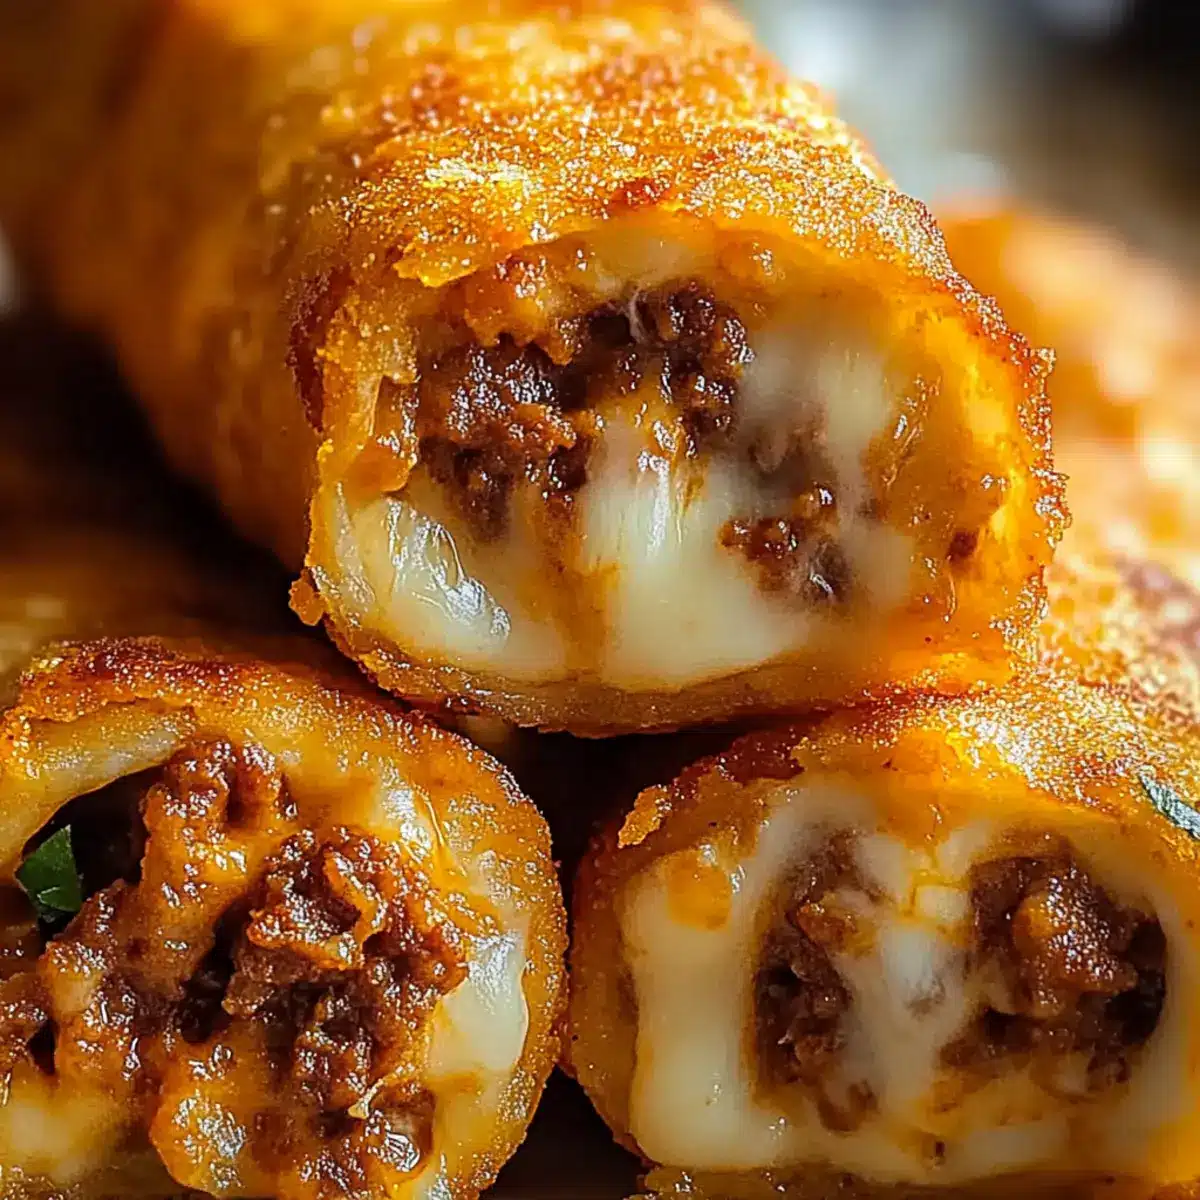
As I stood in my kitchen, the enticing aroma of seasoned beef and melting cheese wafted through the air, instantly sparking joy. This is the magic of Cheesy Taco Sticks—a quick and fun Tex-Mex snack that transforms weekday dinners into something special. In just 30 minutes, you can whip up these crispy delights, perfect for satisfying that afternoon snack craving or impressing guests at your next gathering. Not only are they a hit with the whole family, but they also offer the fun of customization, allowing you to experiment with different fillings and dough options. Ready to dive into this cheesy, scrumptious adventure? Let’s get cooking!
Why Are Cheesy Taco Sticks So Irresistible?
Simplicity makes them easy to whip up, perfect for busy weeknights when you need a tasty solution fast. Flavor-packed with seasoned beef and gooey cheese, these sticks deliver a mouthwatering Tex-Mex twist on traditional snacks. Versatility allows for endless filling options—try adding black beans or fresh corn for a personal touch! Crowd-pleaser status is guaranteed, whether serving at parties or family dinners. Quick baking time means you can enjoy these delectable bites in just 30 minutes. Pair with salsa or guacamole for that extra zing! Want to explore more easy appetizers? Check out these Cheesy Ham Cheese or Hut Cheese Sticks for delightful ideas!
Cheesy Taco Sticks Ingredients
• Here’s everything you need to make these scrumptious snacks!
For the Filling
- Ground Beef – A rich protein that’s essential for flavor; ground turkey works as a leaner alternative.
- Onion – Adds depth to the flavor; diced to blend seamlessly into the filling.
- Garlic – Infuses an aromatic touch; minced for quick cooking.
- Chili Powder – Imparts that signature taco spice; adjust to your desired heat level.
- Ground Cumin – Brings warmth and earthiness; a must-have in taco seasoning.
- Smoked Paprika – Offers a smoky note; regular paprika can be a fine substitute.
- Salt & Black Pepper – Key seasonings to elevate taste; adjust to your preference.
- Water – Helps to combine the ingredients and achieve the right filling consistency.
For the Cheese
- Shredded Mozzarella Cheese – Melts beautifully and binds the filling together; feel free to mix in other cheeses.
- Shredded Cheddar Cheese – Adds a sharp, tangy flavor; any sharp cheese makes a great alternative.
For the Dough
- Pizza Dough – The perfect base for wrapping; you can also use whole wheat tortillas for a nutty twist.
- Melted Butter – Brushed on for added crispiness; olive oil can substitute for a healthier option.
Optional Flavor Boosts
- Garlic Powder & Dried Parsley – Enhance the flavor profile; optional but highly recommended.
Dive into these Cheesy Taco Sticks, and get ready to enjoy a delightful Tex-Mex treat the whole family will adore!
Step‑by‑Step Instructions for Cheesy Taco Sticks
Step 1: Sauté the Aromatics
Heat 1 tablespoon of olive oil in a skillet over medium heat. Add ½ cup of diced onion and sauté for 2-3 minutes until softened and translucent. Then, stir in 2 cloves of minced garlic and cook for an additional 30 seconds until fragrant. This fragrant base is crucial for infusing flavor into your Cheesy Taco Sticks filling.
Step 2: Cook the Beef
Add 1 pound of ground beef to the skillet and cook, breaking it up with a spatula. Brown the meat for about 5-7 minutes, or until it’s cooked through and no longer pink. Once done, drain any excess fat from the skillet to ensure your filling isn’t greasy, keeping the texture light for those delicious taco sticks.
Step 3: Season the Mixture
Next, stir in 1 tablespoon of chili powder, 1 teaspoon of ground cumin, 1 teaspoon of smoked paprika, salt, and pepper to taste, along with ¼ cup of water. Simmer this mixture for 2-3 minutes, allowing the flavors to meld and the sauce to thicken slightly. Once combined, set the filling aside to cool for a few minutes while you prepare the dough.
Step 4: Prepare for Baking
Preheat your oven to 375°F (190°C) and line a baking sheet with parchment paper to avoid sticking. This ensures your Cheesy Taco Sticks will bake evenly and develop that golden-brown crust everyone loves. As the oven heats up, get your pizza dough ready to roll.
Step 5: Roll Out the Dough
Take your pizza dough and roll it out on a lightly floured surface into a rectangle about ¼ inch thick. Cut the dough into 10 strips, each approximately 2 inches wide. These strips will serve as the wrappers for your cheesy filling, ready to be filled and folded into tasty Taco Sticks!
Step 6: Fill the Dough Strips
Place a generous spoonful of the cooled taco filling in the center of each dough strip, topping it with a mix of shredded mozzarella and cheddar cheese. Fold the dough over the filling, enclosing it completely, and pinch the edges to seal securely. This step is crucial to keep all the cheesy goodness inside while baking.
Step 7: Arrange and Brush
Turn each filled stick seam-side down on the prepared baking sheet. Brush the tops with melted butter for extra crispiness, and optionally sprinkle with garlic powder and dried parsley for an aromatic touch. These final touches will give your Cheesy Taco Sticks a beautiful golden finish when baked.
Step 8: Bake to Perfection
Bake your Cheesy Taco Sticks in the preheated oven for 12-15 minutes, or until they are golden brown and crispy. Keep a close eye during the last few minutes to ensure they don’t overbake. Once done, remove them from the oven and let them cool slightly before serving them warm at your next gathering or family meal.
What to Serve with Cheesy Taco Sticks?
The perfect Tex-Mex accompaniment can elevate your Cheesy Taco Sticks into a memorable meal that delights all the senses.
-
Salsa Fresca: Adds a fresh, zesty kick with ripe tomatoes, onions, and cilantro that perfectly complements the cheesy goodness.
-
Guacamole: Creamy and rich, it balances the crunchiness of the sticks while providing a delightful contrast in flavors.
-
Sour Cream: A classic dip that enhances each bite with its coolness, ensuring a light and refreshing balance to the spiced filling.
-
Mexican Street Corn Salad: Sweet corn mixed with lime, cotija cheese, and chili powder provides a burst of bright, summery flavor that pairs perfectly.
-
Refried Beans: A hearty side that adds a creamy, savory component to your meal, creating a comforting and filling combination.
-
Tortilla Chips: Serve these crispy chips alongside salsa or guacamole for an added layer of crunch and fun!
-
Pineapple Salsa: For a tropical twist, this sweet and tangy salsa brings a refreshing element to the table.
-
Limeade: This refreshing drink with a hint of sweetness and tartness balances the savory flavors of the Cheesy Taco Sticks beautifully.
Create a delightful spread that will have family and friends coming back for more!
Storage Tips for Cheesy Taco Sticks
Room Temperature: Keep Cheesy Taco Sticks at room temperature for up to 2 hours, ensuring they stay deliciously fresh for snacking.
Fridge: Store leftover sticks in an airtight container in the refrigerator for up to 4 days, layered with parchment paper to prevent sticking.
Freezer: For longer storage, freeze individually wrapped Cheesy Taco Sticks for up to 2 months. To enjoy later, bake from frozen, adding a few extra minutes to the cooking time.
Reheating: Reheat in the oven at 350°F (175°C) for about 10-15 minutes until warmed through and crispy again, avoiding a soggy texture.
Cheesy Taco Sticks Variations & Substitutions
Feel free to let your creativity shine as you customize these Cheesy Taco Sticks to suit your tastes!
- Meat-Free: Substitute ground beef with lentils or quinoa for a delicious vegetarian option packed with protein.
- Spicy Kick: Add diced jalapeños or crushed red pepper flakes to the filling for extra heat that’ll elevate your snack!
- Nutty Twist: Use almond flour tortillas instead of traditional dough for a gluten-free, nutty flavor that complements the filling beautifully.
- Creamy Avocado: Mix diced avocado into the filling for a creamy texture that balances out the spices, making each bite more delightful.
- Loaded Veggies: Include diced bell peppers, shredded carrots, or zucchini in the mix for a colorful, nutrient-rich filling. This not only enhances flavor but also adds a lovely crunch.
- Cheese Lovers: Experiment with a blend of cheeses like pepper jack for a spicy twist, or creamy gouda for a rich flavor swap.
- Tex-Mex Fusion: Swap out the pizza dough for puff pastry for a flaky texture that turns your sticks into sophisticated bites—perfect for entertaining guests.
- Herb Infusion: Add fresh cilantro or thyme to the filling for an aromatic twist that adds depth and freshness to each bite.
I hope these variations inspire you to make these Cheesy Taco Sticks your own. And when you’re looking for other mouthwatering snacks, don’t forget to check out my Hut Cheese Sticks for even more cheesy goodness!
Expert Tips for Cheesy Taco Sticks
-
Fresh Tortillas: Use fresh, pliable tortillas for the best texture. Stale or dry tortillas can lead to a chewy or tough bite.
-
Filling Balance: Don’t overfill each stick; stick to about ¼ cup of filling to prevent bursting during baking, ensuring that your Cheesy Taco Sticks stay intact.
-
Sharp Knife: For clean cutting, use a sharp knife when slicing the dough. A dull knife can lead to tearing, impacting the final presentation.
-
Freeze Ahead: Assemble and freeze unbaked Cheesy Taco Sticks for up to 2 months. Just pop them in the oven when you’re ready for a quick snack!
-
Layer Storage: When storing leftovers, place parchment paper between layers to prevent sticking, ensuring you can easily reheat each stick without any hassle.
Make Ahead Options
Preparing Cheesy Taco Sticks ahead of time is a fantastic way to streamline your meal planning! You can assemble the sticks and refrigerate them for up to 24 hours. Simply prepare the filling, roll out the dough, and fill each strip—then, store the assembled sticks in an airtight container with parchment paper between layers to prevent sticking. When you’re ready to enjoy these delicious treats, just brush them with melted butter, sprinkle with garlic powder, and bake directly from the fridge for 12-15 minutes until golden brown. This method keeps the Cheesy Taco Sticks just as flavorful and satisfying, saving you valuable time on busy weeknights!
Cheesy Taco Sticks Recipe FAQs
What type of tortillas should I use for Cheesy Taco Sticks?
I recommend using fresh, pliable tortillas for the best texture and flavor. If you prefer a healthier option, whole wheat tortillas can be a delightful alternative, adding a nutty taste to the mix.
How long can I store leftover Cheesy Taco Sticks?
Absolutely! Leftover Cheesy Taco Sticks can be stored in an airtight container in the refrigerator for up to 4 days. I suggest placing parchment paper between layers to prevent them from sticking together and losing their delightful crunch.
Can I freeze Cheesy Taco Sticks?
Yes! To freeze Cheesy Taco Sticks, assemble them unbaked and wrap them individually in plastic wrap or aluminum foil. Place the wrapped sticks in a freezer-safe bag and store for up to 2 months. When you’re ready to bake, preheat the oven and bake them directly from frozen, adding about 5-7 minutes to the cooking time for perfect crispy goodness.
What if my taco filling is too wet?
If your filling turns out a bit too wet, don’t worry! Just simmer it for an additional 2-3 minutes to evaporate some of the excess moisture. This helps ensure your sticks won’t burst open while baking. If you’re ever in doubt, use less water next time until you reach your desired consistency.
Are Cheesy Taco Sticks suitable for people with allergies?
That’s a great question! These Cheesy Taco Sticks contain common allergens such as dairy (cheese) and gluten (pizza dough). If your guests have specific allergies, you can easily customize the recipe. Substitute cheese with a non-dairy alternative and use gluten-free tortillas or dough to make this dish more accessible.
What is the best way to serve Cheesy Taco Sticks?
For a delightful experience, pair your Cheesy Taco Sticks with salsa, sour cream, or guacamole. The creamy and zesty dips elevate the flavors, making them even more enjoyable during your next snack session or gathering!
Cheesy Taco Sticks: Easy, Delicious Tex-Mex Snack Delight
Ingredients
Equipment
Method
- Heat 1 tablespoon of olive oil in a skillet over medium heat. Add 1/2 cup of diced onion and sauté for 2-3 minutes until softened and translucent.
- Stir in 2 cloves of minced garlic and cook for 30 seconds until fragrant.
- Add 1 pound of ground beef and cook, breaking it up. Brown for 5-7 minutes until cooked through.
- Drain excess fat from the skillet.
- Stir in 1 tablespoon of chili powder, 1 teaspoon of ground cumin, 1 teaspoon of smoked paprika, salt, pepper, and 1/4 cup of water. Simmer for 2-3 minutes.
- Preheat oven to 375°F (190°C) and line a baking sheet with parchment paper.
- Roll out pizza dough into a rectangle about 1/4 inch thick and cut into 10 strips.
- Place filling in the center of each strip, top with cheese, fold dough, and pinch edges to seal.
- Brush tops with melted butter and optionally sprinkle with garlic powder and dried parsley.
- Bake for 12-15 minutes until golden brown and crispy.
Leave a Reply