
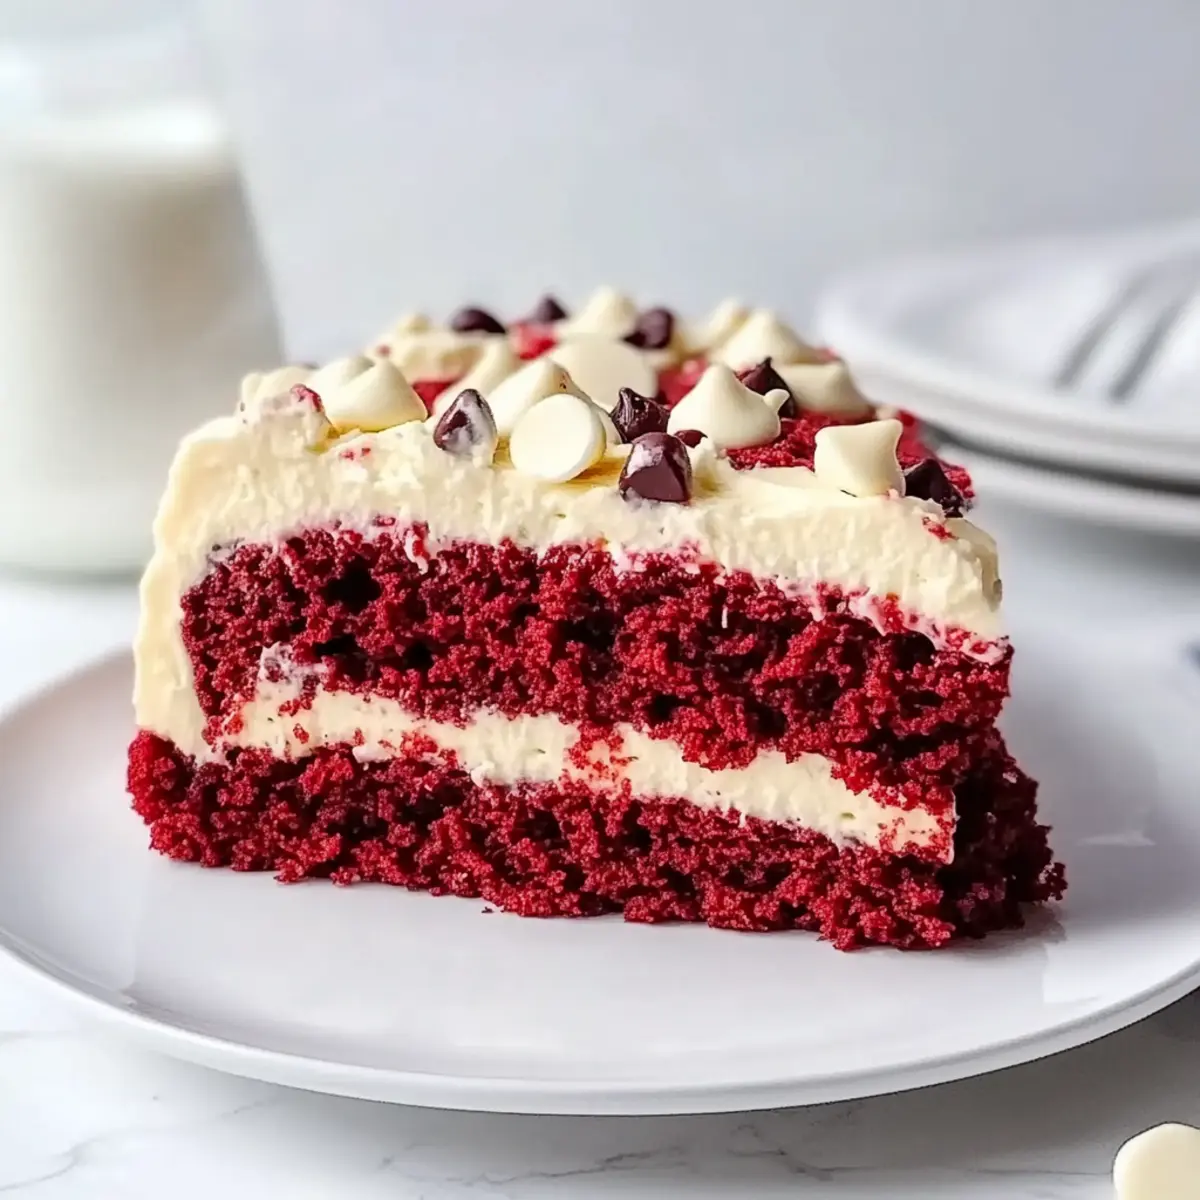
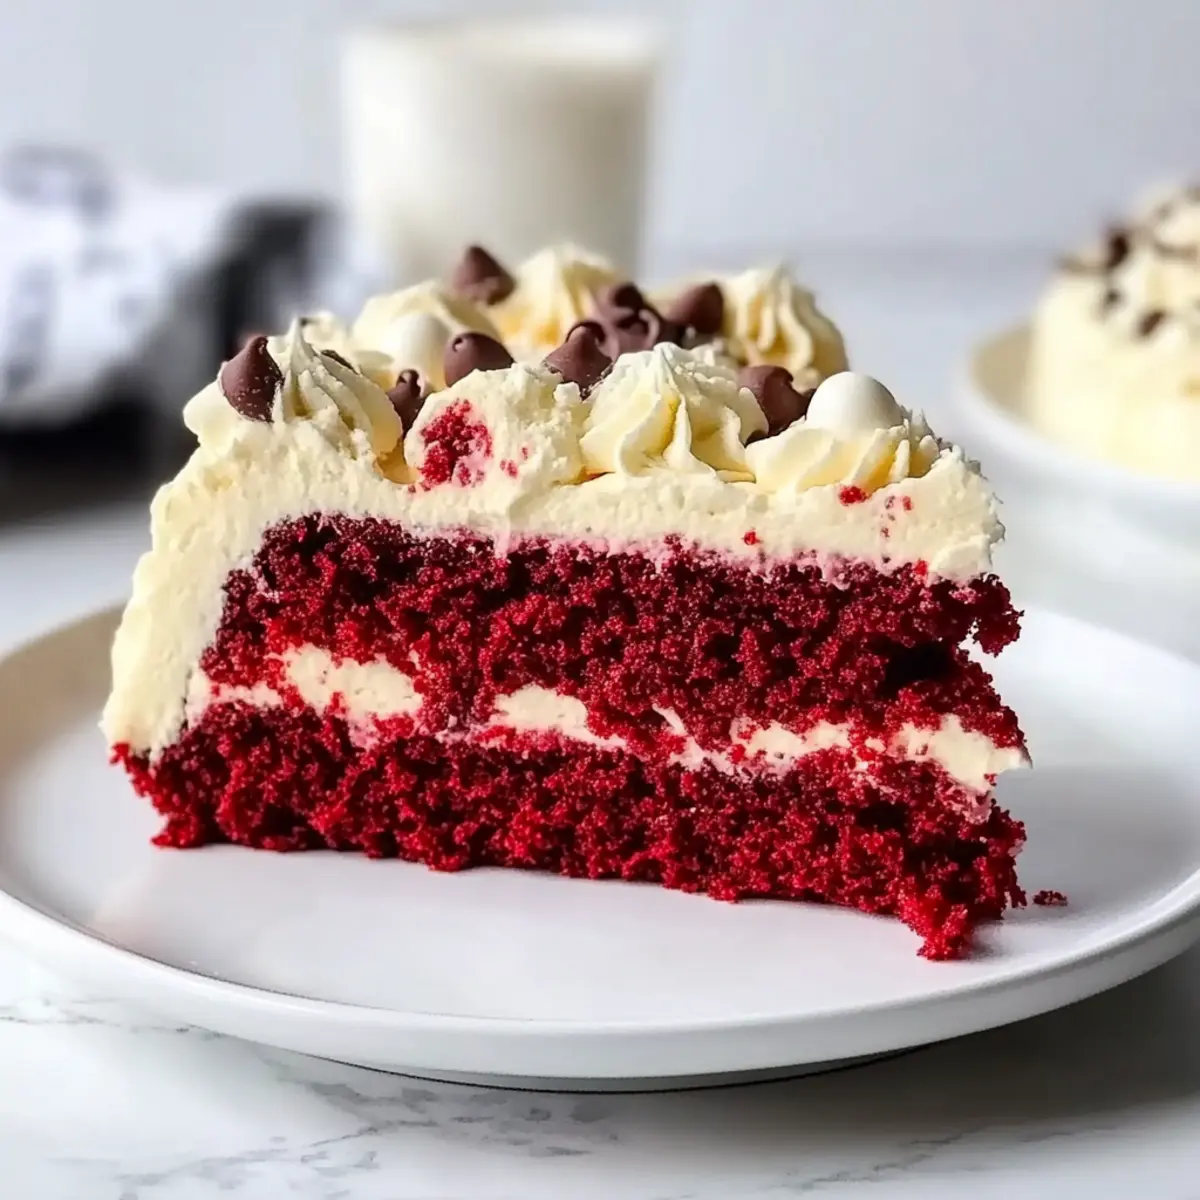
Under the twinkling lights of a celebration, nothing quite captures the spirit like a slice of decadently rich Red Velvet Cookie Cake. This enchanting dessert ingeniously combines the soft, chewy texture of cookies with the classic elegance of red velvet, making it perfect for birthdays, Valentine’s Day, or simply an everyday treat that feels special. With minimal effort required, this easy baking recipe invites you to elevate your dessert game, impressing friends and family without the complexities of traditional baking. The delightful duo of white chocolate chips and creamy frosting seals the deal, creating a crowd-pleasing masterpiece that beckons for seconds. Ready to dive into this delicious creation? Let’s get baking!
Why is This Cookie Cake So Special?
Chewy Texture: The unique soft and chewy texture makes each bite feel indulgent—just like a giant fluffy cookie!
Vibrant Color: With its eye-catching red hue, this cake doubles as a stunning centerpiece for any gathering.
Easy Baking: This recipe is perfect for both novice bakers and seasoned pros who want a quick win in the kitchen.
Crowd Pleaser: Pair it with coffee or a scoop of ice cream, and watch it disappear in no time!
Plus, if you love unique desserts, check out my Pineapple Rum Cake for a tropical twist or these delicious Peanut Butter Cookies for a nostalgic treat.
Red Velvet Cookie Cake Ingredients
For the Cake
• Unsalted Butter – Provides richness and a soft texture; substitute with margarine for a dairy-free option.
• Light Brown Sugar – Adds moisture and caramel notes for a chewier cookie; can replace with dark brown sugar for a deeper flavor.
• Granulated Sugar – Balances flavor and helps achieve golden edges; can be reduced slightly for less sweetness.
• Eggs – Bind dough together and provide structure; no substitute recommended for best results.
• Vanilla Extract – Rounds out the flavor; use pure vanilla for the best taste.
• Red Food Coloring – Gives the classic red velvet look; omit for a chocolate cookie effect.
• Unsweetened Cocoa Powder – Imparts a subtle chocolate flavor characteristic of red velvet; can substitute with Dutch cocoa for a richer taste.
• All-Purpose Flour – Forms the body of the dough; can replace with a gluten-free blend for a gluten-free version.
• Baking Soda – Provides lift to keep the cookie cake thick but not heavy; do not substitute as it is essential for rising.
• Salt – Enhances overall sweetness; essential for flavor balance, do not omit.
• White Chocolate Chips – Add sweetness and visual appeal; can swap with dark or milk chocolate chips according to preference.
For the Frosting
• Cream Cheese – Essential for the tangy frosting pairing perfectly with red velvet; omit for a simpler frosting.
• Powdered Sugar – Sweetens the frosting while maintaining a smooth texture; reduce for less sweetness.
• Heavy Cream/Milk – Adjusts the consistency of frosting for spreading; use milk for a lighter option.
• Sprinkles/White Chocolate Shavings – For decoration; optional but recommended for visual appeal.
Step‑by‑Step Instructions for Red Velvet Cookie Cake
Step 1: Preheat and Prepare
Preheat your oven to 350°F (175°C) and prepare a 9-inch round cake pan. Coat the pan with a thin layer of unsalted butter or line it with parchment paper for easy removal of your Red Velvet Cookie Cake. Setting up your pan ensures that your cake bakes evenly and releases without sticking.
Step 2: Cream the Butters and Sugars
In a large mixing bowl, use an electric mixer to beat together 1 cup of unsalted butter, ½ cup of light brown sugar, and ½ cup of granulated sugar until the mixture is light and fluffy, about 3-4 minutes. This step is crucial for achieving a soft texture in your cookie cake, so expect a creamy consistency before moving on.
Step 3: Incorporate Wet Ingredients
Add in 2 large eggs, 1 teaspoon of vanilla extract, and 2 tablespoons of red food coloring to the butter and sugar mixture. Mix these together until you have a smooth, vibrant batter. The combination of these ingredients will not only enhance flavor but also give your Red Velvet Cookie Cake its signature hue.
Step 4: Mix the Dry Ingredients
In a separate bowl, whisk together 2 cups of all-purpose flour, ¼ cup of unsweetened cocoa powder, 1 teaspoon of baking soda, and a pinch of salt. This dry mixture should be uniform and well-combined, creating the perfect foundation to give your cake structure.
Step 5: Combine Wet and Dry Mixtures
Gradually add the dry ingredients into the wet ingredients, mixing on low speed until a thick dough forms. Be careful not to overmix; stop as soon as you no longer see dry flour. This is a vital step in creating the perfect texture for your Red Velvet Cookie Cake.
Step 6: Fold in Chocolate Chips
Gently fold in 1 cup of white chocolate chips into the dough with a spatula or wooden spoon. The chips will add delightful bursts of sweetness throughout the cake. Ensure even distribution while retaining the dough’s thickness for the ultimate chewy texture.
Step 7: Prepare for Baking
Pour the dough into your prepared 9-inch cake pan, using a spatula to spread and smooth the top evenly. Make sure the dough reaches the edges of the pan for uniform baking. This step is essential for achieving a beautifully round Red Velvet Cookie Cake.
Step 8: Bake the Cookie Cake
Place your cake pan in the preheated oven and bake for 20–24 minutes. The edges should be set while the center remains slightly soft and a bit gooey. This is key for a cookie cake texture, so avoid overbaking to ensure that delicious chewiness.
Step 9: Cool Before Frosting
Once baked, remove the cake from the oven and let it cool in the pan for 10–15 minutes. Carefully transfer it to a wire rack to cool completely. Allowing the cake to cool is crucial before frosting; this ensures that your frosting won’t melt and maintains a lovely presentation.
Step 10: Make the Cream Cheese Frosting
In a mixing bowl, beat together 8 ounces of cream cheese, 2 cups of powdered sugar, and 2-3 tablespoons of heavy cream until smooth and creamy. This frosting is integral to enhance the flavor of your Red Velvet Cookie Cake, providing a tangy contrast to the sweet cookie base.
Step 11: Frost the Cake
Once your Red Velvet Cookie Cake is completely cool, use a spatula to spread the cream cheese frosting evenly over the top. Consider swirling it gently for an elegant look. This frosting step elevates your cake from delicious to truly stunning.
Step 12: Garnish and Serve
For the finishing touch, sprinkle with white chocolate shavings and colorful sprinkles if desired. After garnishing, slice your cake into wedges and serve! Enjoy chilled or at room temperature, and savor the delightful soft and chewy experience of this Red Velvet Cookie Cake.
Make Ahead Options
These Red Velvet Cookie Cakes are perfect for busy weeknights or special occasions! You can prepare the dough up to 24 hours in advance by mixing all your ingredients and storing the dough in an airtight container in the refrigerator. Alternatively, bake the cake ahead and store it frosted in the fridge for up to 4 days. Just make sure to cover it well to prevent the frosting from drying out. When ready to serve, allow slices to come to room temperature for about 20 minutes for the best texture. By prepping ahead, you’ll enjoy delicious homemade flavors without the last-minute rush!
What to Serve with Soft & Chewy Red Velvet Cookie Cake
Indulging in a slice of this dessert is the perfect opportunity to elevate your meal with delightful accompaniments.
-
Cold Milk: A classic pairing, cold milk balances the rich flavors and enhances the cookie cake’s sweetness, making every bite even more enjoyable.
-
Scoop of Vanilla Ice Cream: The creamy richness of vanilla ice cream contrasts beautifully with the chewy texture of the cookie cake, providing a delightful temperature contrast. Imagine the melting ice cream blending with the cake, creating a decadent experience.
-
Fresh Berries: A mix of strawberries and blueberries adds a refreshing tartness that cuts through the sweetness while providing a burst of color and flavor.
-
Café-style Coffee: A robust cup of coffee complements the cocoa notes, bringing out the deep flavors of the red velvet while adding a warm touch to your dessert experience.
-
Chocolate Ganache Drizzle: Enhance indulgence by drizzling warm chocolate ganache over each slice, adding a luxurious touch that beautifully pairs with the soft, chewy texture.
-
Whipped Cream: Light and fluffy whipped cream adds airiness, contrasting with the dense cookie cake, making it a beloved addition for cake lovers.
-
Sparkling Lemonade: A refreshing glass of sparkling lemonade offers a zesty kick, brightening the palate and making each bite feel light and festive.
-
Cream Cheese Frosting: For those who can’t get enough of the original flavor, serve a side of cream cheese frosting for dipping or spreading over each slice. It adds extra creaminess and the essential tang that defines the classic red velvet experience.
-
Chocolate Milkshake: Create a nostalgic experience by pairing your cookie cake with a rich chocolate milkshake—richness upon creaminess that you won’t forget!
Red Velvet Cookie Cake Variations
Feel free to explore these delightful twists, bringing your own flair to the classic red velvet cookie cake!
-
Dairy-Free: Substitute unsalted butter with coconut oil or margarine to create a vegan-friendly version that still tastes divine.
Coconut oil adds a subtle tropical note, enhancing the overall flavor while ensuring the chewy texture remains intact. -
Chocolate Lovers: Replace white chocolate chips with dark chocolate or milk chocolate chips for a richer, more sumptuous flavor.
This variation satisfies those who crave chocolate, ensuring each bite is a chocolatey delight, and adds an exciting twist! -
Nutty Crunch: Add ½ cup of finely chopped nuts such as pecans or walnuts for a pleasant crunch in every slice.
The nutty texture complements the soft cookie cake and adds just the right amount of contrast, elevating your dessert! -
Fruit Fusion: Incorporate ½ cup of dried cranberries or cherries for a fruity burst, balancing the sweetness with tartness.
The addition of fruit not only brings color but also a delightful chew, making each bite an exciting surprise. -
Cream Cheese Alternative: Swap the traditional cream cheese frosting for a velvety vanilla buttercream for a different flavor profile.
This creamy option can be just as rich and luscious while giving a classic twist on the red velvet experience. -
Spicy Kick: Add 1 teaspoon of cinnamon or a pinch of cayenne pepper to the dough for a warming, spicy twist.
This surprising flavor component adds depth and enhances the overall complexity, leaving guests intrigued and delighted! -
Gluten-Free: Use a gluten-free all-purpose flour blend to cater to gluten-sensitive friends and family.
This adaptation ensures everyone can enjoy a piece of your delicious creation without sacrificing flavor or texture. -
Charming Citrus: Add zest from an orange or lemon to the dough for a refreshing, citrusy note that brightens the flavors.
The zest complements the richness of the cake, adding an inviting aroma that makes it perfect for spring celebrations.
Need more dessert inspiration? Don’t forget to check out my delightful Butterbeer Cream Cake or explore the tropical essence in my Pineapple Rum Cake. Happy baking!
How to Store and Freeze Red Velvet Cookie Cake
Fridge: Keep your Red Velvet Cookie Cake in the refrigerator for up to 4 days, tightly covered to prevent the frosting from drying out. Allow slices to return to room temperature for the best texture.
Freezer: For longer storage, freeze unfrosted slices tightly wrapped in plastic wrap and aluminum foil for up to 3 months. When ready to enjoy, add fresh frosting just before serving.
Thawing: To thaw, place slices in the refrigerator overnight or at room temperature for a couple of hours. This ensures your cake maintains its delightful soft and chewy texture.
Reheating: If you prefer a warm treat, pop slices in the microwave for about 10-15 seconds. Just enough to melt the chocolate chips slightly without overbaking!
Expert Tips for Red Velvet Cookie Cake
• Watch the Baking Time: Check doneness around 20 minutes. Overbaking can lead to a dry texture, missing that chewy essence essential for a perfect Red Velvet Cookie Cake.
• Cooling is Key: Let your cake cool completely before frosting; this prevents the frosting from melting, ensuring a neat and beautiful finish.
• Use Quality Ingredients: Fresh eggs and pure vanilla extract make a big difference; better ingredients yield a more delightful flavor in your cake.
• Chill Before Slicing: Chill the frosted cake for about 20 minutes before cutting to achieve clean, attractive slices that showcase your beautiful creation.
• Experiment with Flavors: Try different chips like dark chocolate instead of white for a tasty twist! This simple change can elevate your Red Velvet Cookie Cake to new heights.
Red Velvet Cookie Cake Recipe FAQs
How do I choose the right red food coloring?
Absolutely! For the best results, use a high-quality red gel food coloring instead of liquid. Gel colors provide more vibrant shades without altering the cake’s moisture. Always check the packaging for how much to use; typically, 1-2 tablespoons will do for that classic red velvet hue!
What’s the best way to store my cookie cake?
Very! Store your Red Velvet Cookie Cake in the refrigerator for up to 4 days, ensuring it’s tightly covered to prevent the frosting from drying out. For serving, allow slices to come to room temperature, which helps restore the chewy texture you love. It’s even better when slightly warmed, so don’t hesitate to leave it on the counter for a bit before indulging!
Can I freeze leftover slices?
Of course! To freeze your Red Velvet Cookie Cake, wrap unfrosted slices tightly in plastic wrap, followed by aluminum foil. This will keep them fresh for up to 3 months. When you’re ready to enjoy, simply thaw the slices in the refrigerator overnight or let them sit at room temperature for a couple of hours. Add your cream cheese frosting just before serving for that fresh taste!
Why is my cookie cake not as chewy as I expected?
Very good question! If your Red Velvet Cookie Cake is more on the cakey side, it might be due to overbaking. To achieve that delightful chewiness, remove it from the oven when the edges are set but the center is still soft. If you’re on the edge of unsure, checking around the 20-minute mark can help you determine doneness.
Are there any common allergens in this recipe?
Absolutely! This recipe includes common allergens such as eggs, dairy (in butter and cream cheese), and gluten (in all-purpose flour). If you’re baking for someone with allergies, consider substitutes: use dairy-free margarine, egg replacers, and a gluten-free flour blend. Always double-check ingredients if serving guests with specific dietary restrictions.
Can I adjust the sweetness of the frosting?
Indeed! If you prefer a less sweet frosting, you can reduce the amount of powdered sugar in the cream cheese frosting. Start with 1 cup and gradually mix until you reach your desired sweetness. It’s all about tailoring it to your tastes!
Indulge in a Soft Red Velvet Cookie Cake for Any Celebration
Ingredients
Equipment
Method
- Preheat your oven to 350°F (175°C) and prepare a 9-inch round cake pan. Coat the pan with a thin layer of unsalted butter or line it with parchment paper for easy removal of your Red Velvet Cookie Cake.
- In a large mixing bowl, use an electric mixer to beat together the butter, light brown sugar, and granulated sugar until light and fluffy, about 3-4 minutes.
- Add in the eggs, vanilla extract, and red food coloring to the butter and sugar mixture. Mix until smooth.
- In a separate bowl, whisk together the all-purpose flour, unsweetened cocoa powder, baking soda, and salt.
- Gradually add the dry ingredients into the wet ingredients, mixing on low speed until a thick dough forms.
- Gently fold in the white chocolate chips into the dough.
- Pour the dough into your prepared cake pan, smoothing the top evenly.
- Bake for 20–24 minutes, until the edges are set and the center is slightly soft.
- Once baked, let the cake cool in the pan for 10–15 minutes, then transfer it to a wire rack to cool completely.
- In a mixing bowl, beat together the cream cheese, powdered sugar, and heavy cream until smooth.
- Frost the cake evenly with the cream cheese frosting.
- Garnish with sprinkles and white chocolate shavings if desired, then slice and serve.
Leave a Reply