
As I walked into the kitchen, a wave of sweetness hit me—the unmistakable mix of chocolate and caramel beckoned, promising bliss in every bite. These Quick and Easy Carmelitas are not just a dessert; they’re a heartfelt hug in bar form, perfectly layered with gooey caramel and rich chocolate, all cradled in a delightful cookie crust. With a simple assembly that takes mere moments, these treats come together quickly, making them a go-to crowd-pleaser for any gathering. Not to mention, they can be customized to fit any dietary needs, ensuring everyone can indulge in their sweet glory. Ready to dive into a recipe that’s just as enjoyable to make as it is to eat? Let’s create something irresistible together!
Why are Carmelitas a must-try?
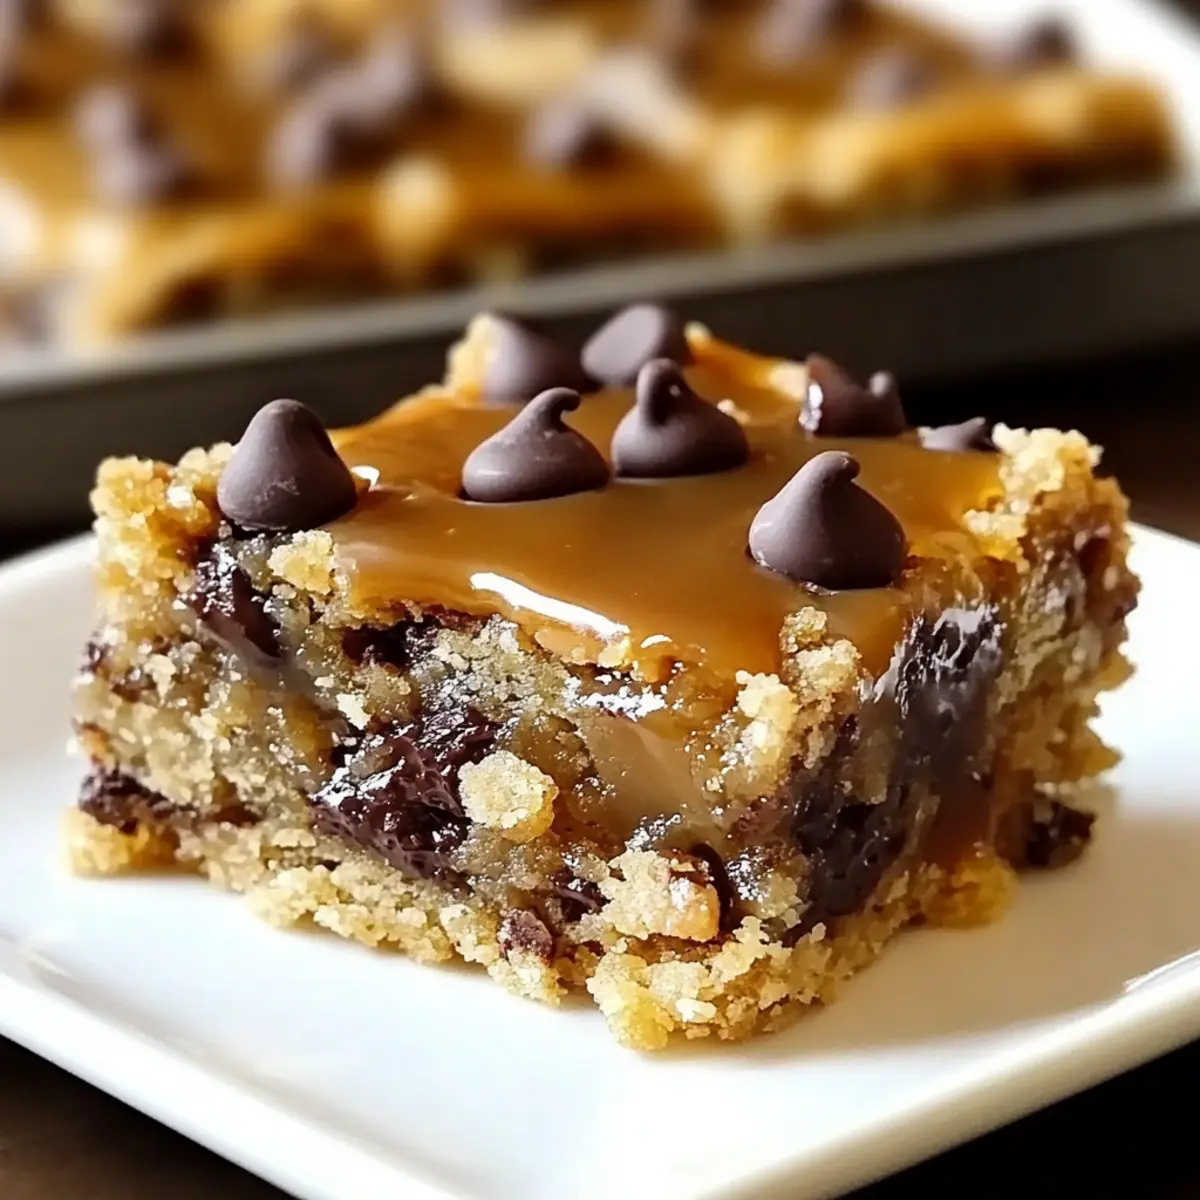
Decadent Layers: Each bite of these Carmelitas combines a crispy cookie crust, gooey caramel, and luscious chocolate, creating a heavenly experience.
Quick Preparation: With minimal fuss, you can whip these up in no time, making them a fantastic option for last-minute gatherings.
Crowd-Pleasing Treat: Everyone loves a delicious dessert, and these bars are guaranteed to be a hit, whether at a family get-together or a bake sale.
Customizable Delight: Need to cater to dietary preferences? Swap in gluten-free options or add nuts for a personal twist. You can even try Keto Salami Roll for a fun pairing!
Make-Ahead Magic: Prepare these Carmelitas in advance and store them for a delightful treat whenever you crave something sweet.
Quick and Easy Carmelitas Ingredients
For the Cookie Base
• Refrigerated Chocolate Chip Cookie Dough – Provides a quick and easy base for the bars; feel free to substitute with homemade dough if you’re in the mood!
For the Gooey Layer
• KRAFT Caramels – Creates the essential gooey layer; you can also use soft caramel candies or caramel sauce if you prefer.
• Evaporated Milk – Helps to melt the caramels smoothly; for a richer flavor, swap with cream.
For the Topping
• Semi-Sweet Chocolate Chips – Adds that sweet, rich chocolate flavor; dark chocolate chips can be used for a deeper taste.
With these Quick and Easy Carmelitas ingredients on hand, you’re ready to create a treat that will have everyone begging for seconds!
Step‑by‑Step Instructions for Quick and Easy Carmelitas
Step 1: Preheat the Oven
Begin by preheating your oven to 350°F (175°C). As the oven warms up, line a 9-inch square baking pan with parchment paper, allowing some overhang for easy removal later. This initial step ensures that your Quick and Easy Carmelitas will have the perfect texture and baking time.
Step 2: Prepare the Cookie Crust
Slice more than half of the refrigerated chocolate chip cookie dough into 1/4-inch rounds. Press the dough evenly into the bottom of the prepared pan to form a solid crust. Bake in the preheated oven for 20-25 minutes, watching closely until it turns light golden around the edges. This creates a sturdy base for the decadent layers to come.
Step 3: Melt the Caramels
While the crust is cooling, unwrap the KRAFT caramels and place them in a microwave-safe bowl. Add the evaporated milk and heat the mixture in the microwave in 30-second intervals, stirring frequently until the caramels are completely melted and smooth. This gooey caramel will be the heart of your Quick and Easy Carmelitas.
Step 4: Assemble the Bars
Once the cookie crust has cooled slightly, sprinkle a generous layer of semi-sweet chocolate chips evenly over the top. Pour the melted caramel mixture over the chocolate chips, ensuring it covers them well. Finally, crumble the remaining cookie dough over the caramel layer for a deliciously textured topping that makes these bars irresistible.
Step 5: Bake Again
Carefully return the assembled bars to the oven and bake for an additional 12-15 minutes. Keep an eye on them, as you want the top to turn golden and the edges to bubble slightly. This final baking step melds all the layers together, enhancing the flavor and texture of your Quick and Easy Carmelitas.
Step 6: Cool and Set
Once baked, remove the pan from the oven and let it cool at room temperature. After a warm cooling period, refrigerate the bars for at least 2 hours to set fully. This step is essential for achieving clean cuts and allowing the flavors to meld beautifully before you slice these scrumptious treats into squares.
Expert Tips for Quick and Easy Carmelitas
-
Cool the Crust: Let the cookie crust cool until warm to prevent the chocolate chips from melting too much into the caramel layer.
-
Spread Carefully: Use an offset spatula to gently spread the caramel over the chocolate chips for an even drizzle that enhances the layers in your Quick and Easy Carmelitas.
-
Adjust Baking Time: If changing your pan size, remember that smaller pans will yield thicker bars and need a longer bake time, while larger pans require less time.
-
Chill for Best Texture: Refrigerating the bars after baking is crucial; it allows them to firm up, making them easier to cut into perfect squares.
-
Customize Creatively: Don’t hesitate to add nuts like pecans or walnuts for added crunch, or sprinkle sea salt on top for a delightful sweet-and-salty contrast.
Make Ahead Options
These Quick and Easy Carmelitas are perfect for meal prep, allowing you to indulge in their sweetness whenever the craving strikes! You can prepare the cookie crust up to 24 hours in advance; simply bake it and let it cool completely before wrapping it tightly in plastic wrap to prevent moisture. The caramel mixture can also be made up to 3 days ahead and stored in the refrigerator until you’re ready to assemble. When you’re ready to serve, simply reheat the caramel for a few seconds in the microwave, then layer it with chocolate chips and cookie dough before a final bake. This method ensures that your Carmelitas are just as delicious and gooey, ready to delight friends and family with minimal effort!
What to Serve with Quick and Easy Carmelitas
Indulging in these delightful bars opens up a world of delicious pairing possibilities that will elevate your dessert experience.
-
Vanilla Ice Cream: The creamy, coolness of vanilla ice cream balances the rich caramel and chocolate perfectly, making each bite a heavenly delight.
-
Fresh Berries: A handful of tart raspberries or sweet strawberries adds a burst of freshness and acidity, cutting through the sweetness of the bars beautifully.
-
Cold Brew Coffee: The bold flavors of cold brew coffee complement the chocolate and caramel, providing a lovely contrast that enhances each bite.
-
Chocolate Drizzle: A light drizzle of melted chocolate on top elevates the presentation and gives an extra punch of chocolaty goodness to each piece.
-
Whipped Cream: A dollop of freshly whipped cream adds a light and airy texture, making these bars feel even more decadent and indulgent.
-
Caramel Sauce: An extra drizzle of caramel sauce brings out the gooey layer, intensifying the flavors and making for an irresistible pairing.
-
Nutty Granola: Serve these Carmelitas with a side of nutty granola for a crunchy texture, adding a delightful contrast to the rich softness of the bars.
Quick and Easy Carmelitas Variations
Feel free to put your own spin on these delightful bars; customizing them allows you to explore new flavors and textures.
-
Gluten-Free: Use gluten-free cookie dough and caramel to enjoy these bars without compromising taste. They will still deliver that gooey, chocolatey goodness we all crave!
-
Nutty Crunch: Fold in some chopped pecans or walnuts into the cookie dough for an added crunch that contrasts beautifully with the soft caramel.
-
Salted Caramel: Sprinkle flaky sea salt over the caramel layer before adding the cookie crumbles. This enhances the flavor, elevating the experience with a savory kick.
-
Dark Chocolate Delight: Swap semi-sweet chocolate chips for dark chocolate chips to indulge in a richer, more intense chocolate flavor. It’s a superb twist for chocolate lovers!
-
Toffee Twist: Mix in some chocolate toffee bits with the chocolate chips for a delightful crunchy texture. It adds a layer of caramel-like sweetness that’s hard to resist.
-
Peanut Butter Swirl: Drizzle some melted peanut butter over the caramel layer before adding the cookie crumbles for an unforgettable flavor combination. This is perfect for all the peanut butter fans out there!
-
Caramel Sauce Substitute: If KRAFT Caramels aren’t available, use a high-quality caramel sauce instead. This saves time and still adds the luscious texture that makes these bars so delectable.
If you’re looking for even more delightful treats, consider pairing these Carmelitas with some Irresistible Best Smothered Chicken and Rice Recipe for a savory complement!
How to Store and Freeze Quick and Easy Carmelitas
Room Temperature: Store your Carmelitas in an airtight container at room temperature for up to 3 days to keep them fresh and delicious.
Fridge: For longer freshness, refrigerate the bars in an airtight container for up to a week; this will also enhance the texture.
Freezer: To freeze, cut the squares and place them between layers of parchment paper in an airtight container. They can be frozen for up to 2 months. Thaw before serving for the best taste and texture.
Reheating: If you’d like to enjoy them warm, simply microwave for 10-15 seconds; this will soften the chocolate and caramel without compromising the bars’ structure.
Quick and Easy Carmelitas Recipe FAQs
What type of chocolate chip cookie dough should I use?
Absolutely! You can use refrigerated chocolate chip cookie dough for convenience, or if you’re feeling adventurous, homemade cookie dough works great too. Just make sure it’s the right consistency—soft enough to press into the pan!
How should I store leftover Carmelitas?
For optimal freshness, store your Carmelitas in an airtight container at room temperature for up to 3 days, or refrigerate for up to a week. I often find they taste even better the next day after the flavors have had a chance to meld!
Can I freeze Carmelitas?
Yes! To freeze your Carmelitas, cut them into squares and place parchment paper between each layer in an airtight container. They’ll keep for up to 2 months. When you’re ready to indulge, simply thaw them in the fridge overnight or at room temperature for a few hours before serving.
What if my caramel isn’t melting smoothly?
Very common! If your caramel isn’t melting smoothly, try adding a splash more evaporated milk and continue heating in 30-second intervals, stirring well each time. It’s vital to maintain the right consistency—smooth and gooey—to achieve that perfect layer in your Quick and Easy Carmelitas.
Are these bars suitable for people with nut allergies?
Absolutely! These Carmelitas can be made nut-free with simple ingredient swaps. Just ensure your chocolate chips and cookie dough are nut-free, and you’re good to go! If you want to add some crunch, consider using seeds like sunflower seeds instead—a delicious alternative!
Irresistible Quick and Easy Carmelitas You’ll Love to Share
Ingredients
Equipment
Method
- Preheat your oven to 350°F (175°C) and line a 9-inch square baking pan with parchment paper.
- Slice more than half of the refrigerated cookie dough into 1/4-inch rounds and press it into the bottom of the prepared pan. Bake for 20-25 minutes until light golden.
- Melt the KRAFT caramels with evaporated milk in a microwave-safe bowl in 30-second intervals until smooth.
- Once the crust has cooled slightly, sprinkle chocolate chips over the top and pour the melted caramel mixture over them. Crumble remaining cookie dough on top.
- Bake again for 12-15 minutes until golden on top and edges are bubbling.
- Allow to cool at room temperature, then refrigerate for at least 2 hours to set.
Leave a Reply