
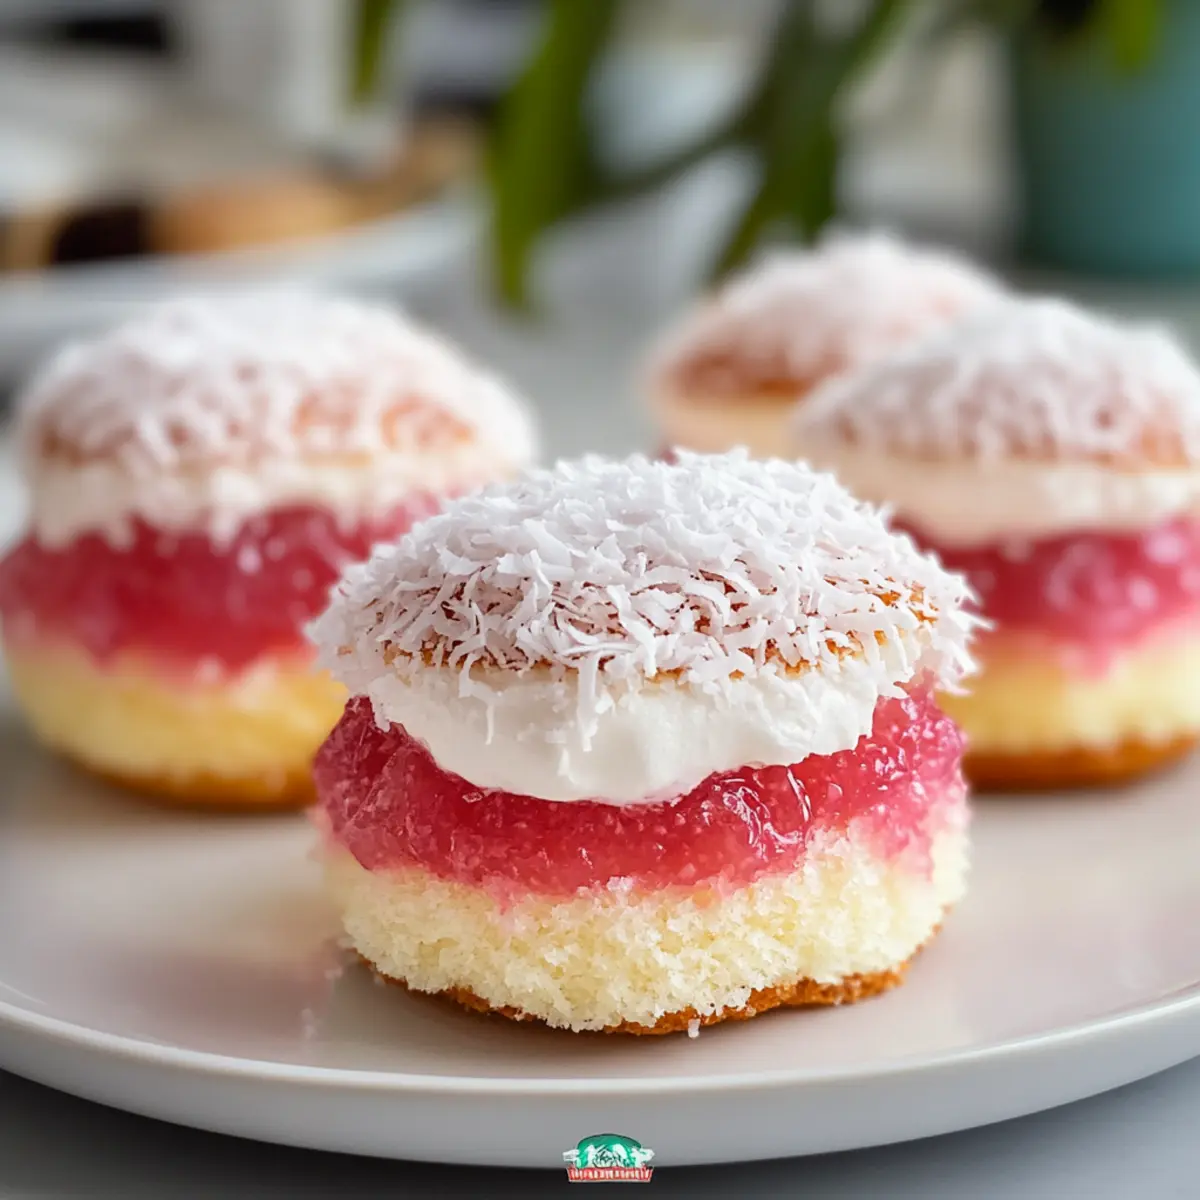
As I pulled the Old-Fashioned Pink Jelly Cakes from the fridge, their charming pink hue transported me back to sun-drenched Australian afternoons filled with laughter and sweet treats. These delightful wonders are not just a feast for the eyes; they combine a soft vanilla sponge cake with a tangy strawberry jelly and a cozy roll in desiccated coconut, creating a nostalgic dessert experience like no other. Not only are these cakes a quick prep solution for last-minute gatherings, but they’re also a crowd-pleaser that brings smiles all around. Perfect for afternoon teas or a unique addition to any celebration, these Pink Jelly Cakes are bound to spark joy. What flavor combinations will you dream up for your next batch?
Why Are Old-Fashioned Pink Jelly Cakes Special?
Nostalgic Taste: These cakes evoke cherished memories of Australian baking, making every bite a delightful trip down memory lane.
Easy to Make: With just a few simple steps, you don’t need to be a pro to whip up these charming treats.
Versatile Options: Feel free to experiment with different jellies, like raspberry or orange, to create your unique spin on a classic.
Gorgeous Presentation: The pink hue and coconut coating make them not only delicious but beautiful, perfect for impressing guests.
Crowd Favorite: Whether at family gatherings or afternoon teas, they’re sure to bring smiles and joy, much like my beloved Fashioned Vegan Stew.
Quick Chilling Time: Just 30 minutes in the fridge allow these delightful cakes to set, letting you spend more time enjoying your company.
Old-Fashioned Pink Jelly Cakes Ingredients
• Delight in every sweet layer of this nostalgic recipe!
For the Sponge Cake
- Vanilla Sponge Cake – The soft base of the cake makes it fluffy and airy, perfect for soaking in jelly.
For the Jelly
- Strawberry Jelly – This sweet-tart addition brings a beautiful pink hue to the cakes; try raspberry or orange for a delightful twist.
For the Coating
- Desiccated Coconut – It adds delightful crunch and enhances the visual appeal of the cakes, making every bite special.
For the Filling
- Whipped Cream – Adding richness, it balances the sweetness of the jelly; opt for real whipped cream for the best taste.
- Powdered Sugar – This sweetens the whipped cream, making it a delicious complement to the pink jelly.
Step‑by‑Step Instructions for Old-Fashioned Pink Jelly Cakes
Step 1: Bake the Sponge
Preheat your oven to 350°F (175°C). Prepare a round cake pan by greasing and lining it with parchment paper. In a mixing bowl, combine eggs and sugar, whipping until fluffy and pale. Gradually fold in flour and melted butter until well blended. Pour the batter into the prepared pan and bake for 25-30 minutes, or until a toothpick comes out clean. Allow the sponge to cool completely on a wire rack.
Step 2: Prepare the Jelly
While the sponge cools, heat the strawberry jelly in a small saucepan over low heat, stirring until it becomes syrupy and smooth. Remove from heat once fully dissolved, ensuring no lumps remain. Allow the jelly to cool slightly, maintaining a pourable consistency, which will make it easier to coat the sponge later.
Step 3: Cut and Dip the Sponge
Once the sponge is completely cool, gently remove it from the pan and cut it into rectangular pieces, about 2 inches wide. Working swiftly, dip each piece of sponge into the prepared strawberry jelly, making sure they are well coated on all sides while allowing excess jelly to drip off. The sponge should glisten with a lovely pink hue.
Step 4: Roll in Coconut
After the cakes are dipped in jelly, roll them in desiccated coconut, ensuring each piece is generously coated and the coconut clings to the jelly. This adds a delightful crunch to each cake and enhances the visual appeal. Arrange the coated cakes on a tray, allowing them to set slightly before the next step.
Step 5: Fill with Whipped Cream
In a mixing bowl, whip the cream with powdered sugar until soft peaks form. Use a piping bag or a spoon to fill the center of each cake with whipped cream, allowing a good dollop to overflow slightly, creating an inviting look. Take care not to overfill, so the cakes retain their shape and manageability.
Step 6: Chill and Set
Once filled, carefully place the assembled Old-Fashioned Pink Jelly Cakes in the refrigerator for at least 30 minutes. This chilling time ensures the jelly sets nicely, providing a delectable bite with each slice. The cakes should feel firm to the touch and beautifully chilled, making them ready for serving.
Step 7: Serve and Enjoy
After chilling, arrange the Old-Fashioned Pink Jelly Cakes on a beautiful platter for serving. These charming treats are perfect for afternoon teas or special gatherings. Their lovely pink hue and delicious flavor will surely delight your guests, evoking fond memories and smiles with each bite.

Expert Tips for Old-Fashioned Pink Jelly Cakes
- Jelly Consistency: Ensure that the strawberry jelly is slightly thickened but still pourable for even coating and to prevent runs.
- Chill Time Matters: Properly chill the cakes for at least 30 minutes. This helps set the jelly and enhances texture—don’t skip this step!
- Exact Sponge Size: Cut sponge pieces uniformly to guarantee even jelly coating and help them absorb just the right amount of flavor.
- Real Whipped Cream: Opt for real whipped cream rather than alternatives for authentic taste and creaminess in each scrumptious bite of your Old-Fashioned Pink Jelly Cakes.
- Avoid Sogginess: When dipping the sponge in jelly, do it quickly; excess soaking can lead to a soggy texture. Just a quick dip will do!
- Presentation Tip: Arrange your cakes on a lovely platter and sprinkle extra desiccated coconut around for an appealing presentation.
Storage Tips for Old-Fashioned Pink Jelly Cakes
- Fridge: Keep uneaten Old-Fashioned Pink Jelly Cakes in the refrigerator, wrapped in cling film or placed in an airtight container, for up to 3 days to maintain freshness.
- Freezer: For longer storage, freeze the cakes without the whipped cream filling for up to 2 months. Thaw in the fridge before serving, then fill with whipped cream just before enjoying.
- Reheating: These cakes are best served chilled; avoid reheating as it may alter their delightful texture and presentation.
- Presentation: If you’ve stored them in the fridge or freezer, give them a few minutes at room temperature to let them soften slightly before serving for the best taste experience.
What to Serve with Old-Fashioned Pink Jelly Cakes?
As you savor the light and fluffy pleasures of these nostalgic treats, it’s wonderful to think about pairing them with other dishes to create a complete dining experience.
-
Classic Tea Sandwiches: Delicate and savory, these add a lovely contrast to the sweet jelly cakes, making your afternoon tea feel exquisite.
-
Fruit Salad: A refreshing mix of seasonal fruits enhances the sweetness of the jelly, providing a burst of freshness that brightens the palate.
-
Pavlova: This iconic Australian meringue dessert is light and airy, harmonizing with the Pink Jelly Cakes’ soft sponge and creamy filling while embracing nostalgia.
-
Lemonade or Iced Tea: A zesty drink not only quenches your thirst but also complements the sweetness of the cakes, making for a balanced treat.
-
Vanilla Ice Cream: The creamy, rich flavor of ice cream offers a delightful contrast to the fluffy sponge, creating a comforting combination with each bite.
-
Chocolate Truffles: For those with a sweet tooth, these little indulgences add a decadent touch, providing a rich flavor pairing that enhances the overall dessert experience.
-
Cheese Platter: An assortment of mild cheeses can offer a unique flavor profile, balancing the sweetness with a hint of savory richness, perfect for an afternoon gathering.
Make Ahead Options
These Old-Fashioned Pink Jelly Cakes are an excellent choice for meal prep, allowing you to save time for busier days! You can prepare the sponge cake and refrigerate it for up to 3 days before assembly. Once cooled, wrap the sponge tightly in plastic wrap to prevent it from drying out. You can also prepare the jelly in advance; just refrigerate it overnight to maintain its pourable consistency. When you’re ready to serve, simply cut and dip the sponge in the jelly, roll in desiccated coconut, and fill with whipped cream. With these steps, you’ll have delightful cakes ready to impress your guests without the last-minute stress!
Old-Fashioned Pink Jelly Cakes Variations
Feel free to let your creativity shine as you adapt these delightful treats to your palate!
-
Jelly Substitution: Swap out strawberry jelly for raspberry, orange, or passionfruit for exciting new flavors. Each option brings its unique twist, making the cakes even more versatile.
-
Dairy-Free Option: Use whipped coconut cream instead of regular whipped cream to cater to dairy-free diets. This adds a delightful hint of coconut, complementing the jelly beautifully.
-
Gluten-Free Version: Substitute regular flour with a gluten-free baking blend for those avoiding gluten. This simple swap keeps the cake light and fluffy without sacrificing flavor.
-
Add a Zesty Kick: Incorporate lemon or lime zest into your whipped cream for a refreshing citrus note. The zing from the zest balances the sweetness perfectly, creating an exquisite flavor profile.
-
Enhanced Texture: Try dipping the sponge pieces in crushed nuts or granola before rolling in coconut for added crunch. This not only boosts texture but adds a delightful new dimension to each bite.
-
Chocolate Lovers: Drizzle melted chocolate over the finished jelly cakes for a rich, decadent addition. Chocolate’s lusciousness pairs splendidly with the fruity jelly, elevating these treats to a new level.
-
Mini Versions: Create bite-sized versions of the cakes by using a mini muffin tin. They’re perfect for parties or gatherings where small finger foods are desirable.
-
Seasonal Flavors: Experiment with seasonal jelly flavors; think peach in summer or spiced apple in fall! This way, you can enjoy these nostalgic treats year-round, adapting them to the season’s bounties.
With all these variations, the classic charm of the Fashioned Vegan Stew still finds its place in your kitchen, reminding us that comforting recipes can be endlessly adaptable!
Old-Fashioned Pink Jelly Cakes Recipe FAQs
What is the best way to select ripe strawberries for the jelly?
Absolutely! When selecting strawberries for your jelly, look for berries that are bright red and firm to the touch. Avoid any with dark spots, bruises, or a sour smell. Fresh strawberries are essential for achieving that sweet-tart balance in your jelly.
How should I store leftover Old-Fashioned Pink Jelly Cakes?
To keep your delightful cakes fresh, store any uneaten Old-Fashioned Pink Jelly Cakes in the refrigerator. Wrap them in cling film or place them in an airtight container for up to 3 days. This will help maintain their moist texture and delicious taste.
Can I freeze Old-Fashioned Pink Jelly Cakes?
Very! You can freeze these cakes, but it’s best to do so before filling them with whipped cream. Wrap each cake piece tightly in plastic wrap and then in aluminum foil, and they can be stored in the freezer for up to 2 months. When ready to eat, simply thaw them in the fridge and fill with whipped cream just before serving.
What should I do if the jelly becomes too runny?
If your jelly is too runny for coating, simply heat it slightly on the stove, stirring continuously until it thickens up. Let it cool down again to a pourable consistency before dipping your sponge cakes. Ensure you give it enough time to set after dipping so it adheres properly.
Are Old-Fashioned Pink Jelly Cakes suitable for people with allergies?
Yes! These cakes can be adjusted for allergies. For example, substitute regular whipped cream with coconut whipped cream for lactose intolerance. Always check for specific ingredients, especially in jelly products, as some may contain allergens. Be mindful of any guests with dietary restrictions when preparing them.
Can I make these cakes without desiccated coconut?
Absolutely! If you prefer, you can omit the coconut or substitute it with crushed nuts or a mixture of crushed graham crackers for a different texture. Each variation will still yield a delicious result while catering to your personal taste preferences.
Sweet Nostalgia: Old-Fashioned Pink Jelly Cakes Delight
Ingredients
Equipment
Method
- Preheat your oven to 350°F (175°C). Prepare a round cake pan by greasing and lining it with parchment paper.
- In a mixing bowl, combine eggs and sugar, whipping until fluffy and pale. Gradually fold in flour and melted butter until well blended.
- Pour the batter into the prepared pan and bake for 25-30 minutes, or until a toothpick comes out clean. Allow the sponge to cool completely on a wire rack.
- While the sponge cools, heat the strawberry jelly in a small saucepan over low heat, stirring until it becomes syrupy and smooth. Remove from heat once fully dissolved. Allow the jelly to cool slightly.
- Once the sponge is completely cool, gently remove it from the pan and cut it into rectangular pieces, about 2 inches wide.
- Dip each piece of sponge into the prepared strawberry jelly, making sure they are well coated on all sides while allowing excess jelly to drip off.
- Roll them in desiccated coconut, ensuring each piece is generously coated.
- In a mixing bowl, whip the cream with powdered sugar until soft peaks form. Use a piping bag or a spoon to fill the center of each cake with whipped cream.
- Once filled, carefully place the cakes in the refrigerator for at least 30 minutes to set.
- After chilling, arrange the cakes on a platter for serving.
Leave a Reply