
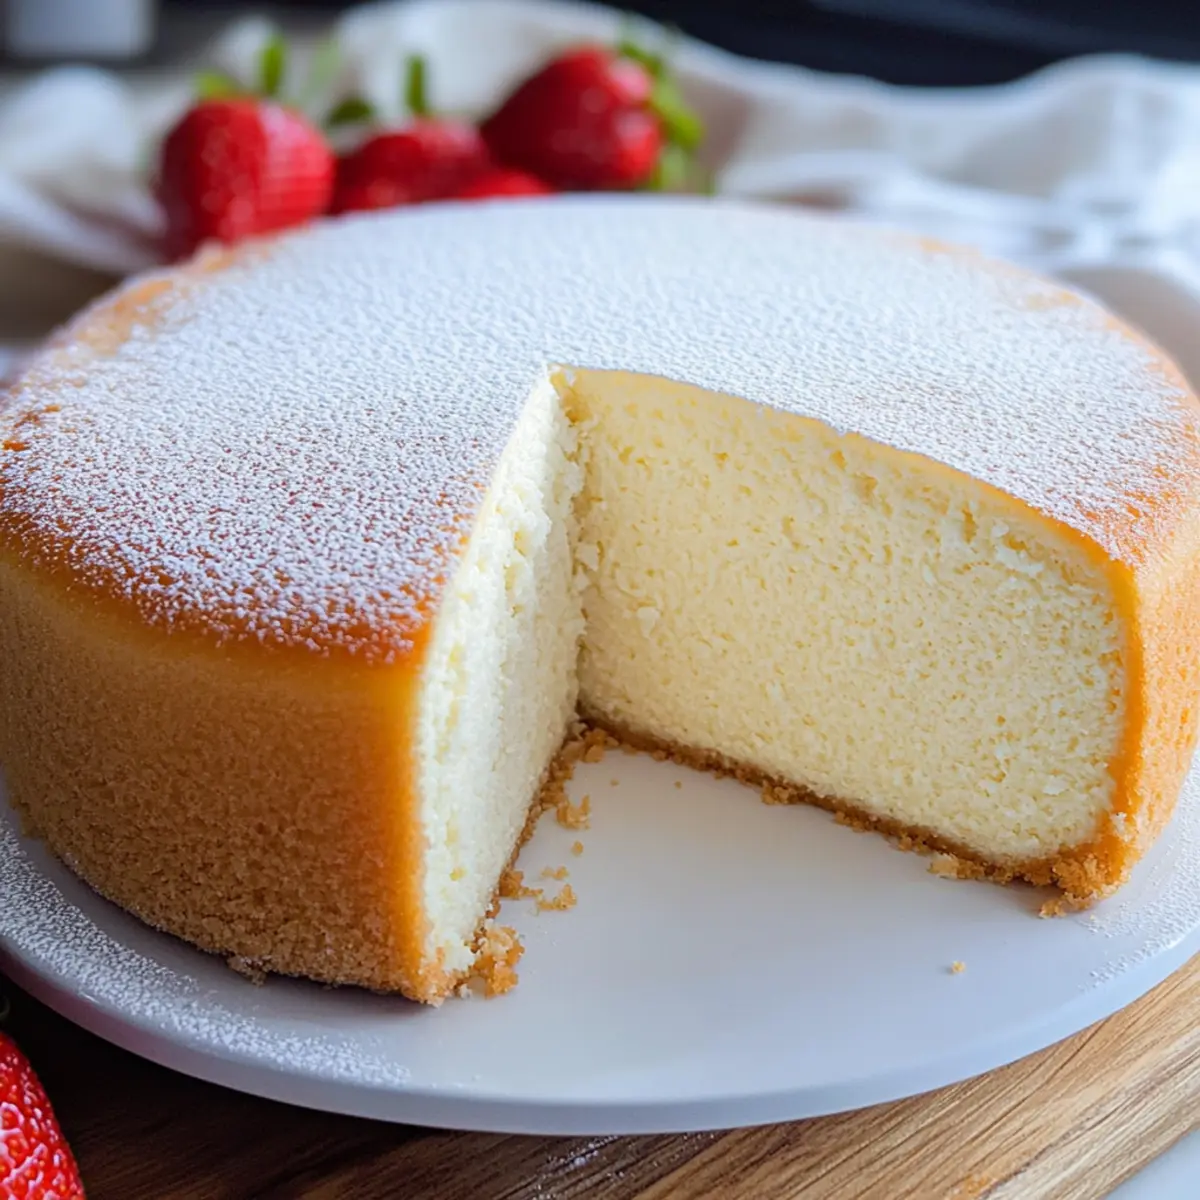
As I take a bite of this jiggly Japanese cheesecake, I can’t help but marvel at its ethereal lightness—a quality that might even make your classic desserts feel a bit envious. Known as Japanese cotton cheesecake, this delightful treat combines a delicate sweetness with a creamy nuance that dances on the palate. With its fluffy, melt-in-your-mouth texture, it’s perfect for anyone in search of a dessert that feels indulgent yet isn’t overly heavy, making it a fantastic choice for gatherings or a well-deserved treat after a long day. Plus, the low-sugar aspect allows everyone to enjoy a slice without the guilt! Curious how to create this show-stopping dessert right in your kitchen? Let’s dive into making this airy masterpiece together!

Why is Japanese Cheesecake so irresistible?
Fluffy Texture: Each bite of this cheesecake delivers a lightness that feels like a cloud, unlike any dense dessert you’re used to.
Creamy Richness: The blend of cream cheese and heavy cream creates a delightful creaminess that beautifully complements the airiness.
Low Sugar Joy: With significantly less sugar, you can indulge without the guilt, making it perfect for health-conscious sweet tooths.
Versatile Serving: Whether topped with fresh berries or enjoyed plain, this cheesecake fits perfectly in any setting, from casual afternoon tea to elegant dinner parties.
Unique Craftsmanship: The method involves gently folding meringue, adding a hint of baking artistry, making it a fun challenge for home chefs.
This recipe is not only a joy to make but also a delicious way to impress your guests. If you’re looking for delightful variations, consider adding a fruity twist like in my Blueberry Lemon Cheesecake, or serve with whipped cream for that extra touch!
Japanese Cheesecake Ingredients
For the Batter
- Large Eggs (6, separated) – Essential for structure and height; remember to keep the whites and yolks separate for the perfect meringue.
- Cream Cheese (8 oz, preferably softened) – Provides the signature creamy flavor; you can use Neufchâtel for a lighter variation.
- Heavy Cream (¼ cup) or Full Fat Milk – Adds luscious moisture; substitute coconut cream for a delightful dairy-free option.
- Unsalted Butter (4 tbsp, cut into smaller pieces) – Enriches the cheesecake’s flavor; margarine works as a dairy-free alternative.
- Cake Flour (½ cup, fluffed, spooned, and leveled) – Essential for that fluffy texture; use a gluten-free blend for a gluten-free option.
- Lemon Zest (1 tbsp, from 1 lemon, optional) – Brightens the flavor profile and adds depth; omit if preferred for a simpler taste.
- Vanilla Extract (1½ tsp, optional) – Enhances the overall flavor; swap for almond extract if you’re looking for a unique twist.
- Granulated Sugar (⅓ cup) – Just the right amount of sweetness; reduce if desired for a less sweet cheesecake or try coconut sugar.
- Lemon Juice (2 tsp, about ⅓ of a lemon) – Infuses tanginess and stabilizes the egg whites; can be omitted but may change the flavor slightly.
This Japanese Cheesecake is not just a dessert; it’s an experience that brings joy with every silky, fluffy bite. Let’s create some wonderful memories in the kitchen together!
Step‑by‑Step Instructions for Japanese Cheesecake
Step 1: Prepare the Oven and Pan
Begin by preheating your oven to 300°F (150°C). While it heats, line an 8-inch round cake pan with parchment paper, ensuring it covers the bottom and edges well. Next, place this pan inside a larger baking dish that will hold water for the bain-marie. This setup is key to achieving that perfect texture for your jiggly Japanese cheesecake.
Step 2: Create Cheesecake Base
In a heat-proof bowl, combine the softened cream cheese, unsalted butter, and heavy cream. Set this bowl over a saucepan of simmering water (bain-marie) and stir until the mixture is smooth and melted, about 5 minutes. Remove from heat and mix in the egg yolks, sifted cake flour, and optional lemon zest and vanilla extract, stirring until fully combined. Let this cheesecake base cool for about 10 minutes.
Step 3: Prepare Meringue
In a clean, dry bowl, begin to beat the egg whites with lemon juice using an electric mixer on medium speed until they become frothy, which should take about 1-2 minutes. Gradually add the granulated sugar, continuing to beat until medium-soft peaks form. The meringue should be glossy and hold a soft “J” shape when the whisk is lifted—this step is crucial for the fluffiness of your Japanese cheesecake.
Step 4: Combine Mixtures
Gently fold one-third of the meringue into the cooled cream cheese mixture using a spatula. This initial fold is to lighten the batter. Continue incorporating the remaining meringue in two more additions, being careful to maintain the airiness. The goal is a light, airy batter that combines the rich cream cheese with the fluffy meringue, forming the heart of your Japanese cheesecake.
Step 5: Bake
Pour the cohesive batter into your prepared cake pan, tapping it gently on the counter to release any trapped air bubbles. Place the cake pan in the larger baking dish and pour hot water into the dish, up to halfway of the cake pan. Bake in the preheated oven for about 80-90 minutes, until the top is golden brown and a toothpick inserted in the center comes out clean.
Step 6: Cool
Once baked, turn off the oven and let the cheesecake cool in the oven for about 30 minutes. This gradual cooling prevents cracking. After that, carefully rotate the pan to ensure even cooling before transferring the cheesecake to a wire rack. Let it cool completely at room temperature for another hour.
Step 7: Serve
After cooling, your fluffy Japanese cheesecake can be enjoyed warm or chilled. For a richer flavor, refrigerate for at least an hour before serving. When ready, slice and top with powdered sugar, apricot jam, or fresh berries for a delightful presentation. Each bite of this cheesecake will be a heavenly experience!
Japanese Cheesecake Variations & Substitutions
Feel free to make this delightful Japanese cheesecake your own with these fun twists and substitutions!
-
Dairy-Free: Substitute cream cheese and heavy cream with silken tofu and coconut cream for a rich, creamy texture without dairy.
-
Gluten-Free: Use a gluten-free flour blend mixed with cornstarch to maintain that light and airy quality while accommodating gluten sensitivities. This way, everyone can enjoy a slice!
-
Fruit-Infused: Swirl in a fruit puree, like raspberry or mango, into the batter for a vibrant flavor boost. The fruity notes will complement the cheesecake’s fluffiness beautifully.
-
Flavor Varieties: Add a teaspoon of matcha powder for a lovely green tea flavor or a hint of almond extract instead of vanilla to create a nutty aroma.
-
Smaller Bites: Create mini cheesecakes by pouring the batter into muffin tins. Just adjust your baking time down to about 25-30 minutes—perfect for bite-sized indulgence!
-
Creative Toppings: Serve it with a homemade fruit coulis or drizzle of chocolate sauce. This adds visual appeal and a delicious contrast to the cheesecake’s lightness.
-
Reduce Sweetness: If you’re looking to lower the sugar content, swap granulated sugar for stevia or monk fruit sweetener while reducing the amount for a lower-calorie treat.
If you’re inspired to explore other cheesecake varieties, consider my delicious Christmas Cheesecake Cranberry or the bright flavors in Strawberry Cheesecake Protein. There’s a world of cheesecake possibilities waiting for you!
Make Ahead Options
These fluffy Japanese cheesecakes are perfect for meal prep enthusiasts looking to save time during busy weeknights! You can prepare the cheesecake batter up to 24 hours in advance by following the first four steps, then refrigerating the combined cream cheese and meringue mixtures in an airtight container. To prevent any loss of fluffiness or moisture, cover the bowl tightly with plastic wrap. When you’re ready to bake, simply pour the mixture into your prepared pan and bake as instructed. For a delightful, melt-in-your-mouth experience, let the cheesecake cool, then chill it in the refrigerator for a minimum of an hour before serving. With these make-ahead tips, you’ll have a stunning dessert ready to impress!
What to Serve with Jiggly Japanese Cheesecake?
Indulging in this fluffy delight opens the door to a meal filled with harmonious flavors and textures that further enhance your experience.
- Fresh Berries: The tartness of strawberries, blueberries, or raspberries slices through the creaminess, creating a delightful balance that enhances every forkful of cheesecake.
- Matcha Green Tea: Whether served hot or cold, this earthy beverage complements the cheesecake’s sweet subtleties, adding a refreshing touch.
- Whipped Cream: A light and airy topping that accentuates the cheesecake’s texture; perfect for those who enjoy an extra creamy experience with each bite.
- Almond Cookies: The light crunch of almond cookies adds a lovely contrast to the cheesecake’s softness and pairs well with its rich flavor profile.
- Lemon Sorbet: A refreshing palate cleanser that enhances the cheesecake’s light lemon notes, creating a bright and zesty accompaniment.
- Chocolate Drizzle: Just a hint of dark or white chocolate adds a decadent touch, contrasting with the cheesecake’s lightness without overwhelming it.
- Earl Grey Tea: The fragrant, citrusy notes of this tea elevate the dessert’s flavor, making for a cozy pairing that’s simply divine on an afternoon break.
Each of these options brings something special to the table, ensuring your Japanese cheesecake shines even brighter as the star dessert!
How to Store and Freeze Japanese Cheesecake
Fridge: Store leftover Japanese cheesecake in an airtight container in the refrigerator for up to 3-4 days. This helps maintain its fluffy texture and flavor.
Freezer: For longer storage, wrap the cheesecake tightly in plastic wrap and then place it in a freezer-safe container. It can be frozen for up to 2 months without sacrificing its quality.
Thawing: When ready to enjoy the frozen cheesecake, transfer it to the refrigerator and let it thaw overnight. For quicker thawing, leave it at room temperature for about 2 hours.
Reheating: If you prefer to enjoy it warm, you can place slices in a microwave for about 10-15 seconds. Just be cautious not to overheat, as it can lose its delightful texture.
Expert Tips for Japanese Cheesecake
- Perfect Egg Whites: Beat egg whites until medium-soft peaks form; they should hold a gentle “J” shape when the whisk is removed. This ensures a fluffy Japanese cheesecake.
- Water Bath Benefits: Always use a water bath during baking to avoid cracks and promote even cooking, giving your cheesecake that desired jiggly texture.
- Avoid Overbaking: Keep a close eye; remove the cheesecake from the oven once a toothpick comes out clean. Overbaking will lead to deflation and dryness.
- Cool Gradually: Allow the cheesecake to cool in the oven with the door slightly ajar for about 30 minutes to prevent sudden temperature changes that can cause cracks.
- Add Flavor Depth: Don’t skip on zest or extracts; a dash of lemon juice and zest brighten the flavor profile, perfectly complementing the rich creaminess.
Japanese Cheesecake Recipe FAQs
How do I know when my eggs are ripe for use in the recipe?
Absolutely, the freshness of your eggs is essential! A simple trick: place your eggs in a bowl of water. If they sink and lay flat on the bottom, they’re fresh. If they stand upright or float, toss them out! For this recipe, using fresh eggs ensures better whipping and structural integrity in your cheesecake.
How do I store leftovers of Japanese cheesecake?
Very! To store leftover cheesecake, wrap it tightly in plastic wrap or place it in an airtight container, keeping it in the fridge for up to 3-4 days. This will help maintain its delightful jiggly texture while ensuring it stays fresh and ready for your next treat!
Can I freeze Japanese cheesecake, and if so, how?
Certainly! To freeze your cheesecake, first let it cool completely. Wrap it tightly in plastic wrap and then place it in a freezer-safe container. It can be stored in the freezer for up to 2 months. When you’re ready to enjoy a slice, simply transfer it to the refrigerator to thaw overnight or let it sit at room temperature for about 2 hours.
What if my cheesecake cracks while baking?
No worries! If your cheesecake cracks, it might be due to a rapid change in temperature or overbaking. To prevent this, always use a water bath during baking, and keep the oven temperature stable. If a crack does happen, consider covering it with powdered sugar or fresh berries for a beautiful presentation!
Are there any dietary considerations I should keep in mind for my guests?
Absolutely! This Japanese cheesecake contains dairy and eggs, so if you have guests who are lactose intolerant or allergic to eggs, consider making substitutions or finding alternative recipes. For a dairy-free dessert, coconut cream can replace the heavy cream and cream cheese, but results may vary. Don’t hesitate to ask your guests about any allergies beforehand!
How can I tell if I overmixed the batter?
Great question! If you think you’ve overmixed the batter, look for signs: it may appear too dense or lose some of the airy volume. A properly mixed batter should have a light, airy texture. If you noticed excess deflation during folding, it might be time for some practice! Remember, gently folding is crucial for a successful Japanese cheesecake.
Fluffy Japanese Cheesecake That Melts in Your Mouth
Ingredients
Equipment
Method
- Preheat your oven to 300°F (150°C) and line an 8-inch round cake pan with parchment paper. Place this pan inside a larger baking dish for the bain-marie.
- In a heat-proof bowl, combine cream cheese, unsalted butter, and heavy cream over simmering water. Stir until smooth and melted, about 5 minutes. Remove from heat and mix in the egg yolks, sifted cake flour, lemon zest, and vanilla extract, then let cool for 10 minutes.
- Beat egg whites with lemon juice until frothy. Gradually add granulated sugar until medium-soft peaks form. The meringue should be glossy and hold a soft 'J' shape.
- Gently fold one-third of the meringue into the cooled cream cheese mixture. Continue incorporating the remaining meringue in two more additions to maintain airiness.
- Pour the batter into the prepared cake pan, tap gently on the counter, and place it in the larger baking dish. Pour hot water into the dish, up to halfway of the pan. Bake for 80-90 minutes until golden brown and a toothpick comes out clean.
- Turn off the oven and let the cheesecake cool inside for 30 minutes. Rotate the pan for even cooling before transferring to a wire rack and cool completely for another hour.
- Enjoy the cheesecake warm or chilled. For richer flavor, refrigerate for at least an hour before serving. Slice and top with powdered sugar, apricot jam, or fresh berries.
Leave a Reply