
The aroma of roasted chickpeas wafts through my kitchen, bringing back memories of sunny afternoons spent experimenting with crispy creations. This Baked Chickpea Chips recipe is a delightful fusion of health and flavor, perfect for anyone striving to ditch fast food for something wholesome. These crunchy chickpea chips are not only gluten-free and vegan but also incredibly easy to make, allowing you to whip up a tasty snack in no time. Plus, the beauty lies in their versatility—get creative with seasonings to suit your palate, whether it’s a zesty chili kick or a savory garlic twist. So, why not elevate your snacking game with these nutritious bites? What unique flavor would you add to make them your own?
What Makes These Chickpea Chips Irresistible?
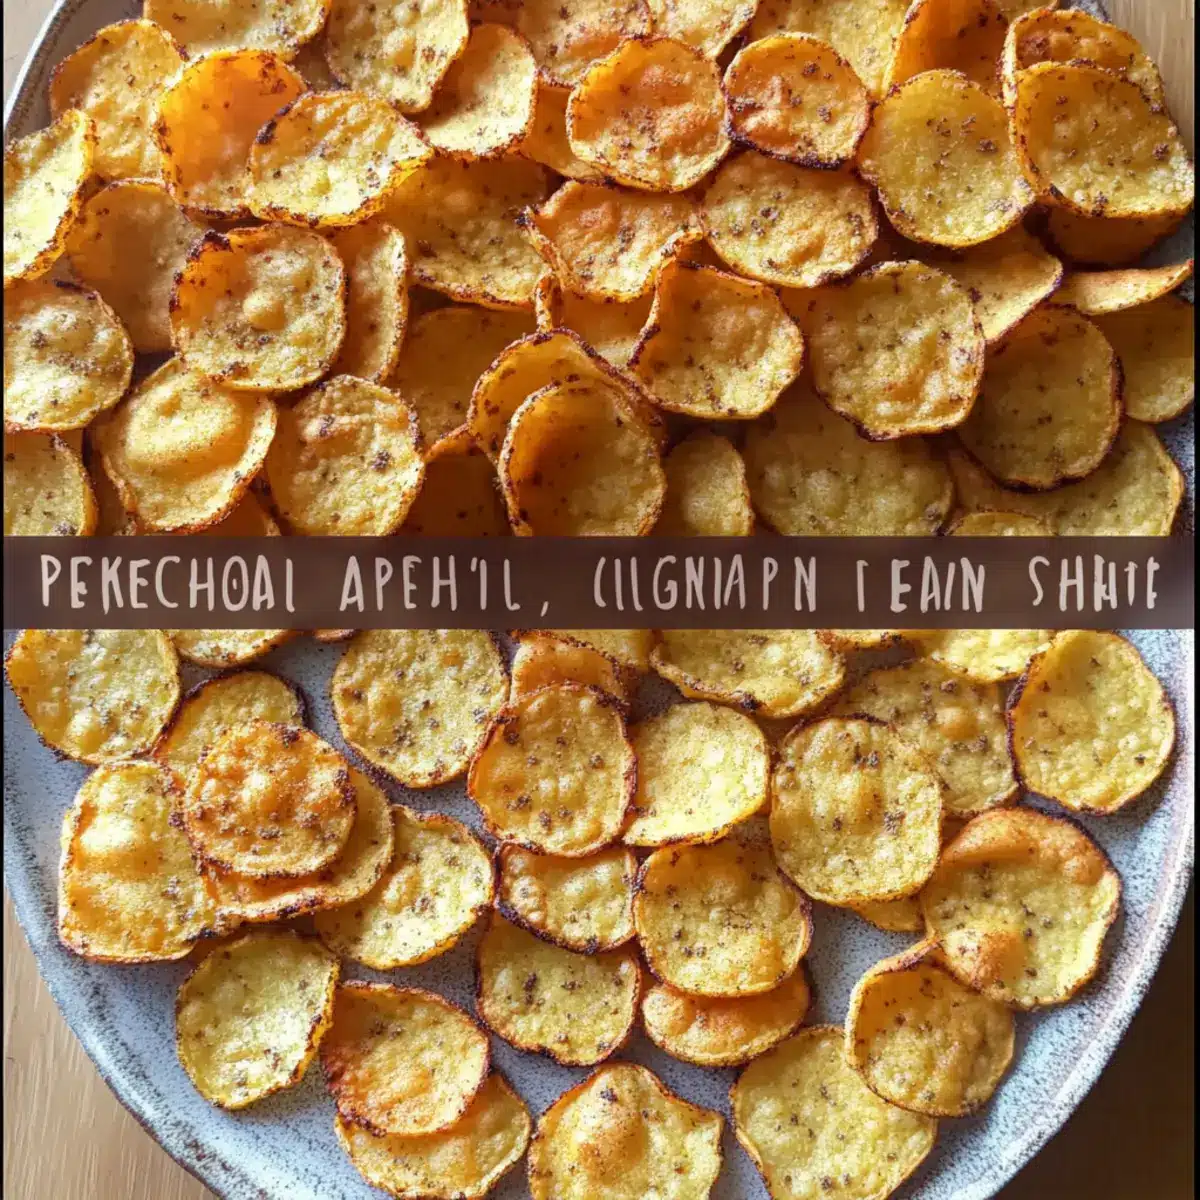
Crunchy Delight: This Baked Chickpea Chips recipe promises a satisfying crunch that you won’t find in typical store-bought snacks.
Healthy Snacking: Packed with plant-based protein and fiber, they make a guilt-free option to munch on throughout the day.
Quick & Easy: With minimal prep time, you can have these chips ready in just 30 minutes, freeing you from the drive-thru dilemma.
Customizable Flavors: Whether you prefer a spicy chili kick or a savory garlic flavor, the possibilities are endless, letting you personalize each batch to your taste.
Kid-Friendly: A hit with both kids and adults, these chips are the perfect snack for family movie nights or after-school cravings.
Enhance your snacking experience and serve them with your favorite dips, like hummus or guacamole for the ultimate treat!
Crunchy Chickpea Chips Recipe Ingredients
• Get ready to create a wholesome masterpiece!
For the Chips
- Chickpea Flour – This is the star ingredient that gives the chips their structure; feel free to mix in rice flour for a different texture.
- Water – Necessary for activating the chickpea flour; adjust the amount to get your desired batter consistency.
- Salt – A key flavor enhancer; modify to suit your taste preferences.
For Flavoring
- Herbs/Spices – Optional items like garlic powder or smoked paprika to boost flavor; customize them based on what excites your palate.
Elevate your crunchy chickpea chips recipe by exploring unique spices to create your signature snack!
Step‑by‑Step Instructions for Crunchy Chickpea Chips Recipe
Step 1: Prepare Batter
In a mixing bowl, whisk together chickpea flour, water, and salt until the mixture is smooth and free of lumps. It should resemble a thick pancake batter. Take your time to ensure there are no dry spots, as this will help achieve the best texture for your crunchy chickpea chips.
Step 2: Set Up Baking Sheets
Preheat your oven to 400°F (200°C). While the oven heats, line two baking sheets with parchment paper, ensuring the sheets are completely covered. This step is crucial as it prevents the chips from sticking and allows for even baking, resulting in perfectly crispy chips.
Step 3: Form Chips
Using a spoon or a spatula, dollop the batter onto the center of each parchment-lined sheet. Spread each dollop into thin circles, about ¼ inch thick, to achieve optimal crispiness during baking. Leave some space between each circle to ensure even airflow and cooking.
Step 4: Add Seasonings
Before baking, sprinkle your desired herbs and spices evenly over the batter circles. This step enhances the flavor of your crunchy chickpea chips, transforming them into a personalized snack. Get creative—try smoked paprika for a smoky note or garlic powder for a savory kick!
Step 5: Bake
Carefully place the baking sheets in the preheated oven and bake for about 10 minutes. Keep an eye on them, and when the edges turn lightly golden and the chips start to lift away from the parchment, it’s time to take them out. This visual cue is key to achieving the right texture.
Step 6: Cool Down
Remove the chips from the oven and allow them to cool on the baking sheets for 15-20 minutes. This cooling period is essential, as the chips will crisp up even more as they cool. Be patient—this is the last step to achieving your delicious crunchy chickpea chips!
Expert Tips for Crunchy Chickpea Chips
- Batter Consistency: Ensure your batter is smooth: A lump-free mixture results in evenly baked crunchy chickpea chips, so whisk thoroughly to avoid lumps.
- Spread Evenly: Thin is key: Keep the batter no thicker than ¼ inch for optimal crispiness; thicker chips may end up chewy instead of crunchy.
- Watch the Bake Time: Monitor closely: Baking times can vary based on oven types; remove the chips when edges are golden for best results.
- Cool for Crispiness: Be patient while cooling: Letting the chips rest on the baking sheet allows them to firm up, enhancing the crunchiness.
- Season to Taste: Get creative with spices: Experiment with flavors like chili powder or dried herbs to make your crunchy chickpea chips uniquely yours.
How to Store and Freeze Crunchy Chickpea Chips
- Room Temperature: Store the crunchy chickpea chips in an airtight container at room temperature for up to 4 days to maintain their crispiness.
- Fridge: If you prefer to keep them longer, you can refrigerate them in an airtight container for up to 1 week, but expect some loss in crunchiness.
- Freezer: For extended storage, freeze the baked chips in a single layer on a baking sheet before transferring them to a freezer-safe bag. They can be kept for up to 3 months.
- Reheating: To regain crunchiness, reheat the frozen chips in the oven at 350°F (175°C) for about 5–7 minutes, keeping an eye on them to avoid burning.
What to Serve with Baked Chickpea Chips
Pair these delightful, crunchy bites with complementary flavors that enhance their wholesome goodness.
-
Creamy Hummus: The velvety smoothness of hummus adds a rich contrast to the crunchy texture of the chips, creating a perfect dip.
-
Zesty Guacamole: This fresh, creamy avocado blend brings a tangy punch, elevating your snacking experience with its vibrant flavors.
-
Spicy Salsa: The tangy zest of homemade or store-bought salsa pairs beautifully with the mild flavor of the chickpea chips, offering an exciting bite.
-
Savory Yogurt Dip: A yogurt dip made with dill and garlic provides a cool, refreshing balance, making each chip even more delightful to munch on.
-
Crunchy Salad Topping: Crumble these chips on top of your favorite salad for an added crunch and nutty flavor that takes your greens to the next level.
-
Wine Pairing: A chilled Sauvignon Blanc offers crisp acidity that complements the chickpea chips’ nutty notes while refreshing your palate.
Crunchy Chickpea Chips Variations
Feel free to let your culinary creativity shine and customize these chickpea chips to match your taste buds!
-
Herb-Infused: Add dried herbs like rosemary or thyme to the batter for an aromatic twist. The fragrant herbs will bring a garden-fresh flavor to every bite!
-
Cheesy Flavor: Incorporate nutritional yeast for a cheesy taste without dairy. This adds a nutty flavor and gives your chips a delightful richness that will please vegan cheese lovers.
-
Spicy Kick: Mix in chili powder or cayenne pepper for a fiery touch. Adjust the amount to suit your spice tolerance—perfect for those who love their snacks with a bit of heat!
-
Sweet Treat: For a fun twist, add a sprinkle of cinnamon and a touch of maple syrup to the batter. This creates a subtly sweet version that pairs beautifully with fresh fruit or yogurt.
-
Zesty Citrus: Grate the zest of a lemon or lime into the batter for a refreshing citrus note. The bright flavor enhances the chips and pairs perfectly with avocado-based dips.
-
Smoky Flavor: Use smoked paprika or chipotle powder to give your chips a smoky depth. This variation is perfect for those craving that savory, BBQ-like taste.
-
Nutty Addition: Sprinkling sesame seeds or flax seeds on top before baking adds a lovely crunch and extra nutrition. They give a delightful texture that elevates your snacking experience.
-
Savory Seeds: Mix ground flaxseed or chia seeds directly into the batter for added fiber and omega-3s. Not only does this enhance the chip’s texture, but it also boosts its health benefits, making your snack choice even better!
If you’re in need of some tasty dips to accompany these chips, try out pipping hot hummus from the Cornbread Casserole recipe, or enjoy them with a zesty guacamole for a harmonious pairing that will elevate your snacking experience!
Make Ahead Options
These crunchy chickpea chips are perfect for meal prep, allowing you to indulge in a healthy snack while saving time on busy days! You can prepare the batter up to 24 hours in advance by mixing chickpea flour, water, and salt and storing it in an airtight container in the refrigerator. Just make sure to stir it well before use, as it may thicken slightly overnight. You can also pre-shape the chips on parchment-lined baking sheets, cover them tightly, and refrigerate them for up to 3 days. When you’re ready to enjoy, simply remove them from the fridge, add your desired herbs and spices, and bake straight from the cold. This way, you’ll have fresh, crispy chickpea chips that are just as delicious as if you made them on the spot!

Crunchy Chickpea Chips Recipe FAQs
What is the best way to select chickpea flour for this recipe?
Choose high-quality chickpea flour that is fresh and free from any dark spots or unusual odors. I recommend opting for finely ground flour for the best texture in your chips, as it creates a smoother batter.
How should I store my crunchy chickpea chips?
Store the crunchy chickpea chips in an airtight container at room temperature for up to 4 days. To maintain their crispiness, avoid exposure to humidity. If you’re looking to prolong their shelf life, refrigerate them in an airtight container for up to 1 week, but expect a slight loss in crunchiness.
Can I freeze the baked chickpea chips, and how?
Absolutely! To freeze, spread the baked chips in a single layer on a baking sheet and place them in the freezer for about 1 hour or until solid. Once frozen, transfer them to a freezer-safe bag or container. They can be stored in the freezer for up to 3 months. When you’re ready to enjoy them, reheat the chips in the oven at 350°F (175°C) for 5-7 minutes to bring back their crunch.
What should I do if my chickpea chips are not crispy enough?
If the chips remain chewy rather than crispy, it might be due to the batter being too thick or unevenly spread. Ensure that your batter is no thicker than ¼ inch when dolloping onto the parchment. After baking, allow them to cool completely on the baking sheet, as they crisp up further during this time. If they still aren’t crispy enough, consider returning them to a low oven for a few more minutes to help achieve that crunch.
Are there any dietary considerations I should be aware of?
These crunchy chickpea chips are vegan, gluten-free, and nut-free, making them suitable for a wide range of dietary needs. However, always check the labels of your herbs and spices, as some may contain allergens or additives you want to avoid. If you have a pet, make sure not to share any seasoned chips with them, as certain spices can be harmful to animals.
Crispy Crunchy Chickpea Chips Recipe for Healthy Snacking
Ingredients
Equipment
Method
- In a mixing bowl, whisk together chickpea flour, water, and salt until the mixture is smooth and free of lumps.
- Preheat your oven to 400°F (200°C) and line two baking sheets with parchment paper.
- Dollop the batter onto the center of each parchment-lined sheet, spreading into thin circles about ¼ inch thick.
- Sprinkle your desired herbs and spices evenly over the batter circles before baking.
- Bake for about 10 minutes, monitoring until the edges turn lightly golden.
- Allow chips to cool on the baking sheets for 15-20 minutes to become crispy.
Leave a Reply