
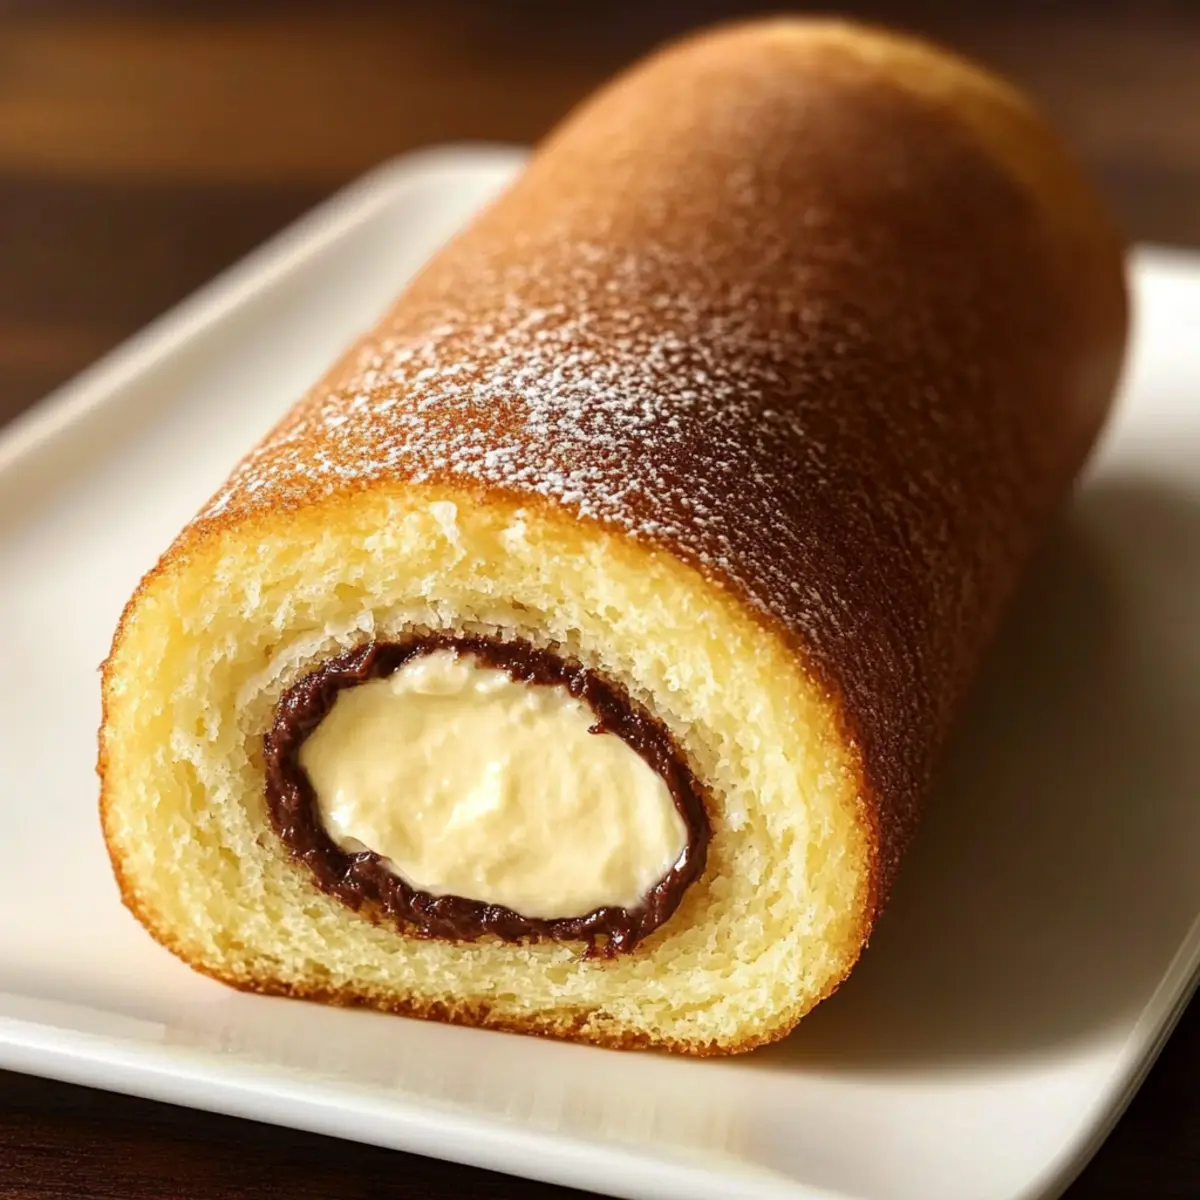
The first bite is always a delightful surprise—crunchy on the outside while revealing a creamy, dreamy interior. That’s the magic of these Crispy Chocolate Rolls with Creamy Vanilla Filling! Not only is this indulgent dessert perfect for those moments when you crave something sweet, but it also invites creativity, allowing you to swap in your favorite ingredients with ease. Imagine whipping these up ahead of time for an elegant afternoon treat or a quick after-dinner delight that will impress your friends and family. With minimal prep and maximum flavor, you’ll find yourself coming back to this recipe again and again. So, are you ready to indulge in a chocolate journey that feels both sophisticated and wonderfully comforting? Let’s roll!
Why Are These Rolls So Irresistible?
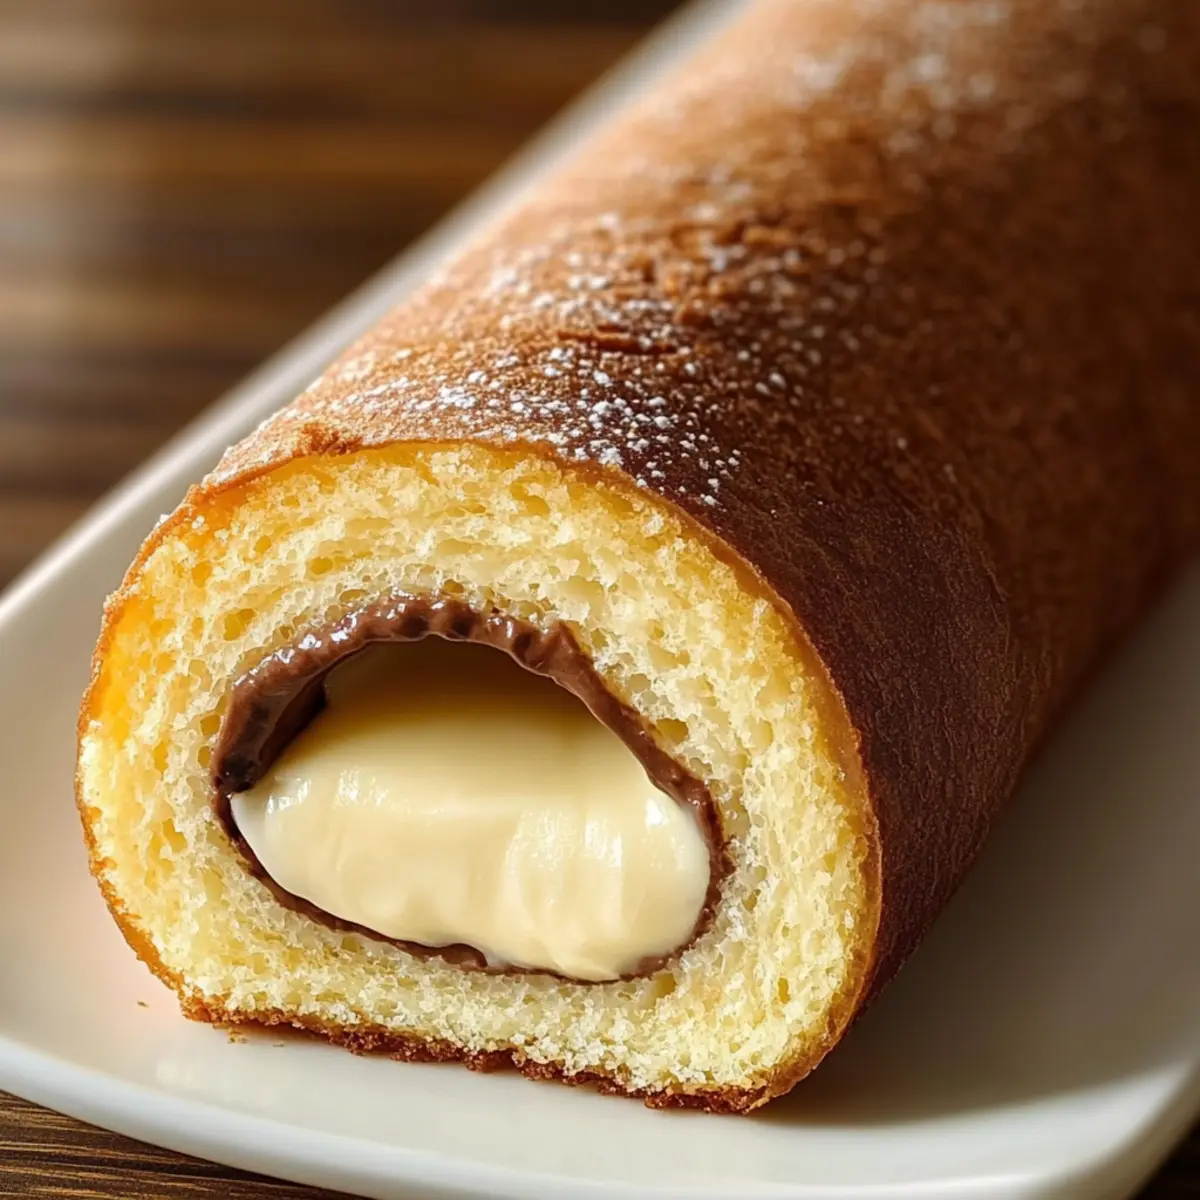
Crispy Texture: The outer layer presents a delightful crunch that makes every bite memorable.
Creamy Filling: Each roll is generously filled with a smooth vanilla cream that melts in your mouth.
Ingredient Flexibility: Got a favorite flavor? Feel free to swap in almond extract or even try a raspberry filling!
Make-Ahead Convenience: These rolls can be prepared in advance, so you can impress guests with minimal last-minute effort.
Crowd Pleaser: Perfect for parties or casual family gatherings, they have a way of making everyone smile!
For an excellent pairing, consider serving your rolls with some of our Homemade Chocolate Milk or a scoop of ice cream for that extra touch of sweetness!
Crispy Chocolate Rolls Ingredients
For the Chocolate Roll Dough
• All-purpose flour – A key ingredient that gives the rolls their structure and lightness.
• Cocoa powder – Adds rich chocolate flavor; sift it to avoid clumps.
• Sugar – Balances the flavors and helps the rolls to brown beautifully.
• Baking powder – Ensures your rolls rise to a fluffy texture.
• Eggs – Bind the ingredients together and add moisture; room temperature works best.
• Milk – Provides necessary liquid; you can substitute with almond or oat milk for a nuttier flavor.
• Butter – Adds richness and ensures the rolls are crispy; melt for easier incorporation.
For the Creamy Vanilla Filling
• Cream cheese – Creates a luscious base for the filling; soften it for easy mixing.
• Powdered sugar – Sweetens the cream filling and helps it achieve a smooth texture.
• Vanilla extract – A must for that classic vanilla flavor; pure extract is recommended for the best taste.
• Heavy cream – Whips up beautifully to create a light and airy filling; ensure it’s chilled for the best results.
For Storage
• Airtight container – Necessary to keep your Crispy Chocolate Rolls fresh and prevent sogginess.
With these carefully selected ingredients, you’re just a few steps away from creating a dessert that will delight your senses and impress everyone at the table! Happy baking!
Step‑by‑Step Instructions for Crispy Chocolate Rolls with Creamy Vanilla Filling
Step 1: Prepare the Chocolate Roll Dough
In a large mixing bowl, sift together 1 cup of all-purpose flour, 1/2 cup of cocoa powder, and 1 teaspoon of baking powder. In another bowl, whisk 2 eggs, 1/2 cup of sugar, and 1/2 cup of melted butter until smooth. Gradually add the dry ingredients and 1/2 cup of milk, mixing until well combined and the dough is smooth. Allow it to rest for 10 minutes.
Step 2: Make the Creamy Vanilla Filling
While the dough rests, prepare the creamy vanilla filling. In a mixing bowl, combine 8 ounces of softened cream cheese with 1 cup of powdered sugar. Use a hand mixer to beat until smooth, then add 1 teaspoon of vanilla extract and 1/2 cup of chilled heavy cream. Whip on medium speed until the mixture is fluffy and holds peaks, making sure it’s airy yet stable for filling.
Step 3: Assemble the Chocolate Rolls
On a floured surface, roll out the chocolate dough into a large rectangle, about 1/4 inch thick. Spread the creamy vanilla filling evenly over the surface, leaving a small border around the edges. Starting from one end, gently roll the dough tightly into a log shape, pinching the edges to seal the filling inside. Use a sharp knife to slice the rolled dough into 1-inch sections.
Step 4: Bake the Rolls
Preheat your oven to 350°F (175°C) and line a baking sheet with parchment paper for easy cleanup. Place the sliced chocolate rolls on the baking sheet, leaving space between them. Bake for about 15 to 20 minutes, checking for a golden-brown color on the exterior. The rolls should feel firm and crisp when done; avoid over-baking to maintain that delightful texture.
Step 5: Cool and Serve
Once baked, remove the crispy chocolate rolls from the oven and let them cool on a wire rack for about 10 minutes. This cooling period allows the filling to set slightly while maintaining the crispy exterior. Slice the rolls in half to showcase the creamy vanilla filling before serving. Indulge in these heavenly treats warm, or store them in an airtight container to keep the crunch for later!

Make Ahead Options
These Crispy Chocolate Rolls with Creamy Vanilla Filling are a fantastic choice for meal prep, ensuring your dessert is ready when you need it. You can prepare the chocolate roll dough and creamy vanilla filling up to 24 hours in advance. To do this, mix the dough and store it in an airtight container in the refrigerator to maintain its freshness. Similarly, whip up the filling and keep it chilled until you’re ready to assemble. When you’re set to serve, simply roll out the dough, spread the filling, slice, and bake as directed. This allows you to enjoy impressive, homemade treats with minimal effort on busy days, keeping them just as delicious!
Expert Tips for Crispy Chocolate Rolls
Quality Dough: Always use fresh ingredients for the chocolate roll dough to ensure the best flavor and texture.
Avoid Sogginess: Store the crispy chocolate rolls in an airtight container immediately after cooling to maintain their crunch.
Check Early: Start checking for doneness at 15 minutes while baking; over-baking can result in hard rolls that lose their appeal.
Flavor Swaps: Don’t hesitate to experiment with the creamy filling! Easier variations such as almond extract or coffee will elevate the crispy chocolate rolls.
Prep Ahead: Make both the dough and filling a day in advance to make assembly a breeze when you’re ready to bake!
Crispy Chocolate Rolls Variations
Feel free to explore your culinary creativity with these delightful twists on the classic recipe!
- Gluten-Free: Substitute all-purpose flour with a gluten-free flour blend to enjoy a similar texture without the gluten.
- Nutty Flavor: Add 1/4 cup of finely chopped nuts (hazelnuts or almonds) into the filling for a delightful crunch and nuttiness.
- Fruity Twist: Swap the vanilla filling for a raspberry or strawberry cream for a fruity explosion that brightens each bite.
- Spicy Kick: For a surprise heat, mix in a pinch of cayenne pepper or ground chili powder into the chocolate dough for a unique flavor profile.
- Decadent Chocolate Filling: Replace the vanilla filling with a rich chocolate ganache for chocolate lovers wanting to go all out!
- Vegan Option: Swap eggs for flaxseed meal and use coconut milk and vegan butter for a deliciously dairy-free treat.
- Layered Flavors: Before rolling, sprinkle cinnamon or espresso powder on the dough for an unexpected layer of flavor.
- Dramatic Presentation: Serve alongside a scoop of ice cream or drizzle with a homemade chocolate sauce for an elegant touch at gatherings.
No matter which variation you choose, these crispy chocolate rolls will surely wow your guests! You can also pair them with a glass of Homemade Chocolate Milk or a few slices of our divine Sokolatina Chocolate Custard for a truly indulgent experience. Enjoy the baking adventure!
What to Serve with Crispy Chocolate Rolls with Creamy Vanilla Filling
Imagine the sweet aroma filling your kitchen as you explore the delightful pairings that elevate these scrumptious rolls into a full meal of indulgent bliss.
- Fresh Berries: Juicy strawberries or raspberries bring a tart contrast, balancing the sweetness of the rolls while adding a burst of freshness.
- Vanilla Ice Cream: A scoop of creamy vanilla ice cream melts beautifully beside the warm rolls, enhancing the dessert experience with a luscious creaminess.
- Chocolate Sauce: Drizzling rich chocolate sauce over the rolls offers an extra layer of chocolatey goodness, making every bite more decadent and delightful.
- Whipped Cream: Light and airy whipped cream adds a fluffy texture that complements the rolls and fills in the sweet gaps with its own lightness.
- Coffee or Espresso: A hot cup of coffee enhances the rich flavors of the rolls, providing a slight bitterness that beautifully contrasts the dessert’s sweetness.
- Chocolate Hazelnut Spread: Slathering a hint of chocolate hazelnut spread on the rolls introduces nutty flavors, making each bite an eloquent chocolate adventure.
- Pistachio Crumble: Sprinkle crushed pistachios on top for a delightful crunch and nutty flavor, which adds a sophisticated twist to the dessert presentation.
These pairings beautifully enhance the Crispy Chocolate Rolls with Creamy Vanilla Filling, transforming a simple dessert into an unforgettable culinary experience!
How to Store and Freeze Crispy Chocolate Rolls
Room Temperature: Keep unfilled rolls tightly wrapped for up to 1 day to maintain freshness; avoid humidity to prevent sogginess.
Fridge: Store leftover Crispy Chocolate Rolls in an airtight container for up to 5 days; this helps retain the crunch while keeping them delicious.
Freezer: For longer storage, freeze baked rolls in an airtight container for up to 2 months; unfurl and thaw at room temperature when you’re ready to enjoy.
Reheating: When ready to serve, reheat rolls in a warm oven for a few minutes to restore crispness, letting that delightful texture shine again!
Crispy Chocolate Rolls with Creamy Vanilla Filling Recipe FAQs
What type of chocolate should I use for the chocolate roll dough?
I recommend using high-quality unsweetened cocoa powder for the best flavor. You can also substitute with dark chocolate if you prefer a richer taste in your rolls.
How should I store leftover Crispy Chocolate Rolls?
Store your leftover rolls in an airtight container in the fridge for up to 5 days. This helps keep the rolls fresh and prevents them from becoming soggy.
Can I freeze the Crispy Chocolate Rolls?
Absolutely! To freeze, place the baked rolls in an airtight container and store them for up to 2 months. When you’re ready to enjoy them, simply thaw at room temperature, and for a crispy finish, warm them in the oven for a few minutes.
What should I do if my dough is too sticky?
If your dough feels sticky, you can sprinkle a little extra flour on your work surface and your rolling pin to help. Be careful not to add too much, as it may affect the texture. It’s also useful to let the dough rest for a few additional minutes to make it easier to handle.
Can my dog eat these chocolate rolls?
No, chocolate is toxic to dogs! It’s important to keep these delicious rolls away from your furry friends. If you’re looking for a pet-friendly treat to make, consider baking some plain oat and banana biscuits instead!
How can I ensure the filling doesn’t ooze out while baking?
When assembling the rolls, make sure to seal the edges tightly by pinching them after rolling. This helps prevent the filling from leaking out during baking. Also, avoid overfilling—less is often more for a neat finish!

Crispy Chocolate Rolls with Creamy Vanilla Filling Bliss
Ingredients
Equipment
Method
- In a large mixing bowl, sift together flour, cocoa powder, and baking powder. In another bowl, whisk eggs, sugar, and melted butter until smooth. Gradually add dry ingredients and milk, mixing until smooth. Allow to rest for 10 minutes.
- While the dough rests, combine softened cream cheese and powdered sugar in a mixing bowl. Beat until smooth, then add vanilla extract and chilled heavy cream. Whip until fluffy and holds peaks.
- On a floured surface, roll out the dough into a rectangle, spread filling evenly, roll tightly, and slice into 1-inch sections.
- Preheat the oven to 350°F (175°C), line a baking sheet with parchment. Bake slices for about 15-20 minutes until golden brown and firm.
- Remove from oven, cool on a wire rack for 10 minutes, slice to serve warm or store in an airtight container.
Leave a Reply