
The delightful sight of vibrant blue cookies is always an instant mood lifter. As a passionate home chef, I often find myself searching for ways to bring a dash of fun into my baking, and these whimsical Cookie Monster Cookies are the perfect solution. Beyond their visually striking appearance, they’re chewy and stuffed with Oreos, making them a guaranteed crowd-pleaser for all ages. What I love most about this recipe is that it doesn’t just cater to special occasions; it’s versatile enough for birthday parties or a casual afternoon bake with the kids. Plus, you can easily customize them by changing the colors or fillings to suit any theme or preference! So, are you ready to dive into a world of cookie magic? Let’s get started!
Why Are Cookie Monster Cookies So Special?
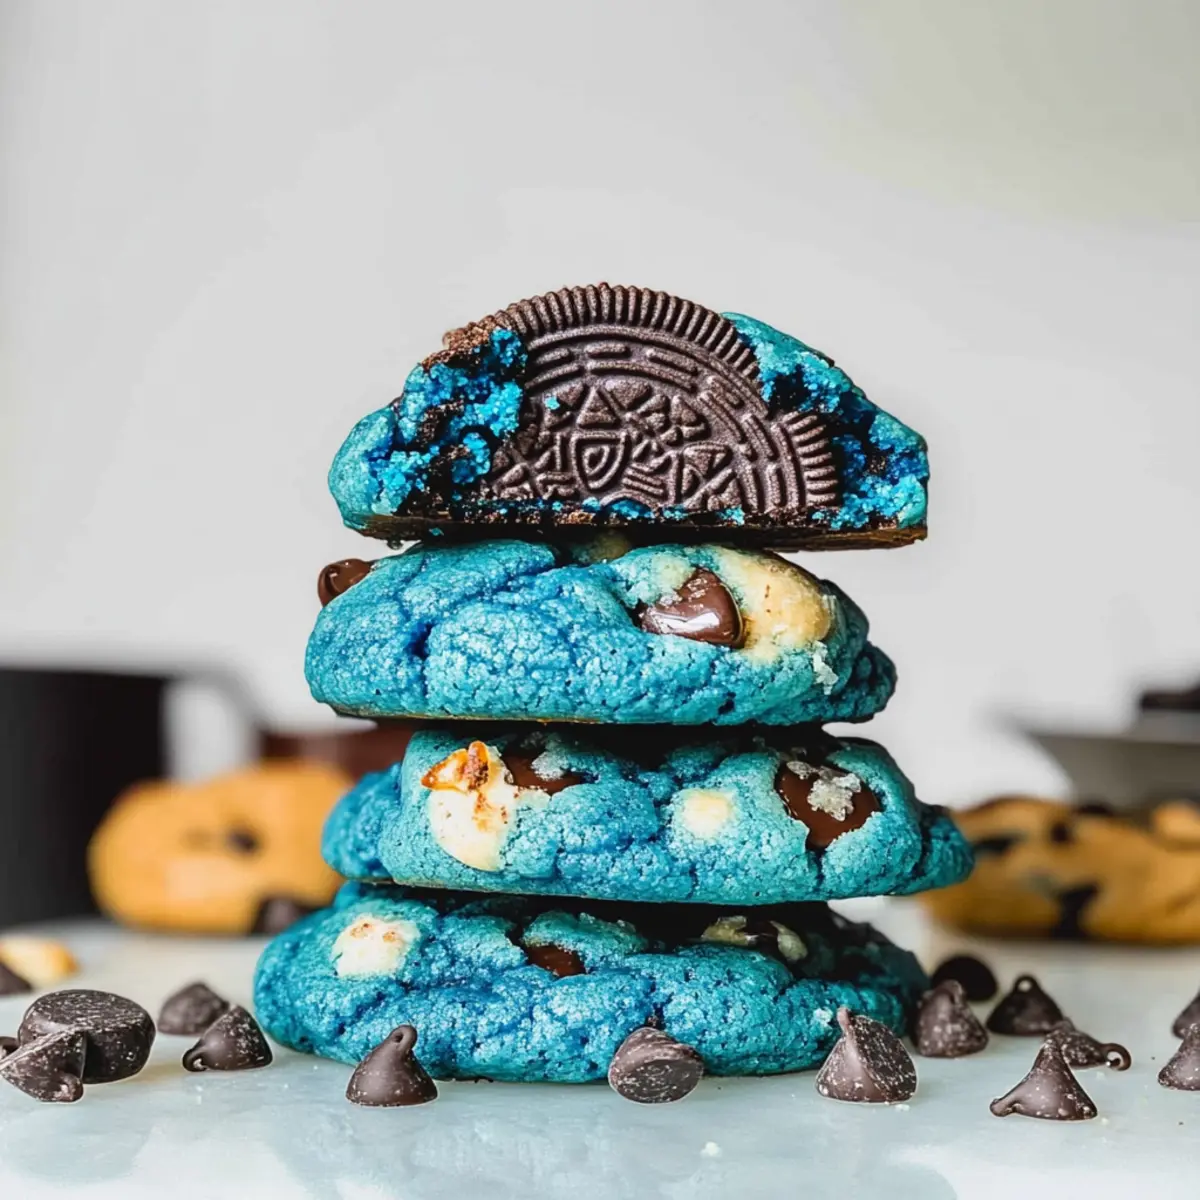
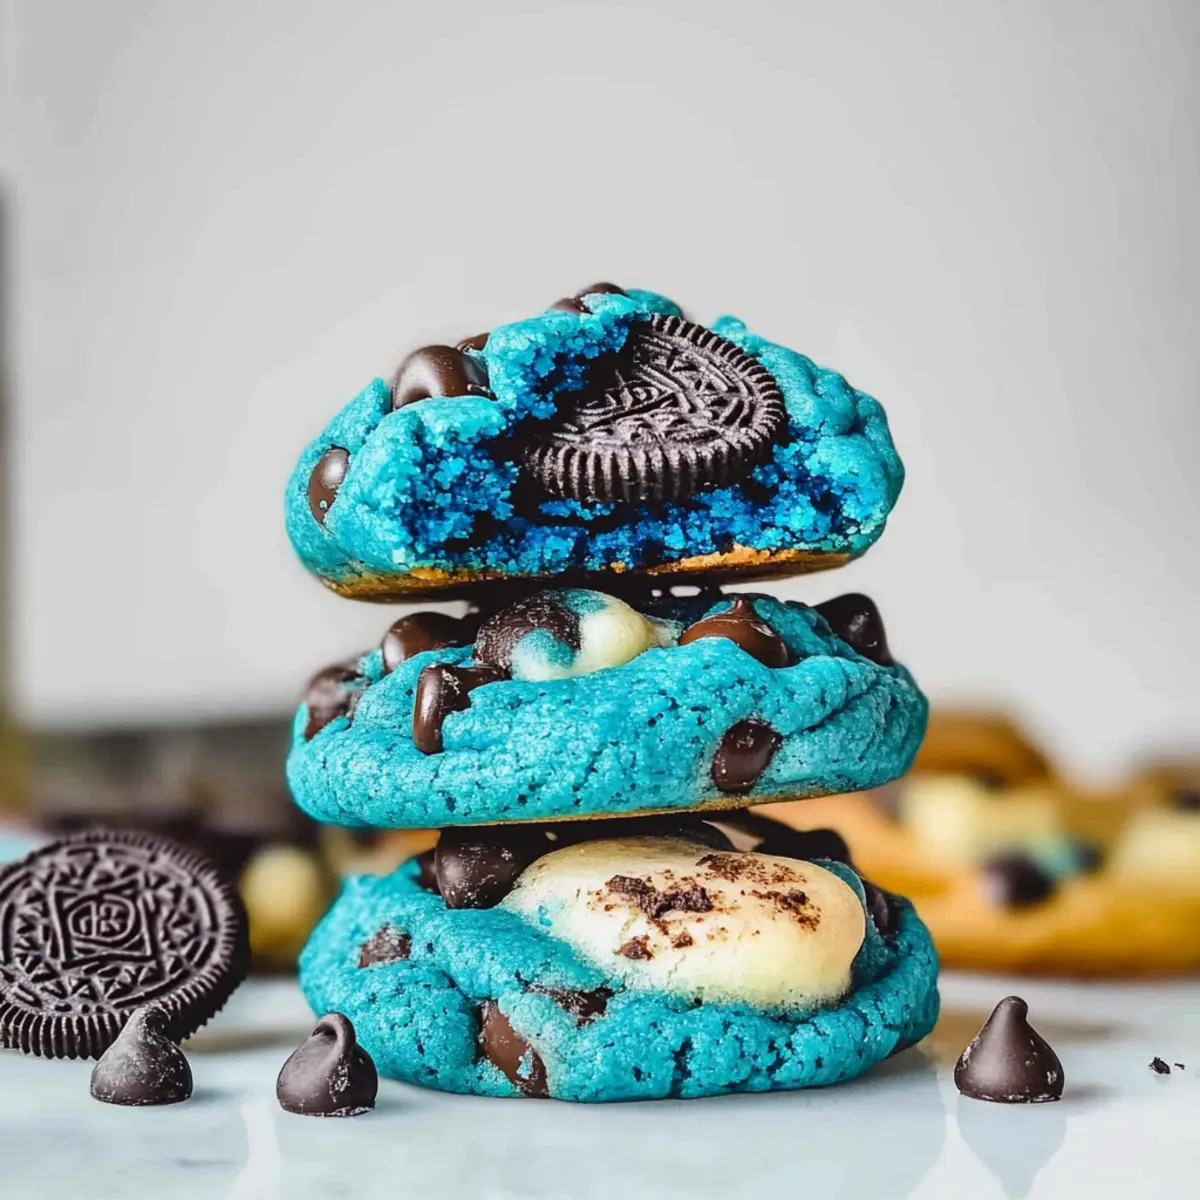
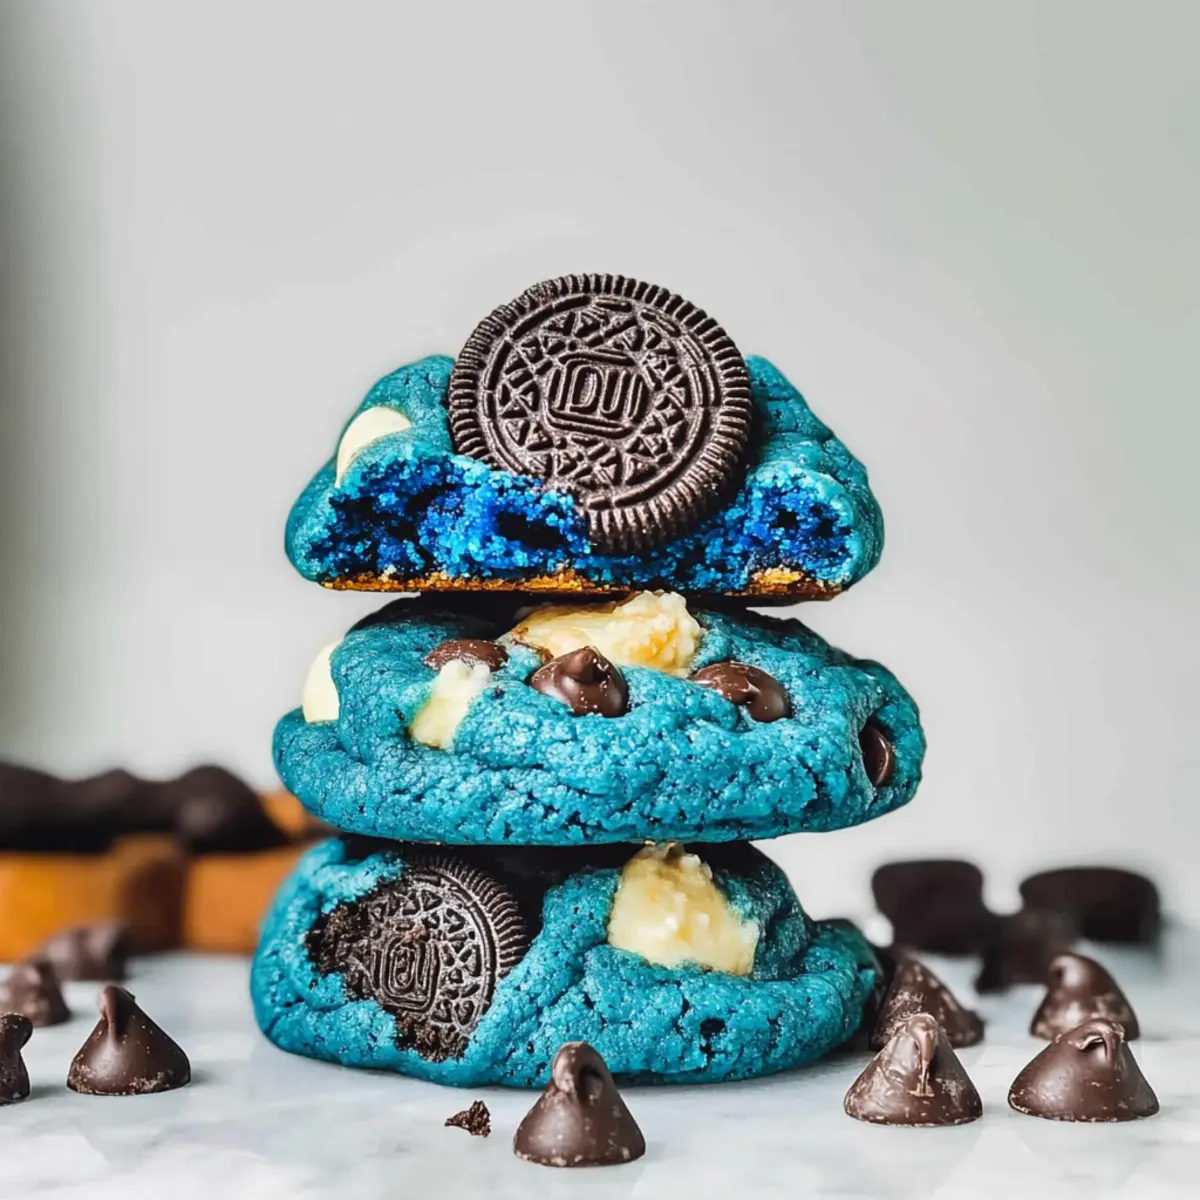
Visual Appeal: The vibrant blue hue grabs attention and adds a fun twist that makes them perfect for any party.
Chewy Texture: With a thick, chewy center, each bite offers a satisfying contrast to the crispy edges.
Customizable Fun: You can easily tailor colors and fillings to match themes or personal preferences.
Crowd-Pleasing Treat: Ideal for kids and adults alike, these cookies are sure to become a favorite at gatherings!
Make-Ahead Magic: Bake these ahead of time and store them for up to a week—perfect for busy schedules! Try pairing your Cookie Monster Cookies with Biscoff Cookie Butter for an extra twist!
Cookie Monster Cookies Ingredients
For the Dough
- Butter (100 g) – Provides richness and tenderness; use unsalted for better control over salt levels.
- Brown Sugar (50 g) – Contributes moisture and a deeper flavor; can substitute with coconut sugar for a unique taste.
- Granulated Sugar (20 g) – Adds sweetness and helps achieve a crisp exterior; no substitutions recommended for best results.
- Egg (1 large) – Binds ingredients and helps with leavening; a flax egg can be used for a vegan version.
- Vanilla Extract (1 tsp) – Enhances flavor profile; substitute with almond extract for a different aroma.
- Blue Gel Food Coloring (1 tsp) – Provides the signature Cookie Monster blue; feel free to use any food coloring for variations.
- All-Purpose Flour (230 g) – Main structure component; a gluten-free blend can be substituted, but texture may vary.
- Baking Powder (½ tsp) – Aids in leavening; ensure it’s fresh for best results.
- Baking Soda (½ tsp) – Helps cookies rise and spread; no substitutions recommended.
- Salt (¼ tsp) – Balances flavors; can reduce to taste.
For the Mix-ins
- Chocolate Chips (40 g) – Adds richness and chocolate flavor; use dark chocolate for a richer taste or omit for a lower sweetness.
- Mini Cookie Pieces (40 g) – Boosts the cookie flavor and adds texture; modify based on personal preference.
- Oreos (12 whole for stuffing) – Central to creating the Cookie Monster aesthetic and taste; substitute with any filled cookie, like Biscoff or chocolate-covered biscuits.
These Cookie Monster Cookies are sure to bring smiles to your kitchen!
Step‑by‑Step Instructions for Cookie Monster Cookies
Step 1: Prepare Dough
In a large mixing bowl, cream together 100 grams of unsalted butter with 50 grams of brown sugar and 20 grams of granulated sugar using a hand mixer on medium speed for 1-2 minutes, until the mixture is smooth and light in color. This creamy base will create a tender texture for your Cookie Monster Cookies.
Step 2: Mix Wet Ingredients
Add 1 large egg, 1 teaspoon of vanilla extract, and 1 teaspoon of blue gel food coloring to the creamed mix. Continue mixing on low speed until everything is well combined and the vibrant blue color is evenly distributed, creating a fun and appealing base for your cookies.
Step 3: Incorporate Dry Ingredients
Gradually sift in 230 grams of all-purpose flour, along with ½ teaspoon each of baking powder, baking soda, and ¼ teaspoon of salt. Using a spatula, gently fold the dry ingredients into the wet mixture until just combined, being careful not to overmix; the dough should be soft and slightly sticky, which is perfect for your Cookie Monster Cookies.
Step 4: Add Mix-ins
Now it’s time to add some fun! Stir in 40 grams of chocolate chips, 40 grams of mini cookie pieces, and 12 chopped Oreos until they are evenly distributed within the dough. This mix of delicious add-ins will enhance both the flavor and visual appeal of your whimsical cookies.
Step 5: Shape Cookies
Take a generous portion of the blue dough and flatten it in the palm of your hand. Place one whole Oreo in the center and carefully wrap the dough around the cookie, ensuring it’s completely covered. This creates the signature look of Cookie Monster Cookies, making them a delight to bite into.
Step 6: Chill Dough
To prevent the cookies from spreading too much while baking, refrigerate the dough balls on a baking sheet for at least 30 minutes. If you’re short on time, you can also freeze them for 15-20 minutes. The chilling process helps maintain the cookie shape, resulting in thick and chewy cookies.
Step 7: Bake Cookies
Preheat your oven to 180°C (350°F). Line a baking sheet with parchment paper and place the chilled cookie dough balls on the sheet, allowing some space between them. Bake for 12-15 minutes until the cookie edges are lightly golden, while keeping the centers soft. Your kitchen will smell heavenly as they bake!
Step 8: Cool
Once the baking time is up, remove the baking sheet from the oven and let the cookies cool for a few minutes. Then, carefully transfer them to a wire rack to cool completely. This cooling step is essential to ensure your Cookie Monster Cookies set perfectly and maintain their chewy texture.
What to Serve with Cookie Monster Cookies?
Imagine a cheerful gathering where laughter dances in the air, and sweet treats like these whimsical cookies steal the show.
- Milkshake Magic: Serve with creamy milkshakes for a nostalgic treat; the sweetness complements the cookies’ rich flavors beautifully.
- Fruit Plate: A vibrant assortment of fresh fruits like strawberries and blueberries adds a refreshing balance to the cookies’ sweetness.
- Chocolate Dipping Sauce: Melting down some chocolate for dipping creates an interactive dessert that kids will absolutely adore.
- Ice Cream Sundaes: Layer these cookies with scoops of vanilla ice cream for an epic dessert that captures the essence of childhood joy.
- Whipped Cream Topping: A light dollop of whipped cream on the side creates a heavenly pairing, enhancing the cookies’ moisture and flavor.
- Hot Cocoa: Warm up chilly evenings with mugs of hot cocoa; the rich chocolate pairs perfectly with the fun flavors of your cookies.
- Rainbow Sprinkles: For a celebration, add rainbow sprinkles on the plate; let your guests custom-decorate their Cookie Monster cookies for extra fun.
- Nutty Caramel Sauce: Drizzle with homemade nutty caramel for a delightful contrast, adding both texture and flavor to your treats.
- Coffee: A warm cup of coffee balances sweetness, making it a perfect pairing for an afternoon baking session with loved ones.
Expert Tips for Cookie Monster Cookies
-
Chill Dough Thoroughly: Make sure to chill the cookie dough for at least 30 minutes. This step is crucial to prevent cookies from spreading too much in the oven.
-
Measure Flour Accurately: Weigh your flour or use the spoon-and-level method to avoid dense cookies. Accurate measuring is key to achieving perfect Cookie Monster Cookies.
-
Use Gel Food Coloring: Opt for gel food coloring instead of liquid to achieve that vibrant blue hue without altering the cookie’s flavor or texture.
-
Avoid Overmixing: Mix the dough until just combined after adding dry ingredients to keep cookies light and fluffy. Overmixing can lead to tough cookies.
-
Customize Your Fillings: Feel free to swap out Oreos for your favorite stuffed cookies or add nuts for an extra crunch. Personalize your Cookie Monster Cookies to fit any occasion!
-
Monitor Baking Time: Every oven is different, so keep an eye on your cookies to ensure they’re perfectly baked with golden edges and soft centers.
How to Store and Freeze Cookie Monster Cookies
Airtight Container: Store your Cookie Monster Cookies in an airtight container at room temperature for up to 1 week to maintain their chewy texture and freshness.
Refrigerator: For extended freshness, keep the cookies in the fridge for up to 2 weeks. Ensure they are well-wrapped to avoid drying out.
Freezer: Freeze unbaked dough portions for up to 3 months. Thaw them in the refrigerator overnight and bake without defrosting for delicious, fresh cookies anytime.
Reheating: To reheat baked cookies, pop them in the microwave for about 10-15 seconds or warm in the oven at a low temperature for a few minutes, reviving that perfect chewiness!
Make Ahead Options
These Cookie Monster Cookies are perfect for meal prep enthusiasts! You can prepare the dough up to 24 hours in advance by covering it tightly in plastic wrap and refrigerating it; this not only saves time but also enhances the flavors as they meld together. Alternatively, you can freeze the cookie dough balls for up to 3 months—just place them in a single layer on a baking sheet to freeze, then transfer them to a freezer bag. When ready to bake, there’s no need to thaw; simply bake from frozen, adding an extra minute or two to the baking time for delicious, freshly baked cookies. By prepping ahead, you’ll have warm, chewy Cookie Monster Cookies ready to enjoy whenever the craving strikes!
Cookie Monster Cookies: Fun Variations
Feel free to get creative with these customizable Cookie Monster cookies and delight everyone’s taste buds!
-
Colorful Dough: Experiment with different gel food coloring to create rainbow, pastel, or seasonal-themed cookies. Imagine a batch of vibrant pink or a spooky green for Halloween!
-
Oreo Swaps: Use flavored Oreos like mint or peanut butter for a delicious twist. The unexpected taste will surprise and delight cookie lovers.
-
Nutty Crunch: Add chopped walnuts or pecans for a delightful crunch. The nutty flavor pairs beautifully with the sweetness, creating a satisfying texture.
-
Chewy Add-ins: Try mixing in some shredded coconut or mini marshmallows for a chewy surprise. Both options add a unique twist that will have everyone reaching for more.
-
Less Sweet: Reduce the granulated sugar slightly and add a pinch of cinnamon for a warm flavor without that extra sweetness. This twist can make them perfect for those who prefer a subtle touch.
-
Texture Combo: Mix in crunchy pretzel pieces along with mini chocolate chips for added texture. The salty-sweet contrast is simply irresistible!
-
Vegan Version: Substitute the egg with a flax egg and use dairy-free chocolate for a vegan-friendly treat. You’ll still achieve that delightful chewiness without losing flavor.
These Cookie Monster Cookies are not only a feast for the eyes but a playground of flavor! For added inspiration, consider pairing these cookies with a decadent spread like Biscoff Cookie Butter for dipping or drizzling. Enjoy experimenting with your cookie creations!
Cookie Monster Cookies Recipe FAQs
What is the best way to select ripe ingredients for making Cookie Monster Cookies?
Absolutely! When selecting ingredients, particularly for eggs, choose large eggs that are fresh and free from cracks. For butter, I recommend using unsalted to have better control over the salt levels in your cookies. If using any added mix-ins like chocolate chips, opt for high-quality chocolate for a richer flavor that complements the sweetness of the cookie.
How should I store my Cookie Monster Cookies to maintain freshness?
I often store my Cookie Monster Cookies in an airtight container at room temperature for up to 1 week. This method keeps them chewy and soft. For even longer freshness, you can refrigerate them, where they’ll stay good for up to 2 weeks when properly wrapped to prevent drying out.
Can I freeze the dough for Cookie Monster Cookies?
Yes, you can! To freeze unbaked dough portions, shape them into balls and place them on a baking sheet. Freeze for about 1-2 hours until solid, then transfer the dough balls into a freezer-safe bag or container, where they can be stored for up to 3 months. When you’re ready to bake, simply thaw them in the refrigerator overnight and bake straight from frozen, adding a couple of minutes to the baking time for perfectly fresh cookies.
What can I do if my Cookie Monster Cookies come out too flat?
If your cookies spread too much and come out flat, it’s often due to the dough not being chilled enough. Ensure to chill the dough for at least 30 minutes before baking. Also, if your butter was too soft, consider using slightly colder butter next time. A little extra flour can help too, but make sure not to overdo it, as that can lead to tough cookies!
Are Cookie Monster Cookies safe for people with nut allergies?
Very! You can easily adapt this recipe for those with nut allergies by ensuring that all ingredients, especially any chocolate or cookie pieces you might use, are nut-free. If you’re substituting any ingredients, always check labels for potential cross-contamination.
Can I substitute any ingredients if I’m trying to make Cookie Monster Cookies gluten-free?
Absolutely! You can substitute the all-purpose flour with a gluten-free blend specifically designed for baking. However, keep in mind that the texture might vary slightly, so check the brand’s recommendations. Also, make sure any add-ins like chocolate chips or Oreos are labeled gluten-free as well.

Cookie Monster Cookies: Chewy Treats for Epic Fun
Ingredients
Equipment
Method
- In a large mixing bowl, cream together butter, brown sugar, and granulated sugar using a hand mixer on medium speed for 1-2 minutes until smooth.
- Add egg, vanilla extract, and blue gel food coloring to the creamed mix and mix on low speed until well combined.
- Gradually sift in all-purpose flour, baking powder, baking soda, and salt. Fold until just combined.
- Stir in chocolate chips, mini cookie pieces, and chopped Oreos until evenly distributed.
- Flatten dough in your hand, place an Oreo in the center, and wrap the dough around it.
- Refrigerate dough balls for at least 30 minutes to maintain cookie shape.
- Preheat oven to 180°C (350°F). Line a baking sheet with parchment and place chilled dough balls on it. Bake for 12-15 minutes.
- Remove from oven and let cool for a few minutes before transferring to a wire rack.
Leave a Reply