
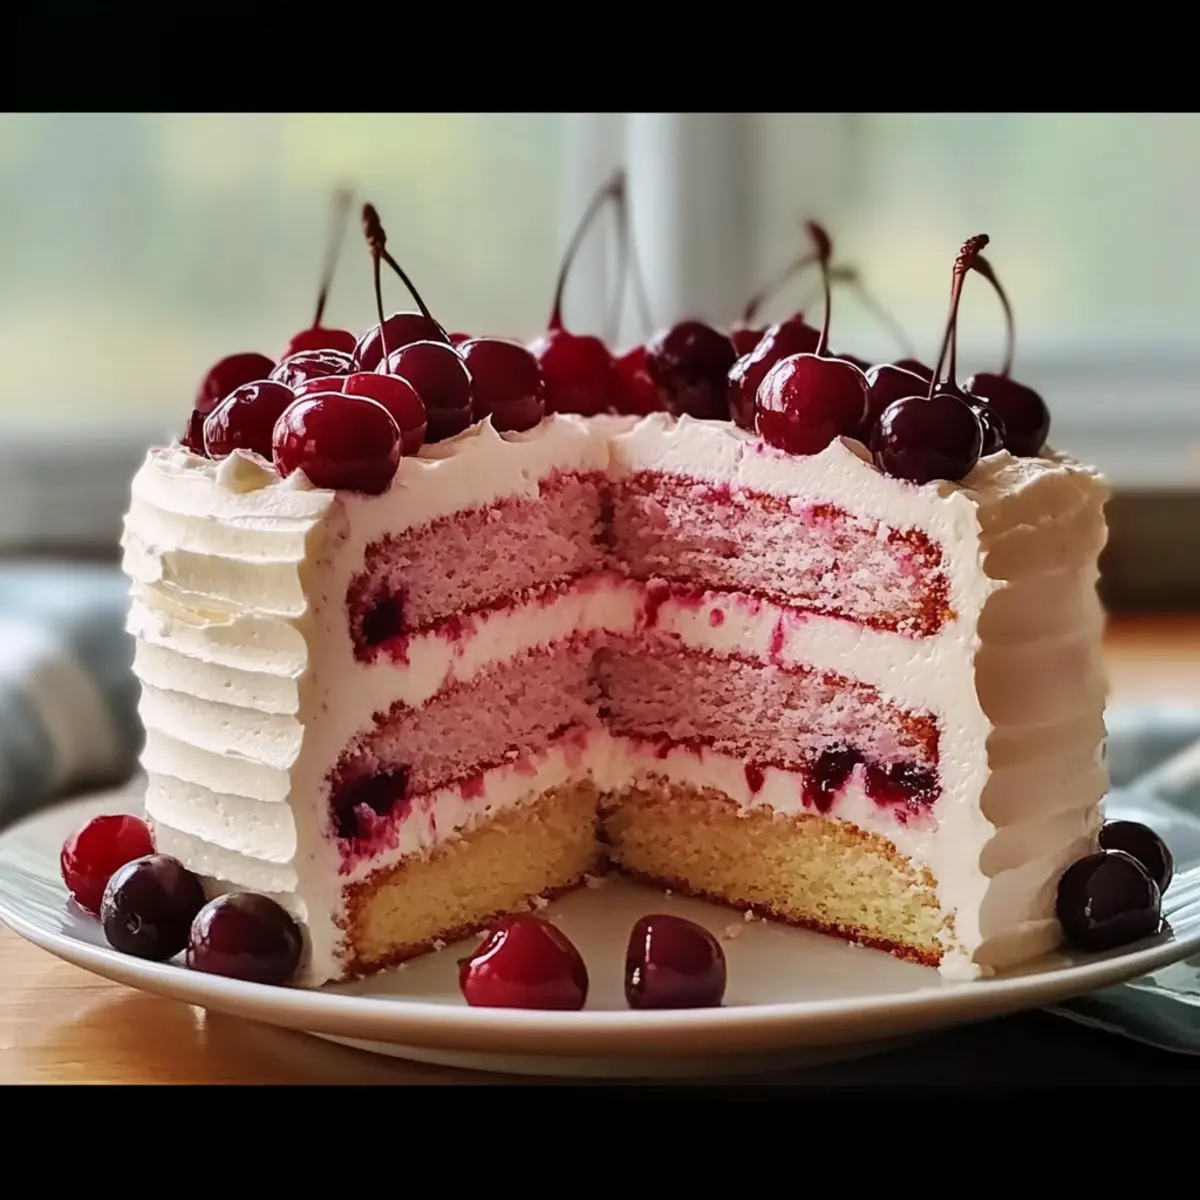
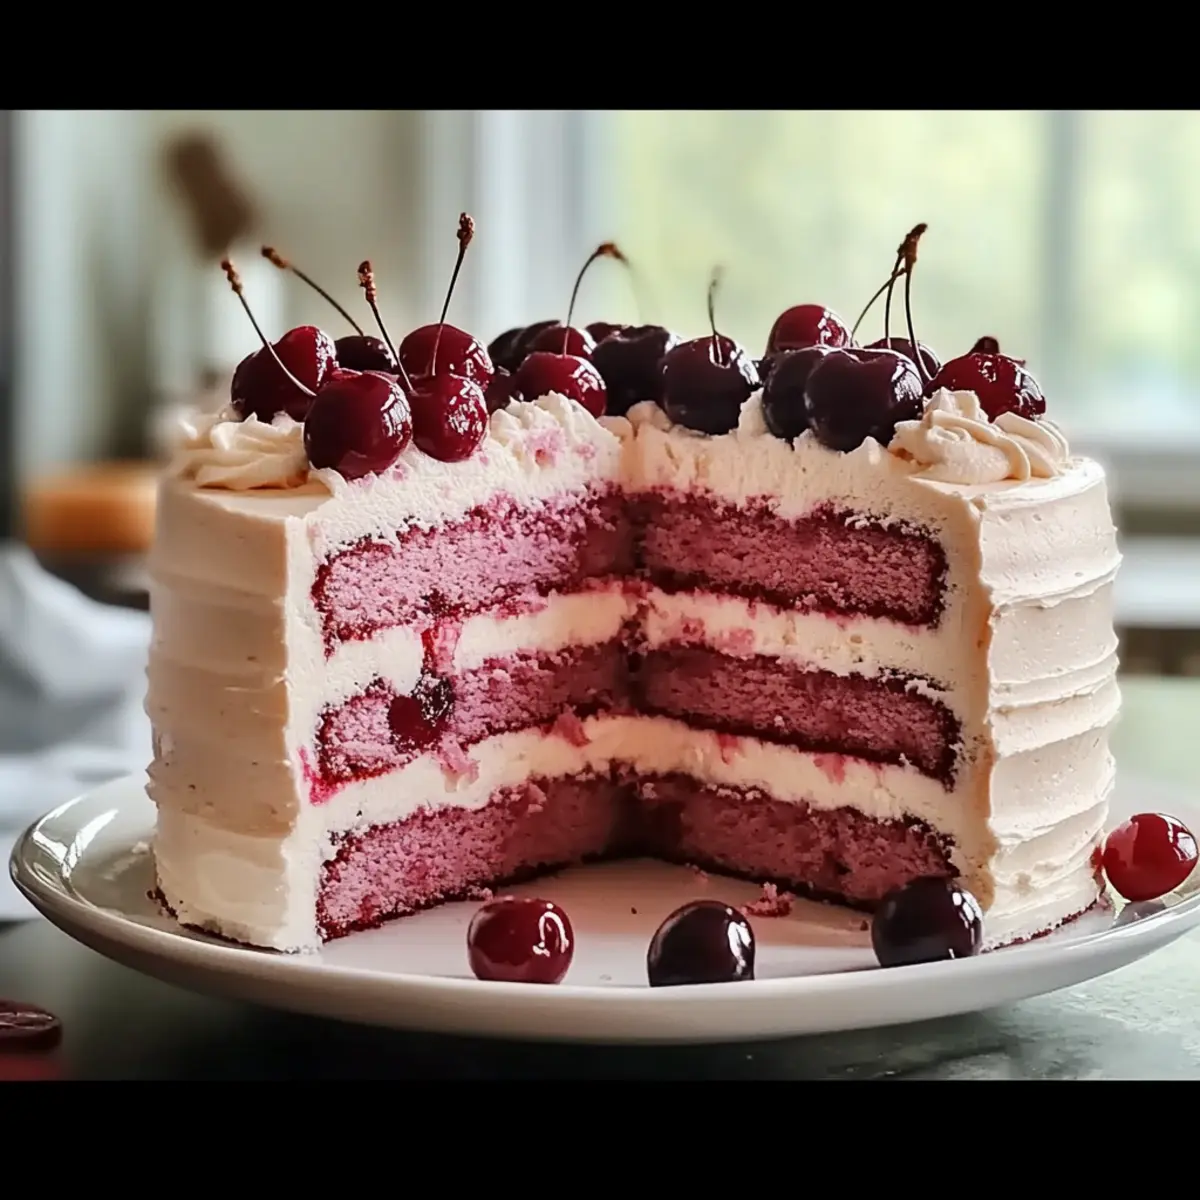
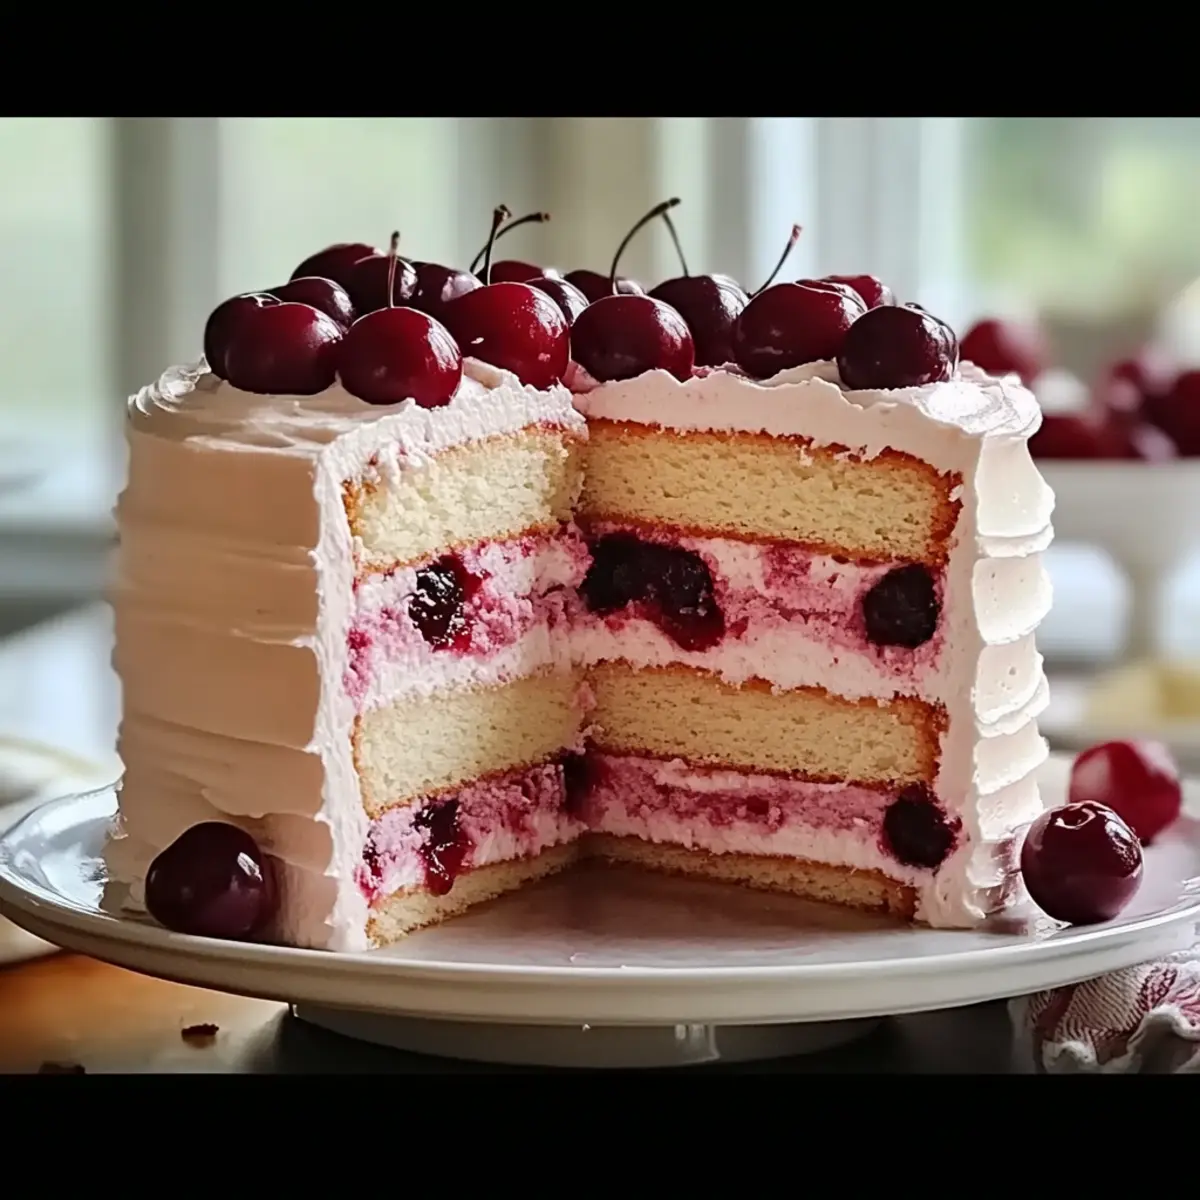
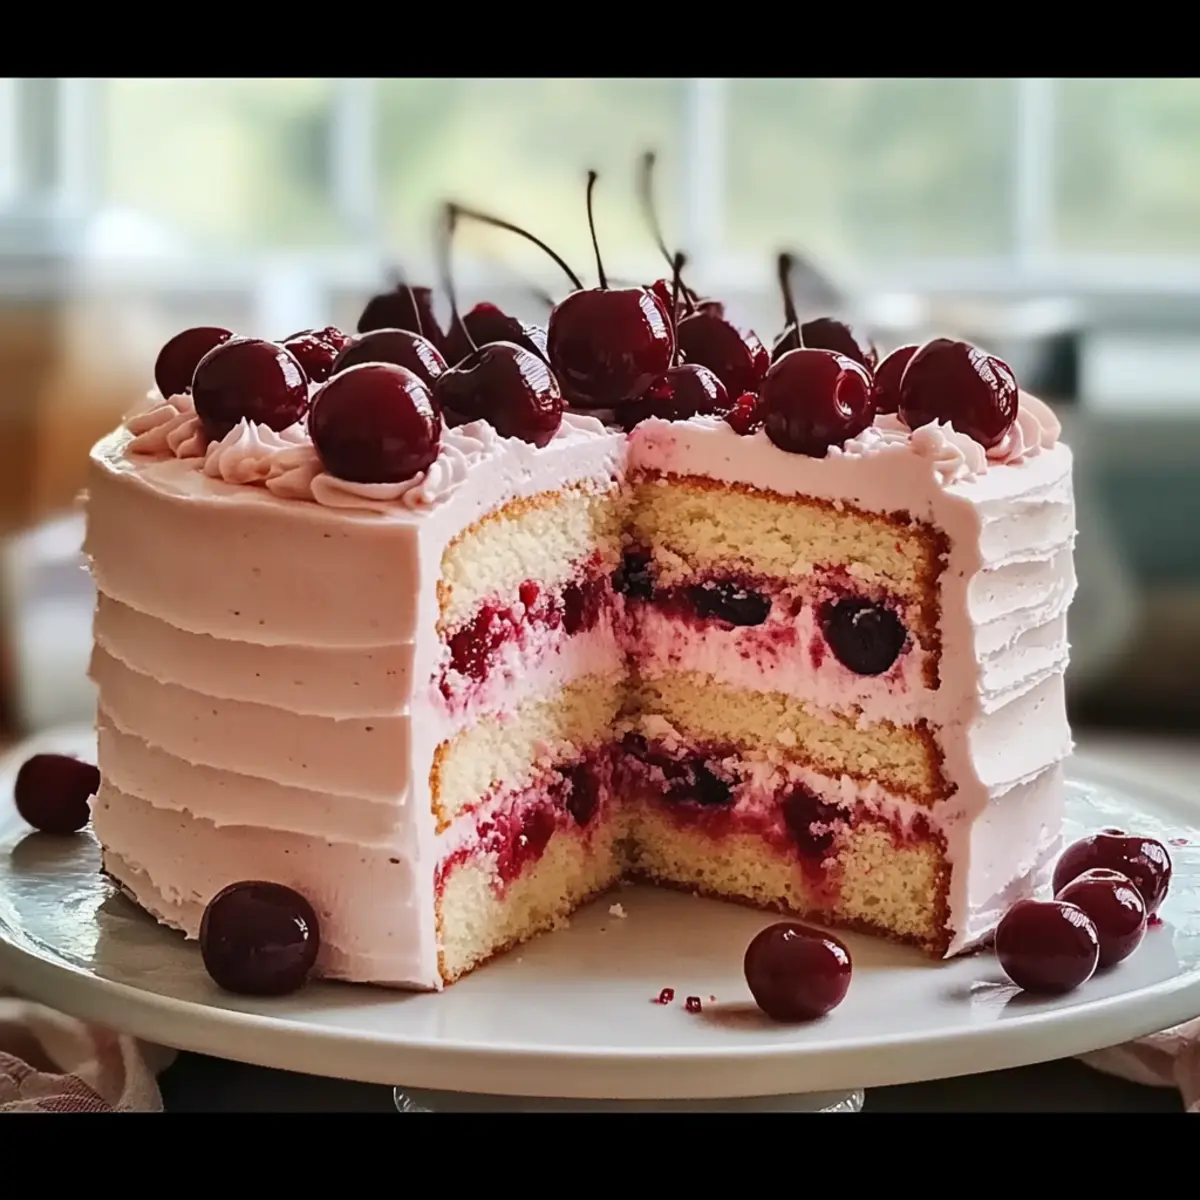
As I stood in my kitchen, the sweet aroma of cherries simmering on the stove instantly transported me to summer picnics filled with laughter and joy. This Cherry Layer Cake with Cherry Cream Cheese Frosting captures that nostalgic essence perfectly. Not only is it an eye-catching centerpiece for any table, but it also makes for a quick and enjoyable bake, ideal for both special celebrations and cozy evenings at home. Each slice reveals soft, tender layers infused with natural cherry flavor, complemented by a tangy cherry cream cheese frosting. And if you’re feeling adventurous, a burst of cherry jam between the layers adds an irresistible twist! Are you ready to dive into creating this delightful cherry dessert that will surely become a favorite?
Why is this Cherry Cake a Must-Try?
Irresistible Flavor: The combination of fresh or frozen cherries and velvety cream cheese frosting creates a delightful balance of sweet and tangy.
Easy to Make: This layered cake requires simple techniques, making it perfect for both novice and seasoned bakers.
Versatile Option: Dress it up with layers of cherry jam or serve with fresh cherries for an elegant touch.
Stunning Presentation: Its beautiful pink hue and inviting layers make it an impressive centerpiece for any occasion.
Perfect for Any Occasion: Whether it’s a birthday celebration or a cozy family dinner, this cake will delight everyone at the table! Sharing slices of this scrumptious cake will surely make you the star of any gathering!
Cherry Cake with Cream Cheese Ingredients
For the Cake
• Pitted Sweet Cherries (3 cups) – Provides natural flavor and color; you can use fresh or frozen.
• Cake Flour (2 1/2 cups) – Ensures a soft and tender crumb; a mix of all-purpose flour and cornstarch works as a substitute.
• Granulated Sugar (1 1/2 cups) – Adds sweetness and moisture for that perfect cherry cake.
• Baking Powder (1 tbsp) – Acts as a leavening agent to help the cake rise beautifully.
• Baking Soda (1/2 tsp) – Works with the acidity of buttermilk for additional lifting.
• Kosher Salt (1/2 tsp) – Enhances overall flavor, bringing balance to the sweetness.
• Unsalted Butter (3/4 cup) – Provides richness and moisture; ensure it’s softened for the best texture.
• Buttermilk (1/2 cup) – Adds tenderness; use at room temperature for the best results.
• Vegetable Oil (1/4 cup) – Contributes to moisture, helping achieve a tender texture.
• Egg Whites (4 large) – Lightens the batter for a fluffier cherry layer cake; at room temperature.
• Vanilla Extract (1 tsp) – Enhances depth of flavor, harmonizing beautifully with the cherries.
• Almond Extract (1/4 tsp) – Optional for boosting the cherry flavor; feel free to skip if preferred.
For the Frosting
• Cream Cheese (8 oz) – Base for the frosting, providing a rich and tangy taste; must be softened.
• Unsalted Butter for Frosting (1/2 cup) – Adds structure and creaminess to the frosting when combined with cream cheese.
• Powdered Sugar (4 cups) – Sweetens and helps achieve the desired stiff consistency for the frosting.
Optional Additions
• Cherry Jam – Adding a layer between the cake for a burst of extra cherry flavor.
Step‑by‑Step Instructions for Cherry Layer Cake with Cherry Cream Cheese
Step 1: Prepare Cherry Puree
In a medium saucepan, combine 3 cups of pitted sweet cherries. Purée the cherries using an immersion blender or food processor until smooth, then simmer over medium heat for about 15 minutes, or until the mixture reduces to a thick paste about ¾ cup in volume. Allow the cherry puree to cool completely before using it in the batter and frosting for your Cherry Layer Cake.
Step 2: Make Cake Batter
In a large mixing bowl, whisk together 2 ½ cups of cake flour, 1 ½ cups of sugar, 1 tablespoon of baking powder, ½ teaspoon of baking soda, and ½ teaspoon of kosher salt. Add in ¾ cup of softened unsalted butter and mix on medium speed with a stand mixer or hand mixer until the mixture resembles coarse sand, ensuring even distribution of ingredients for the best cherry cake.
Step 3: Mix Wet Ingredients
In a separate bowl, whisk together the cooled cherry puree, ½ cup of buttermilk, ¼ cup of vegetable oil, 4 large egg whites, 1 teaspoon of vanilla extract, and ¼ teaspoon of almond extract if using. Pour this mixture into the dry ingredients in two batches, mixing gently until just combined. Be careful not to overmix; you want a smooth batter for your Cherry Layer Cake.
Step 4: Bake the Cake
Preheat your oven to 350°F (175°C) and grease two 8-inch round cake pans with butter or non-stick cooking spray. Divide the batter evenly between the pans, smoothing the tops for an even rise. Bake for 30 to 35 minutes, or until a toothpick inserted in the center comes out clean. Allow the cakes to cool in the pans for 10 minutes before transferring them to a wire rack to cool completely.
Step 5: Prepare Frosting
While the cake cools, make the cream cheese frosting. In a large bowl, using a mixer, beat together ½ cup of softened unsalted butter and 8 oz of softened cream cheese until creamy and well combined. Gradually incorporate 4 cups of powdered sugar until fully blended, then mix in the remaining cherry puree until the frosting reaches a thick, spreadable consistency, perfect for your Cherry Layer Cake.
Step 6: Assemble Cake
Once the cake layers are completely cooled, place one layer on a serving plate. Spread a layer of frosting on top, and if desired, add a layer of cherry jam for an extra burst of flavor. Place the second layer on top, applying frosting on the top and sides of the cake. Chill the assembled cake in the refrigerator for about 30 minutes before serving to set the frosting.
Cherry Cake Variations & Substitutions
Feel free to explore and personalize this delightful Cherry Layer Cake, infusing it with your own twist to make it uniquely yours!
- Almond-Free: Omit the almond extract for a pure cherry flavor or substitute with a splash of lemon juice for a zesty kick.
- Sour Cherries: Use sour pie cherries instead for a delightful contrast of tartness in both cake and frosting.
- Jam Delight: Consider adding a layer of homemade or store-bought cherry jam between the cake layers for an added burst of flavor.
- Gluten-Free: Swap cake flour for a gluten-free blend to make this cake suitable for gluten-sensitive friends and family.
- Layerless Cake: Transform this recipe into a simpler 9×13 inch cake for an easy bake that’s just as delicious. Adjust baking time as needed!
- Creamy Twist: For a richer frosting, mix in a tablespoon of sour cream into the cream cheese frosting for added tang.
- Heat It Up: Add a pinch of cayenne or a few crushed red pepper flakes to the cake batter for an unexpected spicy kick.
- Chocolate Lovers: Drizzle melted dark chocolate over the frosted cake to elevate its decadent feel, perfect for special occasions.
Why not try serving slices alongside a scoop of ice cream or with a dollop of whipped cream, just like with my Blueberry Lemon Cheesecake for a delightful presentation? You can also add a splash of extra cherry flavor with layers of cherry-infused frosting!
Expert Tips for Cherry Cake
-
Cool Ingredients: Always let the cherry puree cool completely before mixing it into your batter or frosting. This prevents melting your butter and achieving the right texture in your Cherry Cake.
-
Measure Precisely: For the best results, be mindful when measuring flour. Spoon it into your measuring cup and level it off to avoid a dense cake.
-
Bake Evenly: Rotate your cake pans halfway through baking to ensure even heat distribution. This helps achieve the soft, tender layers you want in your Cherry Layer Cake.
-
Frosting Matters: Never frost a warm cake. Make sure each layer is completely cool before icing to maintain the integrity of your beautiful Cherry Cream Cheese frosting.
-
Storage Tips: Due to the cream cheese in the frosting, refrigerate any leftover cake within two hours of serving to keep it fresh and safe for enjoyment.
Storage Tips for Cherry Layer Cake
Fridge: Store the cake in an airtight container for up to 4 days to keep the cherry cream cheese frosting fresh and creamy.
Freezer: If you want to save leftovers, wrap the entire frosted cake tightly in plastic wrap and then foil for up to 2 months. Thaw in the fridge overnight before serving.
Cut Portions: For easier storage, slice the cake into individual portions and wrap them separately in plastic wrap. This allows for convenient, quick treats anytime!
Reheating: If you’d like to enjoy a slice warm, gently warm it in the microwave for about 10-15 seconds, allowing the delicious cherry flavor to shine through anew.
Make Ahead Options
These Cherry Layer Cakes are perfect for meal prep enthusiasts! You can prepare the cherry puree up to 24 hours in advance; simply store it in an airtight container in the refrigerator to maintain its vibrant flavor. The cake layers can also be baked a day ahead and stored, tightly wrapped in plastic wrap, at room temperature to keep them moist. When you’re ready to serve, whip up the frosting and assemble the cake; chilling it for about 30 minutes after frosting helps the frosting set perfectly without losing that delightful creaminess. This prep ahead strategy ensures you enjoy a stunning dessert without the last-minute rush!
What to Serve with Cherry Layer Cake with Cherry Cream Cheese Frosting
Imagine delighting your guests with a complete meal that effortlessly highlights the sweetness of the cherry dessert.
-
Whipped Cream: A dollop of lightly sweetened whipped cream complements the cake’s rich frosting and adds a creamy texture.
-
Fresh Mint Leaves: Sprinkling fresh mint on the plate not only adds a pop of color but also enhances the cake’s flavor with a refreshing note.
-
Vanilla Ice Cream: The creamy, cold ice cream contrasts beautifully with the moist cake, creating a delicious harmony of temperatures and flavors.
-
Chocolate Ganache: Drizzling a rich chocolate ganache creates a decadent flavor pairing, contrasting the sweetness of the cherries with deep cocoa notes.
-
Fruit Salad: A vibrant fruit salad with berries and citrus will provide a refreshing counterpoint to the richness of your cake, perfect for warming days.
-
Sparkling Water with Lemon: For a light beverage option, serve sparkling water infused with lemon. This cleanses the palate and keeps the meal feeling fresh.
-
Cherry Limeade: Elevate the cherry theme with a homemade cherry limeade, whose tartness pairs beautifully with the sweetness of the cake.
-
Almond Cookies: These nutty treats provide a delightful crunch and an earthy flavor that balances the fruity notes of the cake.
-
Cheese Platter: A selection of creamy cheeses like goat or brie introduces savory notes, creating a sophisticated contrast with the sugary layers of your cherry delight.
Indulging in these pairings will create a well-rounded experience that makes your Cherry Layer Cake the star of the show!
Cherry Layer Cake with Cherry Cream Cheese Frosting Recipe FAQs
What type of cherries should I use for the Cherry Layer Cake?
Absolutely! You can use either fresh or frozen pitted sweet cherries for your cake. If using frozen cherries, make sure to thaw them and drain any excess liquid before pureeing. This ensures the right consistency in your cake.
How should I store leftover Cherry Layer Cake?
Store the cake in an airtight container in the refrigerator, where it will stay fresh for up to 4 days. Due to the cream cheese frosting, giving it a cool environment is key to maintaining its delightful flavor and texture.
Can I freeze the Cherry Layer Cake?
Yes, you can freeze the entire frosted cake for up to 2 months! Just wrap it tightly in plastic wrap, followed by aluminum foil to prevent freezer burn. To enjoy, simply thaw it overnight in the fridge before serving for the best taste and texture.
How can I ensure my cake layers bake evenly?
For the best results, rotate your cake pans halfway through baking. This helps to distribute heat evenly, preventing one side of your cake from rising faster than the other. Additionally, always make sure to bake the cake on a middle or lower rack for optimal airflow.
What can I do if my frosting is too runny?
If you find your cherry cream cheese frosting is too runny, this can happen if the cream cheese or butter wasn’t fully chilled. To fix it, just blend in more powdered sugar, a little at a time, until you reach your desired thickness. If you’re in a pinch, putting it in the fridge for about 15 minutes can also help.
Is this recipe safe for people with allergies?
While this cake contains common allergens such as gluten and dairy, there are adjustments you can make! For a gluten-free option, substitute cake flour with a gluten-free all-purpose blend. To make it dairy-free, replace the cream cheese and butter with dairy-free alternatives. Always check labels to ensure they’re safe for your dietary needs.
Fluffy Cherry Cake with Cherry Cream Cheese Frosting Delight
Ingredients
Equipment
Method
- In a medium saucepan, combine 3 cups of pitted sweet cherries and purée until smooth. Simmer for about 15 minutes until thickened. Allow to cool completely.
- In a large mixing bowl, whisk together 2.5 cups of cake flour, 1.5 cups of sugar, 1 tablespoon of baking powder, 0.5 teaspoon of baking soda, and 0.5 teaspoon of kosher salt.
- Add in 0.75 cups of softened unsalted butter and mix until the mixture resembles coarse sand.
- Whisk together the cooled cherry puree, 0.5 cups of buttermilk, 0.25 cups of vegetable oil, 4 large egg whites, 1 teaspoon of vanilla extract, and 0.25 teaspoon of almond extract if using. Pour into dry ingredients in two batches, mixing gently until just combined.
- Preheat oven to 350°F (175°C) and grease two 8-inch round pans. Divide the batter evenly and smooth the tops. Bake for 30 to 35 minutes, or until a toothpick comes out clean. Cool in the pans for 10 minutes before transferring to a wire rack.
- For frosting, beat together 0.5 cups of softened unsalted butter and 8 oz of softened cream cheese until creamy. Gradually add 4 cups of powdered sugar until blended, then mix in remaining cherry puree until thick and spreadable.
- Place one cake layer on a serving plate, spread frosting, and add cherry jam if desired. Top with the second layer and frost the top and sides. Chill in the refrigerator for 30 minutes before serving.
Leave a Reply