
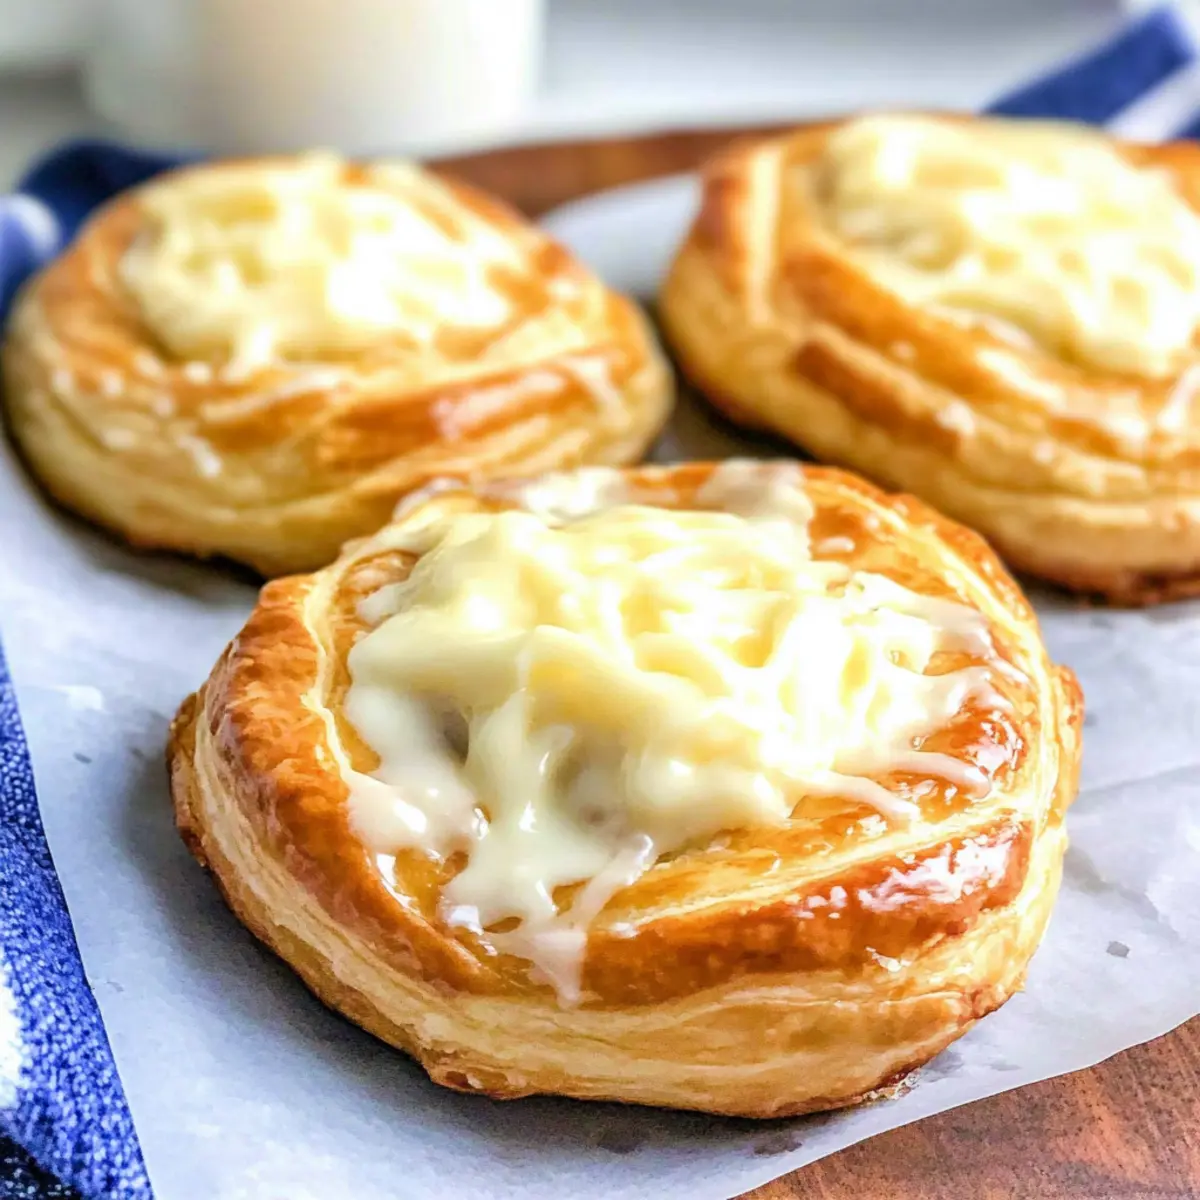
The aroma wafting from my kitchen as these Easy Cheese Danishes bake is nothing short of magical. It’s hard to believe that such flaky perfection can come together in mere minutes! With just a few ingredients, including buttery crescent roll dough and a rich, creamy cream cheese filling, this recipe is a go-to for quick breakfasts or delightful brunches that will impress any guest. Not only are these pastries incredibly simple to whip up, but they also strike that perfect balance of indulgent and approachable. Imagine serving these warm, drizzled with a sweet glaze, alongside a fresh pot of coffee—it’s the kind of comfort that makes any morning feel special. Are you ready to elevate your breakfast game with these delightful treats?
Why Are Cheese Danishes So Irresistible?
Flakiness, the signature feature of these Easy Cheese Danishes, will make you crave more after just one bite. Minimal effort is required—using refrigerated crescent roll dough means you’ll spend less time in the kitchen and more time enjoying delicious pastries. Versatile options abound; customize your filling with fruit or zesty flavors for a unique twist! These danishes are perfect for any occasion, making them a crowd-pleaser at brunch or even a delightful surprise for breakfast. Plus, you can make them ahead, popping them in the oven fresh in the morning, just like with these delectable Bacon Egg Cheese or Cheesy Ham Cheese recipes! What’s not to love?
Cheese Danishes Ingredients
Here’s everything you need to create those heavenly Easy Cheese Danishes!
For the Pastry
- Crescent Roll Dough – A buttery base that provides a flaky texture, making it a breeze to prepare.
- Salted Butter – Brush over the tops for extra richness and a beautifully golden color.
For the Filling
- Cream Cheese – A rich, creamy filling essential for an indulgent pastry experience. Full-fat is best for texture!
- Granulated Sugar – Sweetens the filling just right, making every bite a delightful treat.
- Vanilla Extract – Enhances the flavor and adds a lovely aroma to the filling.
For the Glaze
- Powdered Sugar – Gives that sweet finishing touch for a beautiful glaze.
- Milk – Adjusts the consistency of the glaze, ensuring it drizzles perfectly over the danishes.
For Topping
- Light Brown Sugar – Sprinkled on top for a caramelized finish that adds a hint of sweetness.
Enjoy making these Cheese Danishes that are sure to impress your family and friends!
Step‑by‑Step Instructions for Easy Cheese Danishes
Step 1: Preheat the Oven
Begin by preheating your oven to 375°F (190°C) and prepare a baking sheet by lining it with parchment paper. This will ensure the bottom of your Easy Cheese Danishes won’t stick while baking. A lined sheet also makes cleanup a breeze. Once the oven reaches the set temperature, you are ready to start assembling your pastries.
Step 2: Prepare the Dough
Open the packages of crescent roll dough and carefully unroll them on a clean surface. You’ll want to separate the dough into the triangle-shaped pieces as indicated on the packaging. This easy-to-use dough will form the flaky outer layer of your Cheese Danishes. Make sure each piece remains intact to ensure a perfect pastry shape.
Step 3: Make the Cream Cheese Filling
In a mixing bowl, combine softened cream cheese, granulated sugar, and vanilla extract. Using a hand mixer or a fork, blend these ingredients until the mixture is smooth and creamy. This luscious filling is the heart of your Easy Cheese Danishes, so take a moment to ensure there are no lumps for a silky texture that melts in your mouth.
Step 4: Assemble the Danishes
Take one triangle of dough and place a generous spoonful of the cream cheese filling at the wide end. Carefully roll the dough away from you, starting from the filling, creating a small pocket. Pinch the edges to seal the filling inside, ensuring no leaks during baking. Repeat this process for all the dough triangles, creating your delicious Cheese Danishes.
Step 5: Brush and Sprinkle
Melt a tablespoon of salted butter in a microwave-safe bowl. Using a pastry brush, lightly coat the tops of each Danish with the melted butter. Then, sprinkle each with light brown sugar for that sweet, caramelized finish that adds texture. This little step elevates your danishes from good to irresistibly delightful.
Step 6: Bake the Danishes
Place the assembled Cheese Danishes onto your prepared baking sheet, ensuring they have enough space to expand. Slide them into the preheated oven and bake for about 18 minutes, or until they are beautifully golden brown and flaky. You’ll know they’re done when you see a lovely golden hue taking shape!
Step 7: Prepare the Glaze
While the danishes cool on a wire rack, you can whip up a quick glaze. In a bowl, mix powdered sugar, a splash of vanilla extract, and milk until smooth and drizzable. Adjust the milk to get your desired consistency. This glaze will add a sweet finish to your Easy Cheese Danishes, making them even more tempting!
Step 8: Apply the Glaze and Serve
Once the Cheese Danishes have cooled slightly, drizzle the glaze generously over the top using a spoon or piping bag for a lovely aesthetic. Serve these delectable pastries warm alongside your favorite coffee or tea. They’re perfect for brunch gatherings or simply to treat yourself any time of the day!
Cheese Danishes Variations & Substitutions
Unleash your creativity and make these Cheese Danishes truly yours with simple, delightful twists!
-
Fruit-Filled: Add a spoonful of your favorite berries or fruit preserves to the filling for a burst of fruity flavor.
-
Low-Fat Option: Swap in low-fat cream cheese for a lighter version that still retains a creamy texture.
-
Citrus Zing: Mix in freshly grated lemon or orange zest to the cream cheese filling for a refreshing citrus burst.
-
Nutty Crunch: Incorporate chopped nuts or toasted almonds into the filling for added texture and a rich flavor contrast.
-
Spiced Delight: Add a pinch of cinnamon or nutmeg to the filling for a comforting spice that warms every bite.
-
Maple Glaze: Instead of a powdered sugar glaze, drizzle with maple syrup for a unique, sweet finish that pairs perfectly with the danishes.
-
Chocolate Lover’s Dream: Fold in mini chocolate chips to the cream cheese mixture for a decadent twist that any chocolate lover will adore.
-
Savory Variant: Replace cream cheese with a blend of ricotta and herbs for a savory pastry that’s perfect for brunch alongside savory dishes like Philly Cheesesteak Egg rolls.
Explore these variations to adapt your Cheese Danishes for different tastes and occasions!
How to Store and Freeze Cheese Danishes
Fridge: Store your leftover Cheese Danishes in an airtight container in the refrigerator for up to 3 days. This helps maintain moisture and retains their delightful texture.
Freezer: To freeze, wrap the baked Cheese Danishes individually in plastic wrap and place them in a freezer-safe bag. They can be frozen for up to 2 months.
Reheating: When you’re ready to enjoy a danish, reheat in a preheated oven at 350°F (175°C) for about 10-15 minutes. This will help restore their flaky goodness, making them taste fresh-baked again.
Make-Ahead Tip: Assemble the Cheese Danishes ahead of time, refrigerate, and bake fresh the next day!
What to Serve with Easy Cheese Danishes?
The magical aroma of freshly baked pastries paired with delightful accompaniments creates a truly memorable breakfast experience.
- Fresh Fruit Salad: A colorful mix of juicy berries and citrus fruits adds a refreshing burst and a healthy balance to your rich danishes.
- Rich Coffee: Brew a steaming cup of your favorite coffee to complement the sweetness; the bitterness cuts through the richness beautifully.
- Scrambled Eggs: Fluffy, lightly seasoned eggs provide protein and create a satisfying brunch spread that pairs perfectly with sweet treats.
- Flavored Yogurt: Creamy yogurt drizzled with honey or topped with nuts brings a tangy contrast to the sweet cheese filling, enhancing the overall experience.
- Herbal Tea: A soothing cup of chamomile or mint tea offers a gentle counterbalance to the richness of the danishes, perfect for a relaxing morning.
- Chocolate Drizzle: For an indulgent twist, drizzle some melted chocolate over your danish; the combination of chocolate and creamy filling is pure bliss.
Crafting a complete breakfast around your Easy Cheese Danishes ensures that every bite is a celebration of flavor and comfort for your family and friends!
Make Ahead Options
These Easy Cheese Danishes are a fantastic option for meal prep enthusiasts looking to save time on busy mornings! You can assemble the danishes and refrigerate them for up to 24 hours before baking. Simply prepare the crescent roll dough and cream cheese filling, assemble the pastries, and place them in an airtight container without glazing. This will maintain their freshness and flakiness. When you’re ready to enjoy, pop them in the oven as directed for a delightful treat that tastes just as fresh as when made from scratch! Baking them straight from the refrigerator may require an additional 2-3 minutes in the oven for perfect results.
Expert Tips for Easy Cheese Danishes
-
Softened Cream Cheese: Ensure your cream cheese is at room temperature for a smoother filling that blends easily without lumps.
-
Avoid Overfilling: Keep your filling modest; overfilling can cause leaks during baking, making a mess that’s hard to clean up.
-
Brush Carefully: When brushing with salted butter, do it lightly to enhance flavor and achieve a beautiful golden crust without sogginess.
-
Pre-Bake Prep: Assemble your Cheese Danishes and refrigerate for up to 24 hours before baking for a fresher and quicker morning pastry option.
-
Maintain Flakiness: For the best texture, reheat baked danishes in the oven instead of the microwave; this restores their signature flakiness beautifully.

Easy Cheese Danishes Recipe FAQs
What kind of cream cheese should I use for the filling?
I recommend using full-fat cream cheese for the richest and creamiest filling. It helps achieve that perfect smooth texture, which is key to mimicking the flavors of a gourmet bakery.
How long can I store the Cheese Danishes in the refrigerator?
You can store leftover Cheese Danishes in an airtight container in the refrigerator for up to 3 days. This will help keep them fresh and maintain their delightful texture!
Can I freeze Cheese Danishes after baking?
Absolutely! To freeze, first ensure the Cheese Danishes are completely cooled. Wrap each one individually in plastic wrap and place them in a freezer-safe bag. They can be frozen for up to 2 months. When you’re ready to enjoy one, simply reheat it in a preheated oven at 350°F (175°C) for about 10-15 minutes to restore their flaky goodness.
What should I do if my danishes leak filling during baking?
If you find that your danishes leak filling, it’s likely because they were overfilled. For next time, be sure to use a modest spoonful of filling—just enough to fill but not overflow. Also, pinch the edges tightly to seal. If they do leak, just enjoy the crispy edges!
Can I make Cheese Danishes ahead of time?
Yes, you can! Assemble the Cheese Danishes and store them in the refrigerator for up to 24 hours before baking. This way, you can have fresh pastries ready to pop in the oven the next morning!
Are Cheese Danishes safe for pets or those with allergies?
Cheese Danishes contain ingredients like cream cheese and sugar that may not be suitable for pets. Additionally, if you or your guests have allergies, be mindful of any dietary restrictions regarding dairy or gluten in crescent roll dough. Always check labels for possible allergens.
Deliciously Easy Cheese Danishes You Can Make at Home
Ingredients
Equipment
Method
- Preheat your oven to 375°F (190°C) and line a baking sheet with parchment paper.
- Open the crescent roll dough packages and unroll the dough into triangle-shaped pieces.
- In a mixing bowl, combine softened cream cheese, granulated sugar, and vanilla extract until smooth.
- Take a triangle of dough and place a spoonful of the cream cheese filling at the wide end, rolling it up.
- Brush the tops of each Danish with melted salted butter and sprinkle with light brown sugar.
- Bake the assembled Cheese Danishes for about 18 minutes until golden brown.
- Mix powdered sugar, vanilla extract, and milk to create a smooth glaze.
- Drizzle glaze over the warm Cheese Danishes and serve with coffee or tea.
Leave a Reply