
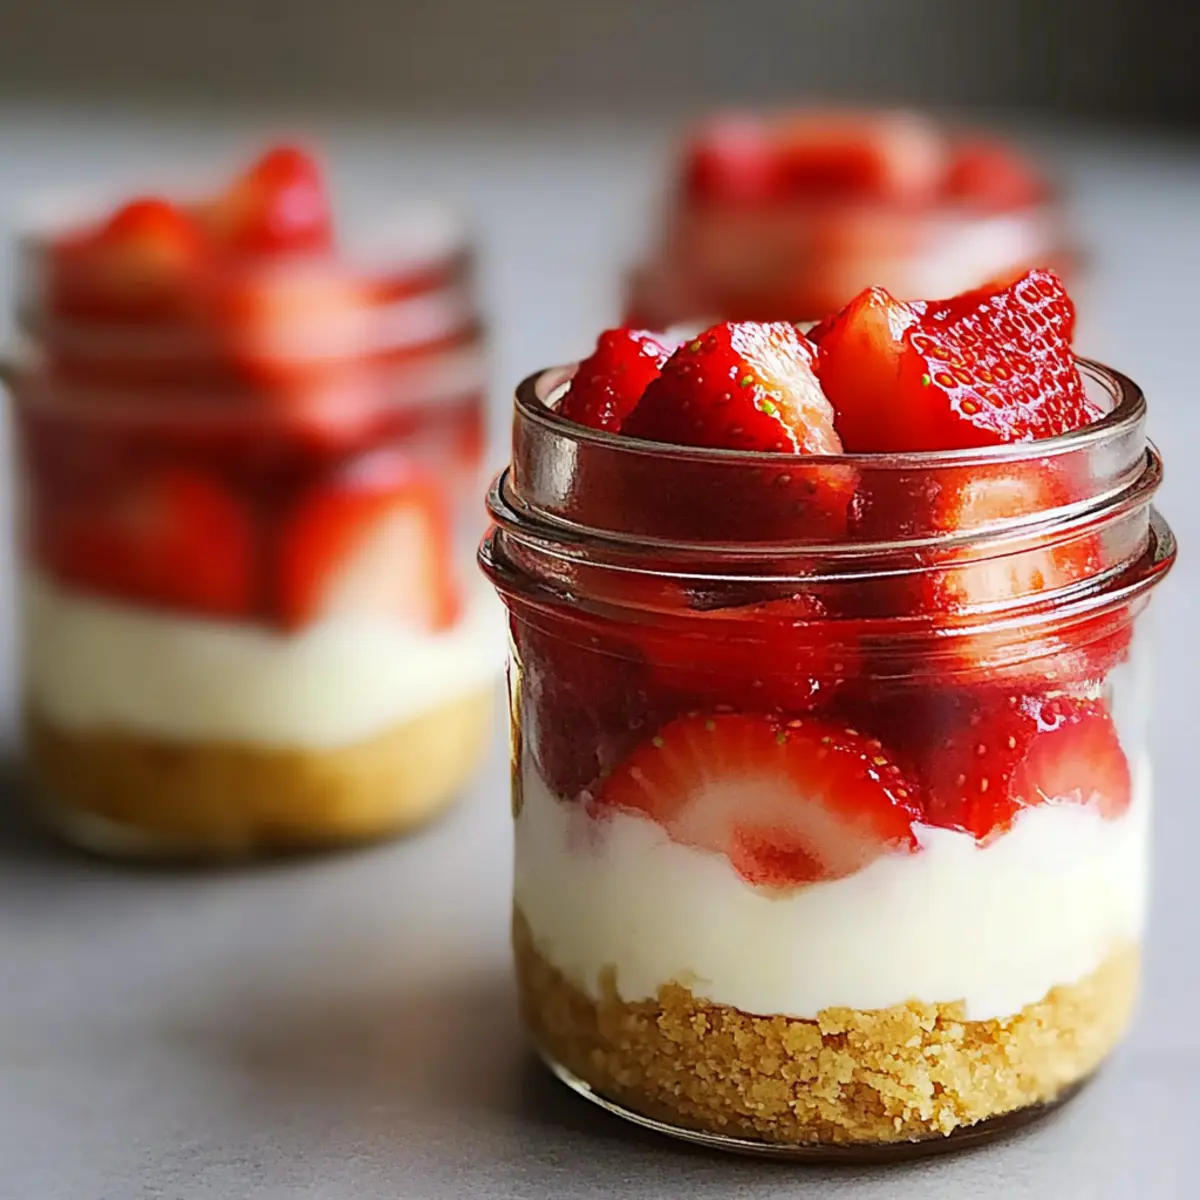
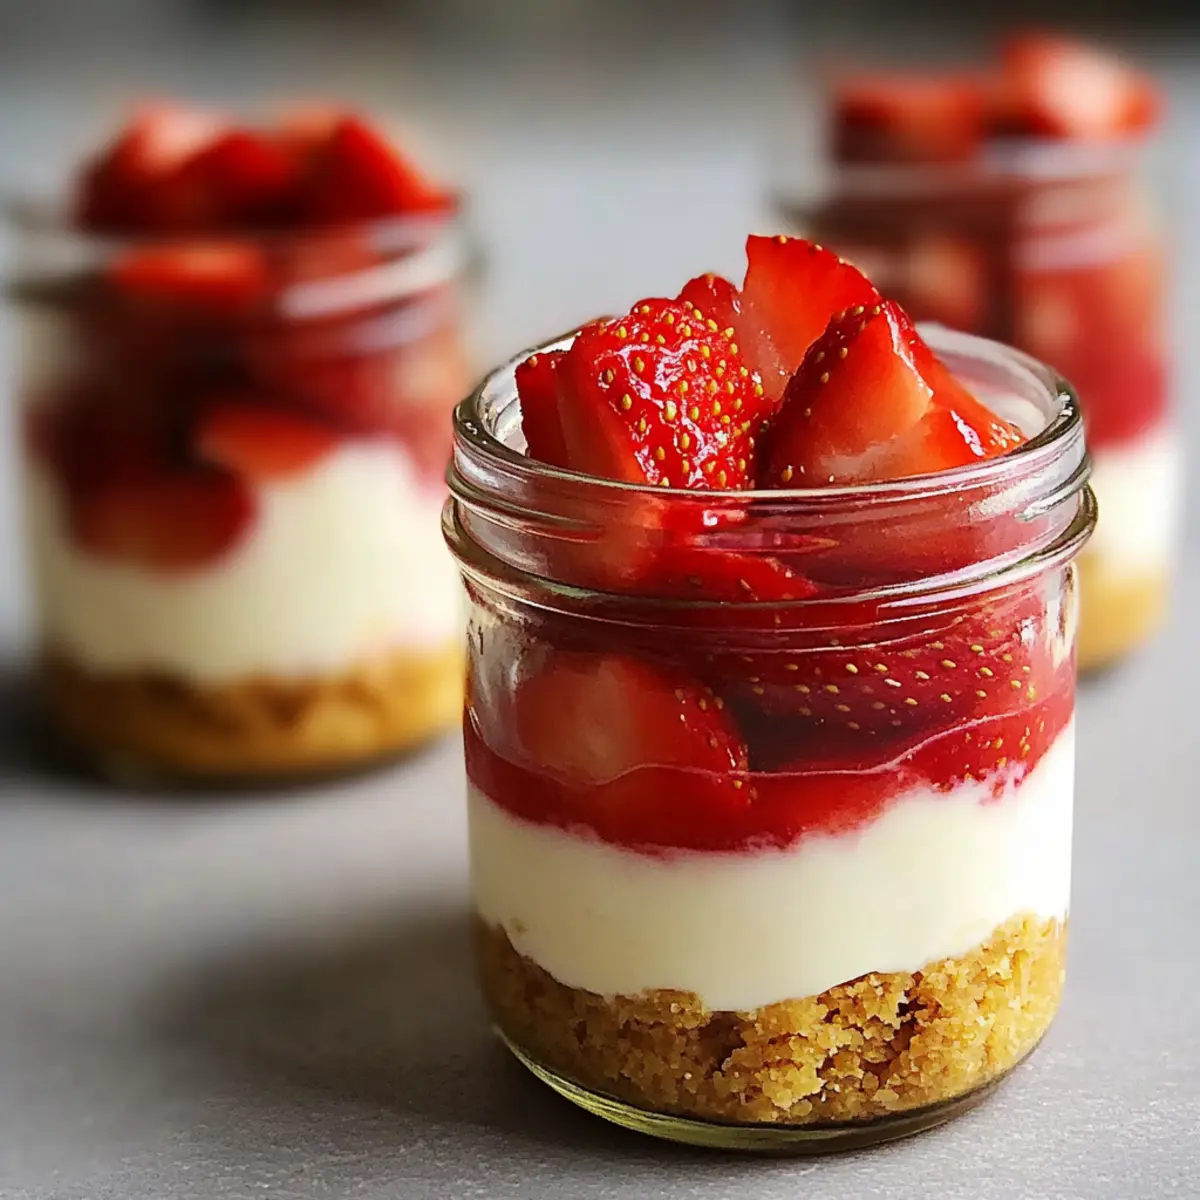
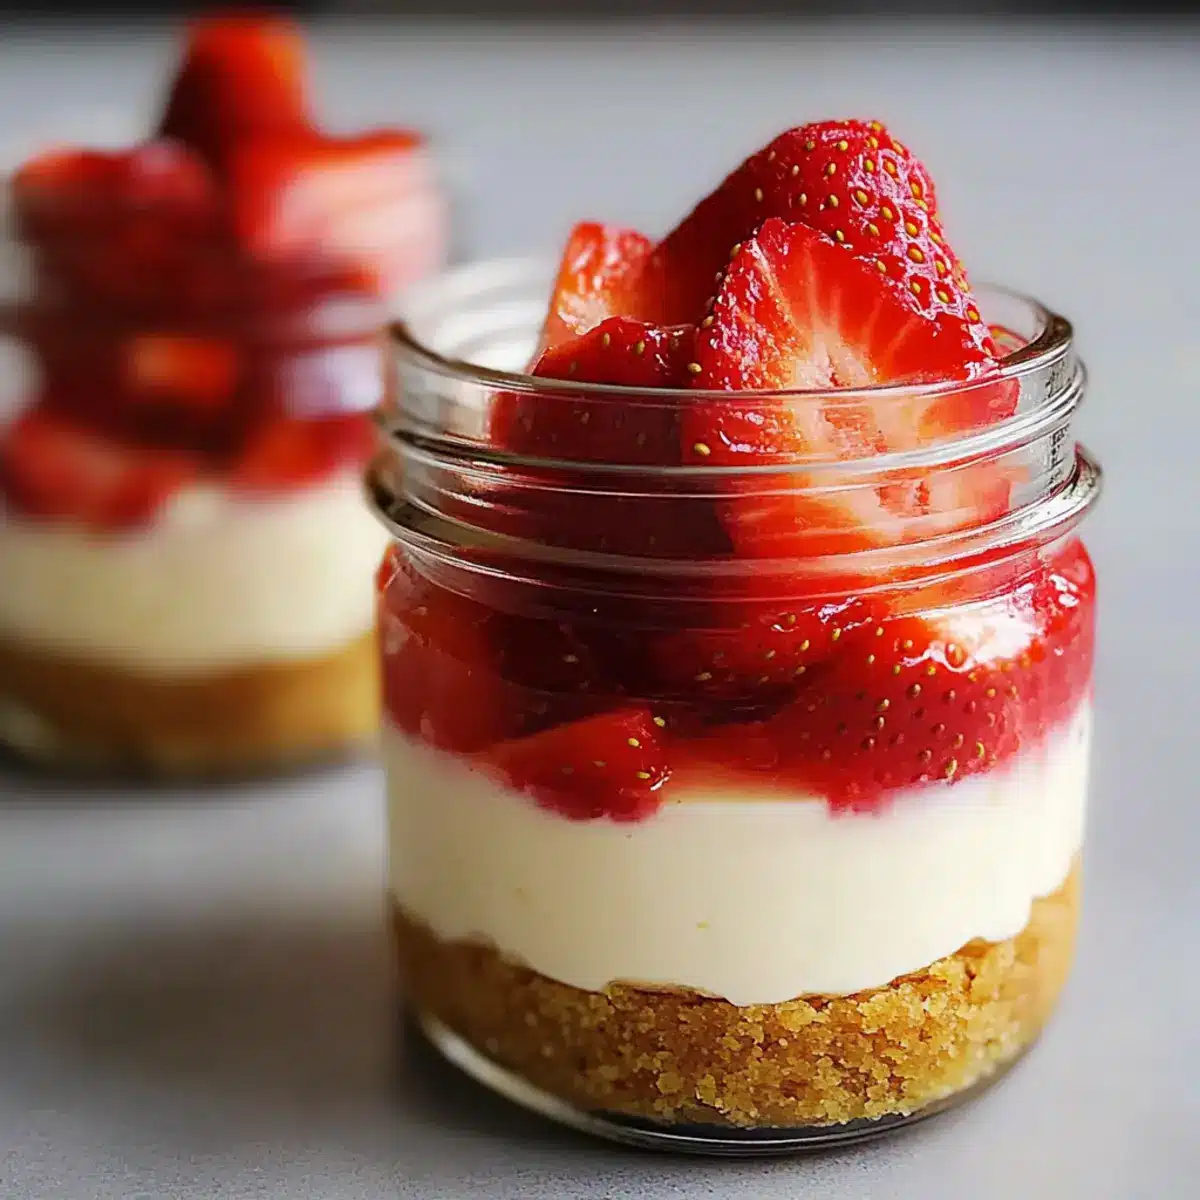
As I opened the fridge door on a sweltering summer afternoon, the sight of my No-Bake Strawberry Cheesecake Jars brought a wave of relief and joy. With just 20 minutes of prep, I could effortlessly whip up a sweet, cool treat that’s not only vegetarian-friendly but can be easily customized for gluten-free diets too! These jars are the ideal solution for those impromptu gatherings or a delightful family dessert, layering rich cheesecake with the freshness of strawberries. Each spoonful captures the essence of summer, making it impossible to resist. Curious how to create this perfect, no-fuss dessert? Let’s dive into the details!
Why Choose No-Bake Strawberry Cheesecake Jars?
Effortless Preparation: You’ll love how this recipe comes together in just 20 minutes with minimal fuss.
Versatile Treat: Enjoy endless customization with various fruit toppings like blueberries or raspberries, and gluten-free options make it suitable for everyone.
Refreshing Delight: The combination of creamy cheesecake and fresh strawberries creates a refreshing, light dessert perfect for hot summer days.
Crowd-Pleasing: Ideal for gatherings, these jars are visually stunning and sure to impress family and friends.
Make Ahead: Prep these delightful jars a day in advance, so you’re ready for any occasion—an effortless sweet treat without the last-minute stress!
Get inspired with other delicious desserts, like Strawberry Cheesecake Protein or a seasonal favorite, Christmas Cheesecake Cranberry.
No-Bake Strawberry Cheesecake Jars Ingredients
Ready to create your No-Bake Strawberry Cheesecake Jars? Here’s everything you need to bring this delightful dessert to life!
For the Crust
• Graham Cracker Crumbs – A sturdy base for your jars; swap with gluten-free crackers if needed.
• Butter (melted) – Binds the crumbs together; choose unsalted for a balanced flavor.
For the Cheesecake Filling
• Cream Cheese (softened) – The creamy foundation of your cheesecake; bring it to room temperature for easy blending.
• Powdered Sugar – Sweetens the filling beautifully; use less if you prefer a lighter touch.
• Vanilla Extract – Adds warmth to your dessert; pure vanilla extract provides the best flavor.
• Heavy Cream – Gives the filling a light, fluffy texture; whip until stiff peaks form for perfect creaminess.
For the Topping
• Fresh Strawberries (sliced) – Bright, fresh topping that enhances flavor and visual appeal; feel free to mix in other berries for variety.
Step‑by‑Step Instructions for No-Bake Strawberry Cheesecake Jars
Step 1: Prepare the crust
In a mixing bowl, combine graham cracker crumbs with melted butter until it resembles wet sand. This mixture should hold together when pressed. Using your fingers or the back of a spoon, firmly press the crumb mixture into the bottom of each jar, creating an even layer. Set the jars aside while you prepare the cheesecake filling.
Step 2: Make cheesecake filling
In a large mixing bowl, beat the softened cream cheese with powdered sugar and vanilla extract using an electric mixer. Mix on medium speed until the mixture is smooth and creamy, about 2-3 minutes. Make sure there are no lumps, and scrape down the sides of the bowl as needed to ensure everything is well combined.
Step 3: Whip the cream
In a separate chilled bowl, pour in the heavy cream and whip using a hand mixer. Beat until stiff peaks form, which usually takes about 3-5 minutes. As you whip, keep an eye on the texture; the cream should be thick and hold its shape without becoming grainy. This will add lightness to your No-Bake Strawberry Cheesecake filling.
Step 4: Fold in the whipped cream
Carefully fold the whipped cream into the cream cheese mixture using a spatula. Start with a third of the whipped cream, gently folding until incorporated, then add the remaining whipped cream. Be gentle to maintain the airy texture, as this will give your cheesecake the light and fluffy texture everyone loves.
Step 5: Layering
Now it’s time to assemble your No-Bake Strawberry Cheesecake Jars! Spoon a generous layer of the cheesecake filling into each jar, about halfway full. Next, add a layer of sliced strawberries on top of the cheesecake. Repeat the layers, finishing with another dollop of cheesecake filling, and a beautiful layer of strawberries on top for presentation.
Step 6: Chill
Cover each jar with a lid or plastic wrap and refrigerate for at least 2 hours. This chilling time allows the flavors to meld beautifully and the cheesecake to set. You’ll know they’re ready when the filling is firm to the touch but still creamy. Enjoy the anticipation as you wait for your delightful No-Bake Strawberry Cheesecake Jars to be ready!
What to Serve with No-Bake Strawberry Cheesecake Jars
As you savor the creamy delight of your dessert, the right accompaniments can elevate your summer dining experience to new heights.
- Fresh Mint Leaves: A garnish of mint adds a refreshing and aromatic touch, brightening each creamy bite with a hint of herbal freshness.
- Lemon Sorbet: The zesty and cooling sorbet complements the richness of the cheesecake, providing a delightful contrast in both texture and flavor.
- Grilled Peaches: The caramelized sweetness of grilled peaches pairs beautifully with the strawberries, creating a warm, fruity delight against the cold cheesecake.
- Dark Chocolate Shavings: A sprinkle of bittersweet chocolate adds depth and a touch of elegance to the dessert, balancing the sweetness perfectly.
- Sparkling Water with Lime: Serve alongside fizzy sparkling water for a refreshing drink that cleanses the palate between rich bites.
- Peanut Butter Sauce: Drizzle a creamy peanut butter sauce on the cheesecake for an unexpected, nutty richness that enhances the overall flavor profile.
- Almond Biscotti: These crunchy treats provide a satisfying crunch that contrasts beautifully with the smooth cheesecake, perfect for dipping.
- Berry Smoothie: A luscious berry smoothie not only mirrors the flavors of the cheesecake but also adds a fun, new texture to your dessert experience.
Make Ahead Options
These No-Bake Strawberry Cheesecake Jars are perfect for busy home cooks looking to save time! You can prepare the cheesecake filling up to 24 hours in advance. Just mix the ingredients and store them in an airtight container in the refrigerator to maintain that creamy texture. The crust can also be made ahead of time; simply press it into the jars and refrigerate until you’re ready to layer. When you’re almost ready to serve, just layer in the strawberries for that fresh burst of flavor. This way, you can enjoy a hassle-free dessert with minimal effort, keeping it just as delicious and delightful!
Expert Tips for No-Bake Strawberry Cheesecake Jars
-
Cream Cheese Care: Ensure your cream cheese is softened to room temperature before mixing; this helps achieve a smooth, creamy filling without lumps.
-
Gentle Folding: When incorporating whipped cream into the cheesecake mixture, do so gently to maintain the fluffy texture essential for your No-Bake Strawberry Cheesecake Jars.
-
Chill Smartly: Cover your jars while chilling to prevent drying out and to keep the flavors vibrant; this step makes all the difference!
-
Mixing Variations: Feel free to swap strawberries for other fruits like blueberries or raspberries for exciting flavor combinations that keep things fresh and fun.
-
Make-Ahead Flexibility: Prep your jars a day in advance; they taste even better after a night in the fridge, making desserts effortless for any occasion!
Storage Tips for No-Bake Strawberry Cheesecake Jars
Fridge: Store your No-Bake Strawberry Cheesecake Jars in the refrigerator for up to 3-4 days. Make sure the jars are covered to keep the filling fresh and prevent drying out.
Freezer: If you want to freeze the jars, they can be stored for up to 1 month. Note that the texture may change upon thawing, so it’s best to enjoy them fresh if possible.
Reheating: These jars are best served chilled and do not require reheating. Simply take them out of the fridge or freezer and enjoy!
Make Ahead: Feel free to prepare your No-Bake Strawberry Cheesecake Jars a day in advance for gatherings; they taste even better after soaking in the flavors overnight!
No-Bake Strawberry Cheesecake Jars Variations
Feel free to explore these delightful twists on your No-Bake Strawberry Cheesecake Jars, adding your personal touch to this creamy treat!
- Gluten-Free Crust: Substitute graham cracker crumbs with crushed gluten-free cookies for a deliciously inclusive dessert.
- Flavorful Swaps: Swap fresh strawberries with blueberries or raspberries for a burst of different flavors and colors in every jar.
- Nutty Crunch: Add some crushed nuts like pecans or pistachios to the crust for extra texture and flavor. The added nuttiness gives each bite a delightful crunch that contrasts beautifully with the creamy filling.
- Chocolate Layer: Drizzle melted chocolate over the cheesecake filling for a rich, indulgent touch. Chocolate lovers will adore this addition!
- Citrus Zest: Add a teaspoon of lemon or orange zest into the cheesecake filling for a refreshing citrus twist that elevates the flavor profile. The citrus brightness lifts the sweetness, creating a perfectly balanced dessert.
- Dairy-Free Delight: Use coconut cream instead of heavy cream and dairy-free cream cheese for a vegan version that’s just as satisfying. This creamy alternative adds a tropical flair that pairs wonderfully with the strawberries.
- Sweetening Varieties: Experiment with honey or maple syrup as a natural sweetener in place of powdered sugar for a different sweetness experience that’s still delicious.
- Spicy Kick: Add a dash of cinnamon or a pinch of cayenne pepper for an unexpected warmth that complements the sweetness beautifully. This subtle heat will intrigue your palate and make every bite a new adventure.
Now, if you’re in the mood for more delicious no-bake treats, consider trying these other recipes: a refreshing Blueberry Lemon Cheesecake or the festive Christmas Cheesecake Cranberry. Each offers its unique charm and flavor profile!
No-Bake Strawberry Cheesecake Jars Recipe FAQs
What type of strawberries should I use?
Absolutely! Always choose fresh strawberries that are bright red and firm to the touch. Avoid those with dark spots all over or soft patches, as they may be overripe. Feel free to swap strawberries with other berries like blueberries or raspberries for varied flavors!
How should I store the No-Bake Strawberry Cheesecake Jars?
For the best taste, keep your jars in the refrigerator covered with a lid or plastic wrap for up to 3-4 days. This helps maintain their freshness and prevents drying out.
Can I freeze the No-Bake Strawberry Cheesecake Jars?
Yes, you can freeze them! To do so, make sure each jar is tightly sealed and store them in the freezer for up to 1 month. When you’re ready to enjoy them, let them thaw in the refrigerator overnight for best results. Note that the texture may change slightly after freezing.
What should I do if my cheesecake filling is lumpy?
If your filling is lumpy, it’s likely because the cream cheese wasn’t softened enough before mixing. To fix this, let the filled jars sit at room temperature for a bit, then give the filling a gentle stir to smooth things out. For the next time, ensure your cream cheese is at room temperature for a smoother, creamier mixture.
Are No-Bake Strawberry Cheesecake Jars suitable for those with dietary allergies?
Yes! This recipe is vegetarian-friendly and can also be made gluten-free with the right crust substitutes, like gluten-free graham crackers. Always check ingredient labels for any specific allergens, and feel free to customize toppings based on dietary needs. Your loved ones will appreciate the thoughtfulness!
Can I prepare these jars a day in advance?
Very! Preparing your No-Bake Strawberry Cheesecake Jars a day ahead actually enhances their flavor as they chill and meld overnight. Just cover them to keep the filling fresh, and you’ll have an effortless dessert ready for your gathering. Enjoy the convenience!

No-Bake Strawberry Cheesecake Jars for Quick Summer Bliss
Ingredients
Equipment
Method
- In a mixing bowl, combine graham cracker crumbs with melted butter until it resembles wet sand. Firmly press the mixture into the bottom of each jar and set aside.
- In a large bowl, beat softened cream cheese with powdered sugar and vanilla extract until smooth and creamy, about 2-3 minutes.
- In a separate chilled bowl, whip the heavy cream until stiff peaks form, about 3-5 minutes.
- Gently fold the whipped cream into the cream cheese mixture, maintaining the airy texture.
- Spoon a layer of cheesecake filling into each jar, add a layer of sliced strawberries, and repeat the layers. Finish with another layer of cheesecake and strawberries.
- Cover the jars and refrigerate for at least 2 hours to allow the flavors to meld and the cheesecake to set.
Leave a Reply