
As I stood in my kitchen, the sweet aroma of melting butter and marshmallows instantly transported me back to carefree childhood afternoons filled with laughter and sticky fingers. This is the magic of Biscoff Rice Krispie Treats—where the classic crispiness of Rice Krispies meets the warm, spiced notes of Biscoff cookies. Not only are these treats a nostalgic indulgence that bring joy to any occasion, but they’re also incredibly quick to whip up, making them perfect for unexpected guests or a cozy movie night. Plus, they can easily be customized with nuts, chocolate drizzles, or even a s’mores twist! Why stick to the mundane when you can elevate your snack game? Let’s dive into this delightful recipe that promises to sweeten your day.
Why are Biscoff Rice Krispie Treats so special?
Sweet nostalgia: These treats bring back cherished childhood memories, turning any moment into a heartwarming experience.
Unique flavor: The combination of crispy Rice Krispies and rich Biscoff spread creates a delightful twist on a classic favorite.
Effortless preparation: With just a few simple ingredients, you can whip these up in no time, perfect for both seasoned chefs and kitchen novices.
Versatile indulgence: Personalize them with nuts or a drizzle of chocolate, or try the s’mores variation for a playful twist. For additional inspiration, check out our delicious Sticky Chicken Rice for a savory treat after your sweet indulgence.
Crowd-pleaser: Perfect for parties, movie nights, or just because—everyone will love this modern take on a beloved classic!
Biscoff Rice Krispie Treats Ingredients
For the Base
- Rice Krispies – A light & crispy cereal that adds delightful crunch to the treats.
- Marshmallows – Essential for that gooey, chewy texture; mini marshmallows melt perfectly.
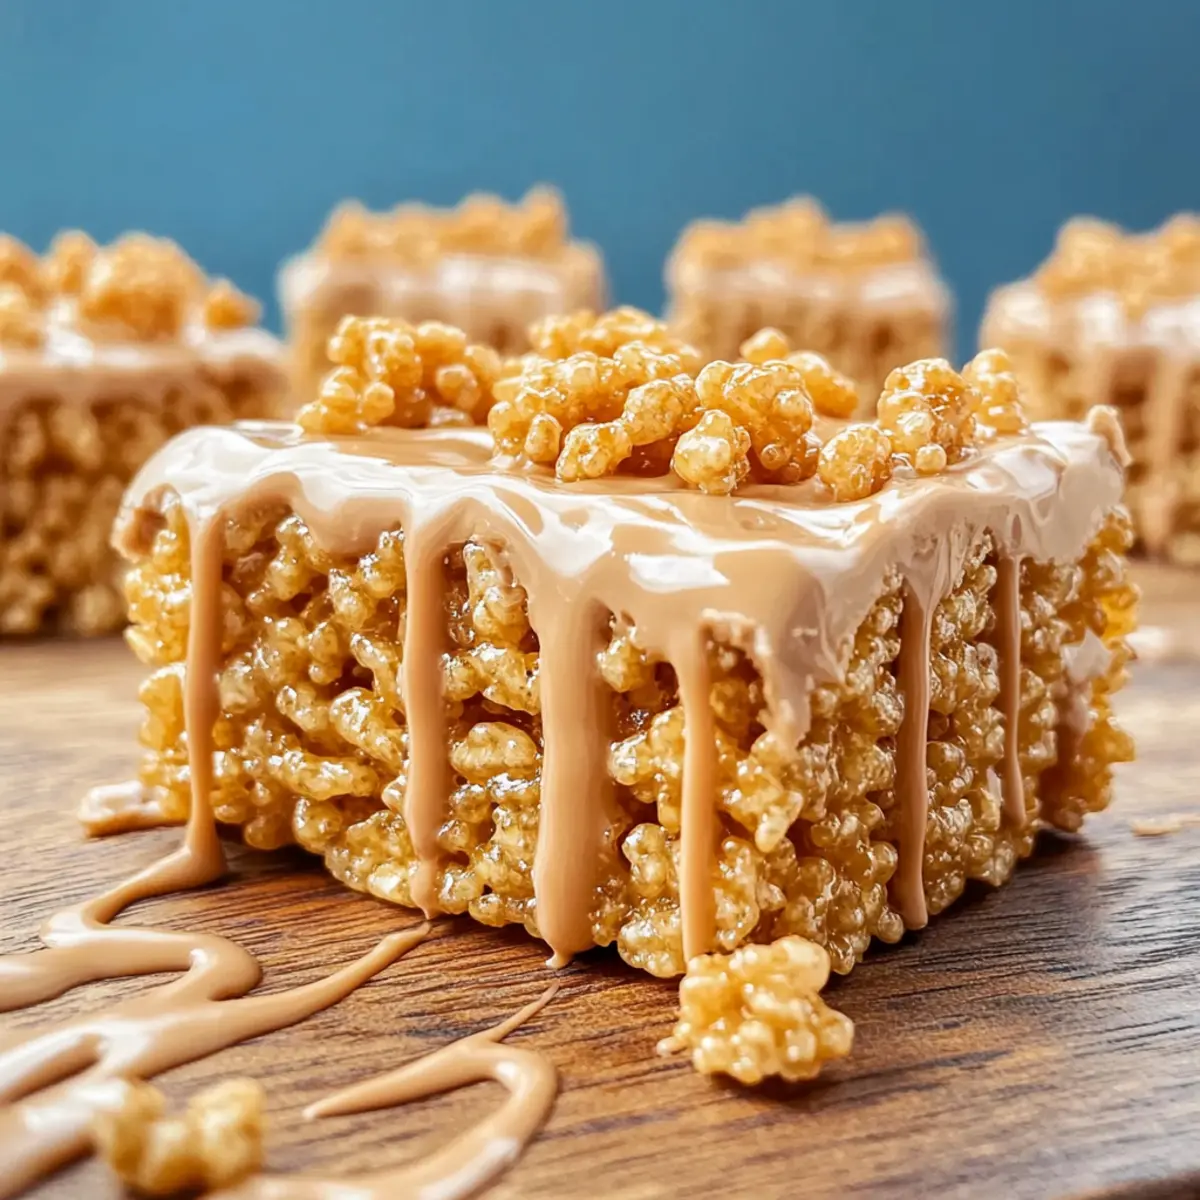
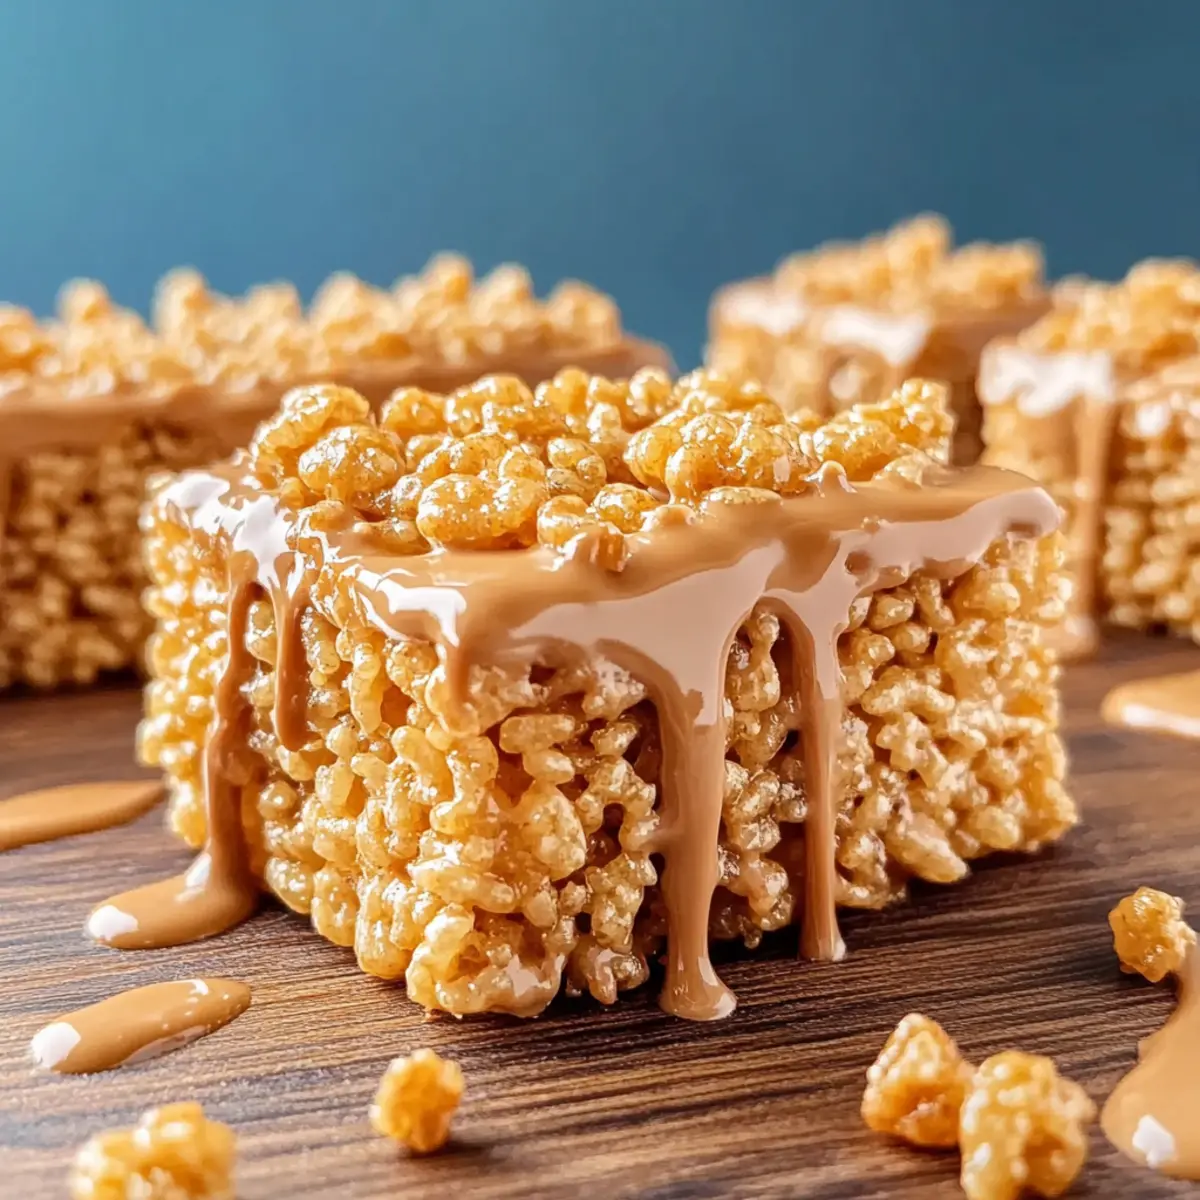
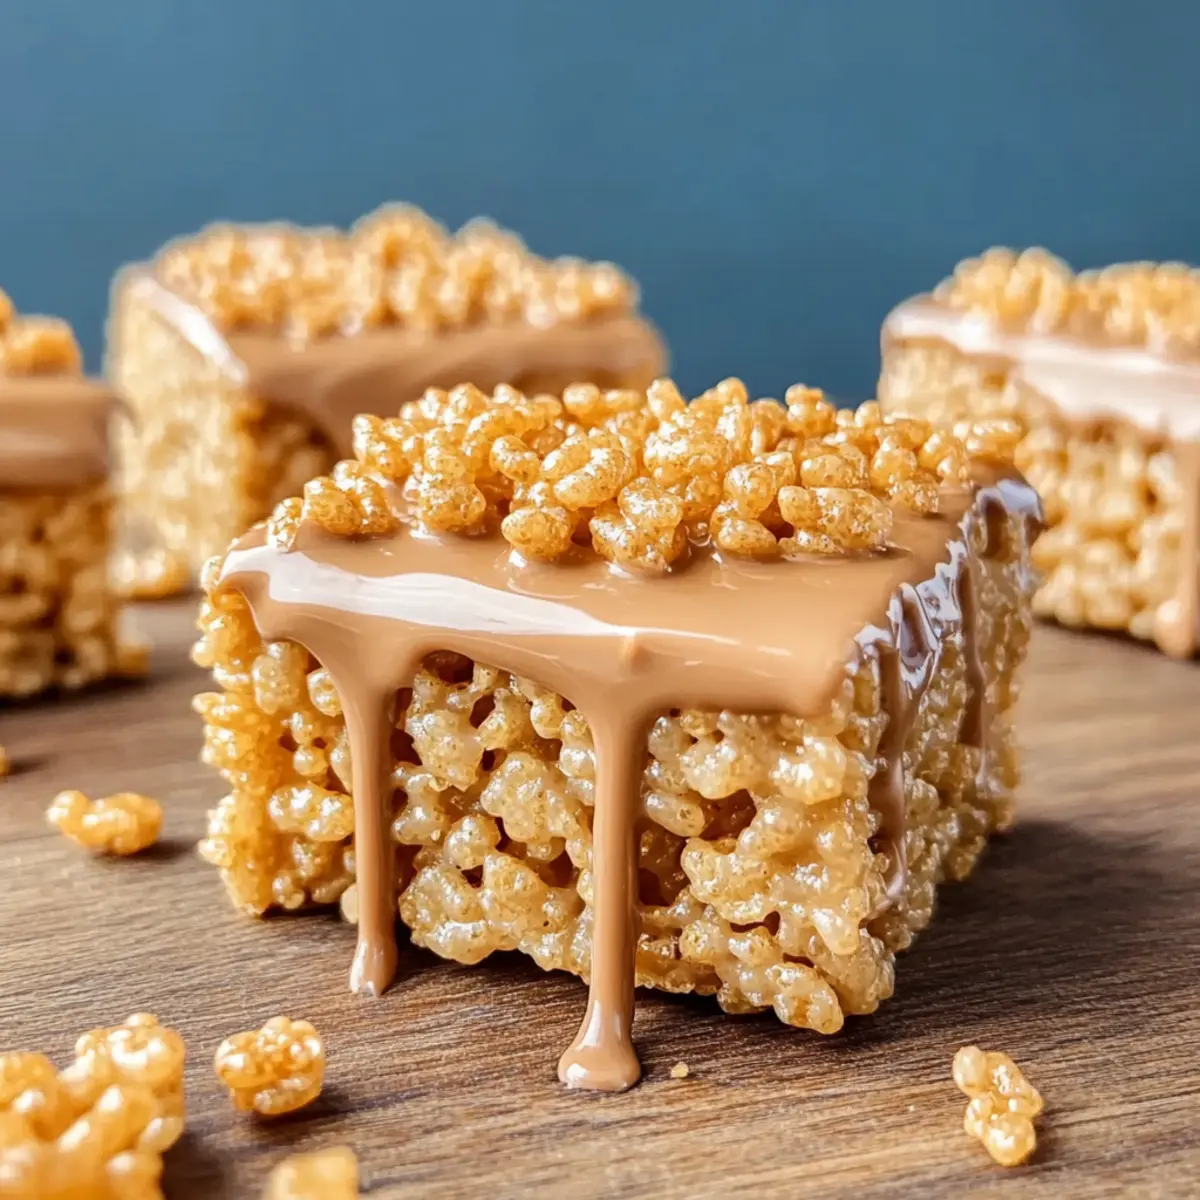
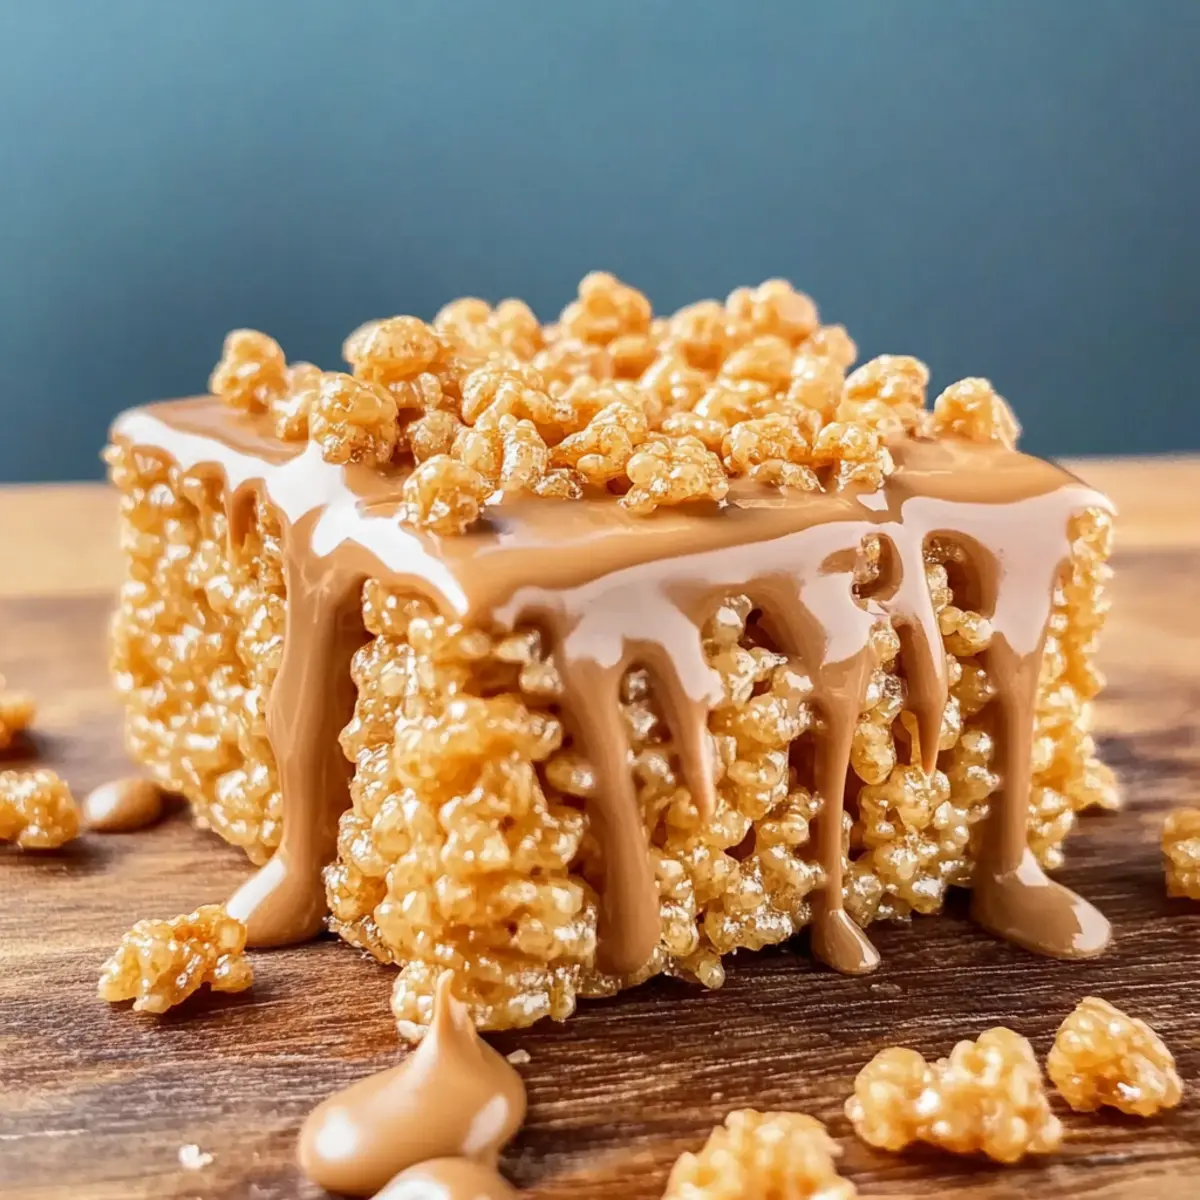
- Biscoff Spread – The star ingredient, providing a unique caramel flavor to elevate the treats.
For the Binding
- Butter – Adds richness and ensures a glossy finish; coconut oil can substitute for a dairy-free option.
- Vanilla Extract – A must-have for enhancing sweetness and complementing the flavors of marshmallows and Biscoff.
Step‑by‑Step Instructions for Biscoff Rice Krispie Treats
Step 1: Melt the Butter
In a medium saucepan, melt 4 tablespoons of butter over low heat, stirring constantly to prevent burning. Once fully melted, the butter should be clear and glossy, creating a rich base for your Biscoff Rice Krispie Treats. This step takes about 2-3 minutes, setting the stage for the gooey marshmallows to follow.
Step 2: Add the Marshmallows
Add 6 cups of mini marshmallows to the melted butter in the saucepan. Stir continuously until the marshmallows are completely melted and the mixture is smooth and creamy. This should take another 3-4 minutes. The marshmallows should no longer have any lumps, and the mixture will appear fluffy and voluminous, coaxing out that delightful sweetness.
Step 3: Incorporate the Biscoff Spread
Remove the saucepan from the heat and promptly stir in 1 cup of Biscoff spread. Mix until everything is fully incorporated and the mixture is evenly combined, resulting in a luscious caramel-hued blend. The Biscoff flavor should permeate the marshmallow mixture, creating a rich, enticing aroma that signals the magic of your Biscoff Rice Krispie Treats.
Step 4: Fold in the Rice Krispies
Gently fold in 6 cups of Rice Krispies to the melted mixture, using a spatula to ensure every crispy rice piece is coated. Be careful not to crush the cereal; this will maintain the crunchy texture vital to the treats. The mixture will start to thicken as you combine. This step should take about 2 minutes of tender folding.
Step 5: Transfer and Press
Grease a 9×13-inch baking dish with butter or non-stick spray to ensure easy removal. Pour the Biscoff Rice Krispie mixture into the dish, spreading it evenly. Using your hands (lightly Greased) or a spatula, press down firmly to create a compact layer, giving the treats their chewy shape. Aim for an even surface, ensuring every bite is just as delicious.
Step 6: Allow to Set
Let the Biscoff Rice Krispie Treats cool at room temperature for about 30 minutes, allowing them to firm up. As they cool, the outer layer will develop a light firmness, while the inside remains soft and gooey. Avoid chilling them in the fridge, as this may alter the texture of the treats, keeping them warm and inviting.
Step 7: Cut and Serve
Once set, use a sharp knife to cut the Biscoff Rice Krispie Treats into squares or rectangles, forming your desired serving sizes. The treats should feel slightly sticky but hold their shape well. Serve them fresh to family and friends, or store them in an airtight container, ready to enjoy later. Each bite promises a nostalgic experience brimming with sweetness.
Expert Tips for Biscoff Rice Krispie Treats
- Choose Fresh Ingredients: Use fresh marshmallows to ensure the right chewy texture; stale marshmallows can lead to a dense treat.
- Watch the Heat: Melt butter on low heat and stir continuously to prevent burning; burnt butter can ruin your mixture’s flavor.
- Fold Gently: When combining the Rice Krispies, fold gently! This preserves their crunchy texture, essential for perfect Biscoff Rice Krispie Treats.
- Cool Before Mixing: Allow the melted mixture to cool slightly before adding Rice Krispies; this helps prevent stickiness that can make mixing challenging.
- Portion Control: Cut into uniform squares for even serving sizes, making it easier to share these delightful treats with friends and family.
How to Store and Freeze Biscoff Rice Krispie Treats
Room Temperature: Store treats in an airtight container at room temperature for up to a week. Layer parchment paper between treats to prevent sticking.
Fridge: If you prefer them chilled, keep in the fridge for up to 10 days. The texture may become firmer, but they’ll still taste delicious.
Freezer: For longer storage, freeze Biscoff Rice Krispie Treats in a sealed container for up to 3 months. Wrap individual bars in plastic wrap to maintain freshness.
Reheating: To enjoy them warm, heat in the microwave for 10-15 seconds. This softens the treats, making them gooey and delightful again, bringing back those sweet memories!
What to Serve with Biscoff Rice Krispie Treats?
Indulging in Biscoff Rice Krispie Treats gives you a perfect opportunity to create a full meal or snack experience that delights all the senses.
-
Rich Coffee: The robust flavors of a freshly brewed coffee contrast beautifully with the sweet, spiced notes of Biscoff, enhancing the overall taste experience.
-
Creamy Ice Cream: A scoop of vanilla or caramel ice cream creates a delightful contrast, making a sweet treat even more indulgent and smooth.
-
Fresh Berries: Add a burst of freshness with strawberries or raspberries; their tartness cuts through the sweetness of the treats, offering a balanced bite.
-
Chocolate Drizzle: Drizzling melted chocolate on top not only adds a luxurious touch but also provides a rich, creamy layer that elevates the entire treat.
-
Nutty Granola: Serve alongside or sprinkle on top for added crunch and a wholesome texture, making each bite even more satisfying.
-
Tea Time: Pair with a fragrant chamomile or chai tea. Both add warmth and complement the cozy vibes these treats inspire.
-
Mini Cheesecakes: For dessert lovers, serving Biscoff Rice Krispie Treats with mini cheesecakes creates a fun platter and offers an exciting variety.
-
Sparkling Water: Refresh with a crisp sparkling water or a fruity mocktail; it cleanses the palate and keeps the snack time vibrant.
Biscoff Rice Krispie Treats Variations
Feel free to explore delightful twists on this classic recipe and elevate your snack experience!
-
Nutty Surprise: Add chopped nuts like pecans or walnuts for a delightful crunch. Their earthy flavor beautifully complements the spiced Biscoff.
-
Chocolate Drizzle: Melt dark or milk chocolate to drizzle over the top for indulgence. Each bite becomes a rich chocolatey treat that’s hard to resist.
-
S’mores Style: Incorporate mini marshmallows and crushed graham crackers for a fun s’mores twist. The result is a nostalgic blend that recreates campfire magic.
-
Cookie Crumble: Sprinkle crushed Biscoff cookies on top before the treats set for extra flavor and texture. This creates a lovely crunch as you bite into the soft treats.
-
Dairy-Free Delight: Substitute the butter with coconut oil for a tasty dairy-free version. Enjoy the same chewy texture while keeping it plant-based!
-
Fruity Twist: Mix in dried fruits such as cranberries or raisins for a hint of tartness. They add a fruity surprise that balances the sweetness beautifully.
-
Spicy Kick: Sprinkle in a dash of cinnamon or ginger for a unique flavor boost. The subtle spice pairs well with the rich Biscoff spread.
For more creative ideas, check out our Biscoff Cookie Butter for another sweet treat or give our Bang Fried Rice a try for a savory option after indulging in these delightful bars!
Make Ahead Options
These Biscoff Rice Krispie Treats are perfect for busy home cooks looking to save time while still indulging in a delightful snack! You can prepare the Rice Krispie mixture and press it into the pan up to 24 hours in advance, allowing the flavors to meld. Simply let it cool and then cover tightly with plastic wrap to maintain freshness. When you’re ready to serve, cut them into squares and enjoy. If you prefer to store leftovers, keep them in an airtight container at room temperature for a week, ensuring they remain just as delicious and chewy. Why not make life easier with these scrumptious make-ahead treats?
Biscoff Rice Krispie Treats Recipe FAQs
What type of Rice Krispies should I use for the best texture?
Absolutely use traditional Rice Krispies for the iconic crunch! They provide the light, airy texture that makes these treats so enjoyable. Avoid using any flavored or crispy rice cereals, as they can alter the final taste and feel of your Biscoff Rice Krispie Treats.
How should I store these treats to keep them fresh?
Store your Biscoff Rice Krispie Treats in an airtight container at room temperature for up to a week. For optimal freshness, layer parchment paper between bars to prevent them from sticking together. If you like them chilled, they can last up to 10 days in the fridge, but be aware that the texture may become a bit firmer.
Can I freeze Biscoff Rice Krispie Treats?
Yes, for longer storage, you can freeze them! Wrap each treat individually in plastic wrap and place them in a sealed freezer-safe container. They can be kept in the freezer for up to 3 months. When you’re ready to enjoy them again, simply remove them from the freezer and let them thaw for a few minutes, or heat them in the microwave for 10-15 seconds to bring back that delightful gooey texture.
What should I do if my treats are too sticky?
If your Biscoff Rice Krispie Treats are overly sticky, it may be due to the marshmallows being too hot when mixed with the Rice Krispies. Always let the melted marshmallow mixture cool for a few minutes before adding Rice Krispies to help with stickiness. Additionally, if you’ve accidentally added more marshmallows than the recipe calls for, try folding in some extra Rice Krispies to balance it out.
Are these treats suitable for those with dietary restrictions?
These Biscoff Rice Krispie Treats can be made vegetarian, but if you are concerned about allergies or dietary restrictions, always check the labels on your marshmallows and Biscoff spread, as they may contain allergens like gluten or nuts. For a dairy-free option, substitute the butter with coconut oil, and be sure to use a certified gluten-free Rice Krispies cereal if necessary.
Irresistible Biscoff Rice Krispie Treats for Sweet Nostalgia
Ingredients
Equipment
Method
- Melt the butter in a medium saucepan over low heat, stirring constantly until fully melted.
- Add the mini marshmallows to the melted butter, stirring until smooth and creamy.
- Remove from heat and stir in the Biscoff spread until fully incorporated.
- Gently fold in the Rice Krispies, ensuring each piece is coated without crushing.
- Pour the mixture into a greased 9x13-inch baking dish and press down firmly.
- Let the treats cool at room temperature for about 30 minutes to firm up.
- Once set, cut into squares and serve.
Leave a Reply