
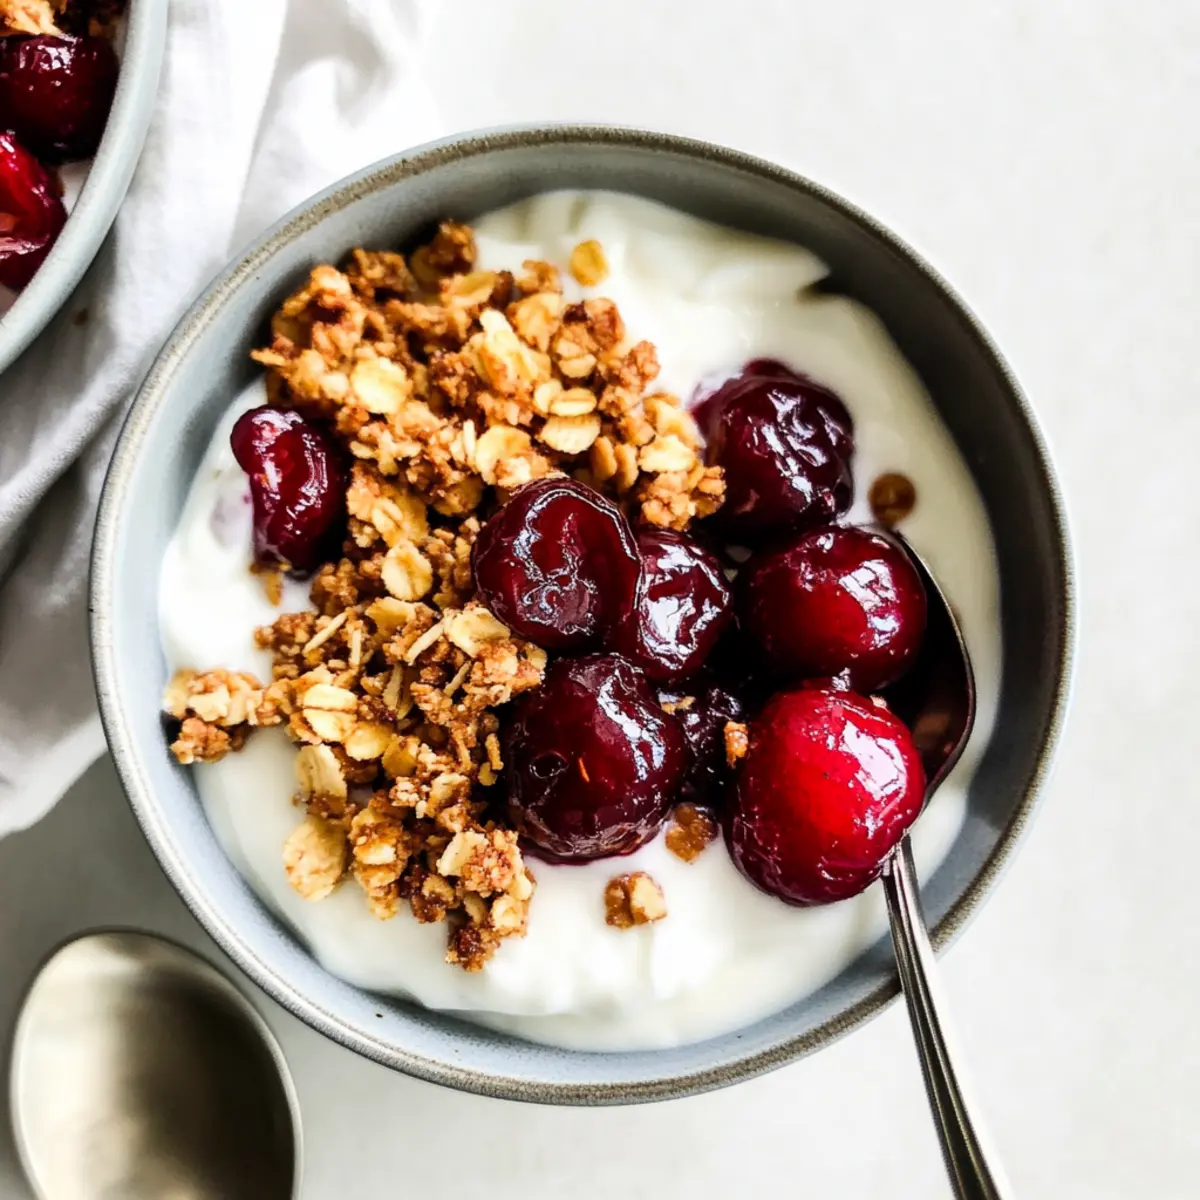
As I sat on my porch enjoying the warm summer breeze, the sweet scent of ripe cherries wafted through the air, beckoning me to create something delightful in the kitchen. That’s when I decided to whip up these Easy Roasted Cherry Yogurt Bowls—a recipe that captures the essence of summertime. The caramelized cherries, drizzled over creamy yogurt, transform this quick dish into a nutritious breakfast, satisfying snack, or playful dessert, all in under 30 minutes. Plus, it’s versatile enough to customize for your dietary needs, making it a go-to for everyone at the table. Ready to dive into a bowl that’s as delicious as it is beautiful? Let’s get started!
Why are Roasted Cherry Yogurt Bowls so special?
Bursting with flavor: The combination of warm, caramelized cherries and creamy yogurt creates a heavenly pairing that is hard to resist.
Quick & Easy: This recipe is ready in just 28 minutes, ensuring you can whip up a delicious dish even on your busiest days.
Customizable: With options for dairy-free or gluten-free alternatives, it caters to various dietary preferences without sacrificing taste.
Texture Harmony: Enjoy the delightful contrast of the soft cherries, smooth yogurt, and crunchy granola, making each bite a delightful experience.
Perfect for Any Occasion: Whether it’s breakfast, a midday snack, or dessert, these bowls are suitable for any time of the day. Want more delicious healthy ideas? Check out these Roasted Cabbage Burgers and the Egg Roll Bowl for more inspiration!
Roasted Cherry Yogurt Bowl Ingredients
-
For the Roasted Cherries
• Roasted Sweet Cherries – These are the main flavor component; they caramelize beautifully when roasted. Use fresh Northwest-grown cherries for optimal flavor.
• Lime Juice – It balances the sweetness of cherries. Can be substituted with lemon juice if desired.
• Cane Sugar – This sweetens the cherry mixture. Alternative sweeteners include honey, maple syrup, or coconut sugar for a different flavor.
• Coconut Oil – Adds richness and helps caramelize the cherries. Can be replaced with another neutral oil if necessary.
• Vanilla Extract – Enhances the overall flavor profile of the dish. Consider using a vanilla bean for a more natural flavor.
• Salt – This enhances sweetness and balances flavors. Use a pinch; adjust according to personal taste preferences. -
For the Yogurt Bowl
• Plain Greek Yogurt – Acts as the creamy base of the bowl. Non-dairy yogurt can be used for a vegan option; flavored yogurt can add extra sweetness.
• Granola – Adds a delicious crunch and texture. Substitutes include chopped nuts, like almonds or pecans, for variety.
• Honey – Drizzled over the bowl for extra sweetness upon serving. Maple syrup can be used as a vegan alternative.
Step‑by‑Step Instructions for Roasted Cherry Yogurt Bowl
Step 1: Preheat Your Oven
Begin by preheating your oven to 400°F (200°C). This temperature is perfect for roasting, allowing the cherries to caramelize beautifully. While the oven heats, line a baking sheet with parchment paper to prevent sticking and make cleanup a breeze.
Step 2: Prepare the Cherries
Next, wash and pit about two cups of sweet cherries. Slice them in half, ensuring that you remove the pits. As you prepare your cherries, enjoy their vibrant color and sweet aroma, which will promise a delightful Roasted Cherry Yogurt Bowl.
Step 3: Make the Cherry Mixture
In a mixing bowl, combine the halved cherries with a splash of fresh lime juice, a couple of tablespoons of cane sugar, melted coconut oil, a teaspoon of vanilla extract, and a pinch of salt. Mix gently until all the cherries are well-coated. This mixture will transform into a delectable topping once roasted.
Step 4: Spread and Bake the Cherries
Pour the cherry mixture onto your prepared baking sheet, spreading the cherries out evenly to ensure they roast uniformly. Bake them in the preheated oven for 18 minutes. You’ll know they’re done when they are soft and slightly caramelized, releasing a sweet fragrance throughout your kitchen.
Step 5: Cool and Assemble the Bowl
After baking, remove the cherries from the oven and let them cool for about 5 minutes. This short break allows the syrup to thicken slightly. While waiting, prepare your serving bowls with a generous layer of creamy Greek yogurt at the base.
Step 6: Layer and Serve
Now, scoop the warm roasted cherries with their syrup on top of the yogurt, creating a beautiful contrast. Sprinkle your favorite granola over the cherries for added crunch, and finish with a drizzle of honey for that extra sweetness. Enjoy your homemade Roasted Cherry Yogurt Bowl right away for the best texture and flavor!
Expert Tips for Roasted Cherry Yogurt Bowl
-
Choose Fresh Cherries: Select ripe, fresh cherries for the best flavor. Overripe or soft cherries won’t hold their shape during roasting.
-
Adjust Sweetness: Taste your cherry mixture before roasting; you can always add more sugar or alternative sweeteners if your cherries are tart.
-
Avoid Sticky Cherries: Spread cherries evenly on the baking sheet; overcrowding can lead to steaming instead of roasting, preventing that delicious caramelization.
-
Store Leftovers: If you have any roasted cherries left, store them in an airtight container in the fridge for up to a week; they make a delightful addition to yogurt or oatmeal.
-
Customize Your Bowl: Feel free to mix and match toppings for your Roasted Cherry Yogurt Bowl; use different granola or add nuts for an extra crunch!
How to Store and Freeze Roasted Cherry Yogurt Bowl
-
Fridge: Store leftover roasted cherries in an airtight container in the refrigerator for up to 1 week. Reheat gently in the microwave or stovetop before using to enjoy their warmth.
-
Freezer: For longer storage, freeze any leftover roasted cherries in a single layer on a baking sheet before transferring them to a freezer-safe bag or container. They can be stored for up to 3 months.
-
Assembled Bowl: Avoid refrigerating an assembled Roasted Cherry Yogurt Bowl, as the granola will become soggy. Instead, store the components separately for maximum freshness.
-
Reheating: When you’re ready to enjoy the frozen cherries, thaw them in the refrigerator overnight or use a microwave for quick reheating, then serve them over freshly prepared yogurt.
Make Ahead Options
These Roasted Cherry Yogurt Bowls are perfect for meal prep enthusiasts! You can prepare the roasted cherries up to 3 days in advance by following the baking instructions and storing them in an airtight container in the refrigerator. This not only saves time but also enhances their flavor as they sit. To maintain their quality, heat the cherries gently in the microwave before serving. Additionally, you can measure out your yogurt and granola portions up to 24 hours ahead and keep them stored separately. When you’re ready to enjoy this delicious bowl, simply layer the warmed cherries over the yogurt, sprinkle with granola, and drizzle with honey for a quick and satisfying treat!
What to Serve with Easy Roasted Cherry Yogurt Bowls
Looking to elevate your Roasted Cherry Yogurt Bowl into a full meal experience? Let’s explore some delicious pairings that will entice every palate.
-
Creamy Oatmeal: A warm bowl of oatmeal brings a hearty texture that complements the sweet cherries and creamy yogurt beautifully.
-
Chill Smoothie: A vibrant berry smoothie adds a refreshing contrast, bursting with flavor while keeping the breakfast light and nutritious.
-
Fresh Mint Tea: The herbal notes of mint tea cleanse the palate and provide a soothing element that pairs perfectly with the warm cherries.
-
Crispy Toast: Try a slice of crusty whole-grain toast topped with almond butter. This adds protein and nutty flavors that mesh well with the bowl.
-
Greek Salad: A side of tangy Greek salad introduces a refreshing crunch and zest that balances the sweetness of the yogurt bowl.
-
Spiced Nuts: Crunchy, spiced nuts add a satisfying crunch and contrast to the soft roasted cherries, making each bite interesting and delightful.
-
Coconut Chia Pudding: For a luxurious touch, chia pudding adds a creamy, tropical flavor that enhances the overall dessert vibes of your cherry bowl.
-
Exotic Fruit Platter: Consider a platter of seasonal fruits, such as peaches and plums, to keep the summery freshness flowing alongside your delightful yogurt treat.
-
Dark Chocolate Squares: For a sweet touch, serve with dark chocolate squares on the side; the rich, bitter chocolate pairs intriguingly with the sweetness of the cherries.
-
Sparkling Water: A chilled glass of sparkling water, perhaps with a lemon wedge, refreshes the palate and enhances the experience of your delightful Roasted Cherry Yogurt Bowl.
Roasted Cherry Yogurt Bowl Variations
Feel free to explore these scrumptious twists and swaps, creating a personalized touch to your bowl!
-
Dairy-Free: Swap plain Greek yogurt for a creamy, non-dairy yogurt alternative like coconut or almond yogurt to cater to vegan diets.
-
Sweetener Swaps: Replace cane sugar with maple syrup or agave nectar for a caramel-like richness that beautifully complements the cherries.
-
Citrus Zing: Use fresh orange juice instead of lime or lemon for a sweeter, more aromatic citrus note, creating a refreshing flavor profile.
-
Nutty Crunch: Experiment with various crunchy toppings like chopped walnuts or pistachios for an unexpected twist that enhances the bowl’s texture.
-
Heat it Up: Add a pinch of cayenne or paprika to the cherry mix before roasting for a slight kick that pairs well with sweetness.
-
Spice Infusion: Dust the finished bowl with cinnamon or cardamom for an aromatic boost that adds warmth, making every bite an experience.
-
Serving Ideas: Serve the bowl with a side of warm oatmeal or yogurt parfait to create a delightful breakfast spread that satisfies all cravings.
For more ideas, you can check out some delicious combinations in my recipes for Corn Chicken Bowl or the wholesome Keto Reuben Bowl. Every variation awaits to be discovered, so go ahead and let your creativity flow!
Roasted Cherry Yogurt Bowl Recipe FAQs
How do I choose the right cherries for this recipe?
Absolutely! Look for fresh, firm cherries that are deep red in color with a slight shine. Avoid those with dark spots or wrinkled skin, as they’ll be less flavorful. Northwest-grown cherries are especially sweet and perfect for roasting, so they’re highly recommended!
How should I store leftover roasted cherries?
You can store any leftover roasted cherries in an airtight glass container in the refrigerator for up to 1 week. Just be sure to allow them to cool completely before sealing. For a warm treat, reheat them gently in the microwave or stovetop before adding them back to yogurt!
Can I freeze the roasted cherries for later use?
Very much! To freeze, spread the roasted cherries in a single layer on a baking sheet and freeze them until firm, usually about 2-3 hours. Then transfer them to a freezer-safe bag or container. They maintain their quality for up to 3 months, which makes them a great option for future yogurt bowls!
What if my cherries don’t caramelize as expected?
Don’t worry! If your cherries seem more steamed than caramelized, make sure they are spread evenly on the baking sheet; overcrowding can cause them to release too much moisture. Next time, try roasting them for a minute or two longer, and keep an eye on them to find that perfect sweet spot!
Is this recipe suitable for people with dietary restrictions?
Absolutely! You can easily make this Roasted Cherry Yogurt Bowl dairy-free by using non-dairy yogurt options like almond or coconut yogurt. For gluten-free needs, simply ensure that your granola is certified gluten-free. This recipe is versatile and adjustable to accommodate various dietary preferences!
Can pets have cherries, and are they harmful?
While fresh cherries in moderation can be a tasty treat for dogs, REMOVE the pits and any stems because they’re toxic to pets. Cats should avoid cherries altogether. Always consult your vet if unsure about introducing new foods to your furry friends.
Delicious Roasted Cherry Yogurt Bowl for a Quick Treat
Ingredients
Equipment
Method
- Preheat your oven to 400°F (200°C). Line a baking sheet with parchment paper.
- Wash and pit about two cups of sweet cherries, slicing them in half.
- In a bowl, combine the halved cherries with lime juice, cane sugar, melted coconut oil, vanilla extract, and salt.
- Spread the cherry mixture on the baking sheet and bake for 18 minutes.
- Cool the cherries for 5 minutes, then prepare serving bowls with Greek yogurt.
- Scoop the roasted cherries on top of the yogurt, sprinkle with granola, and drizzle with honey.
Leave a Reply