
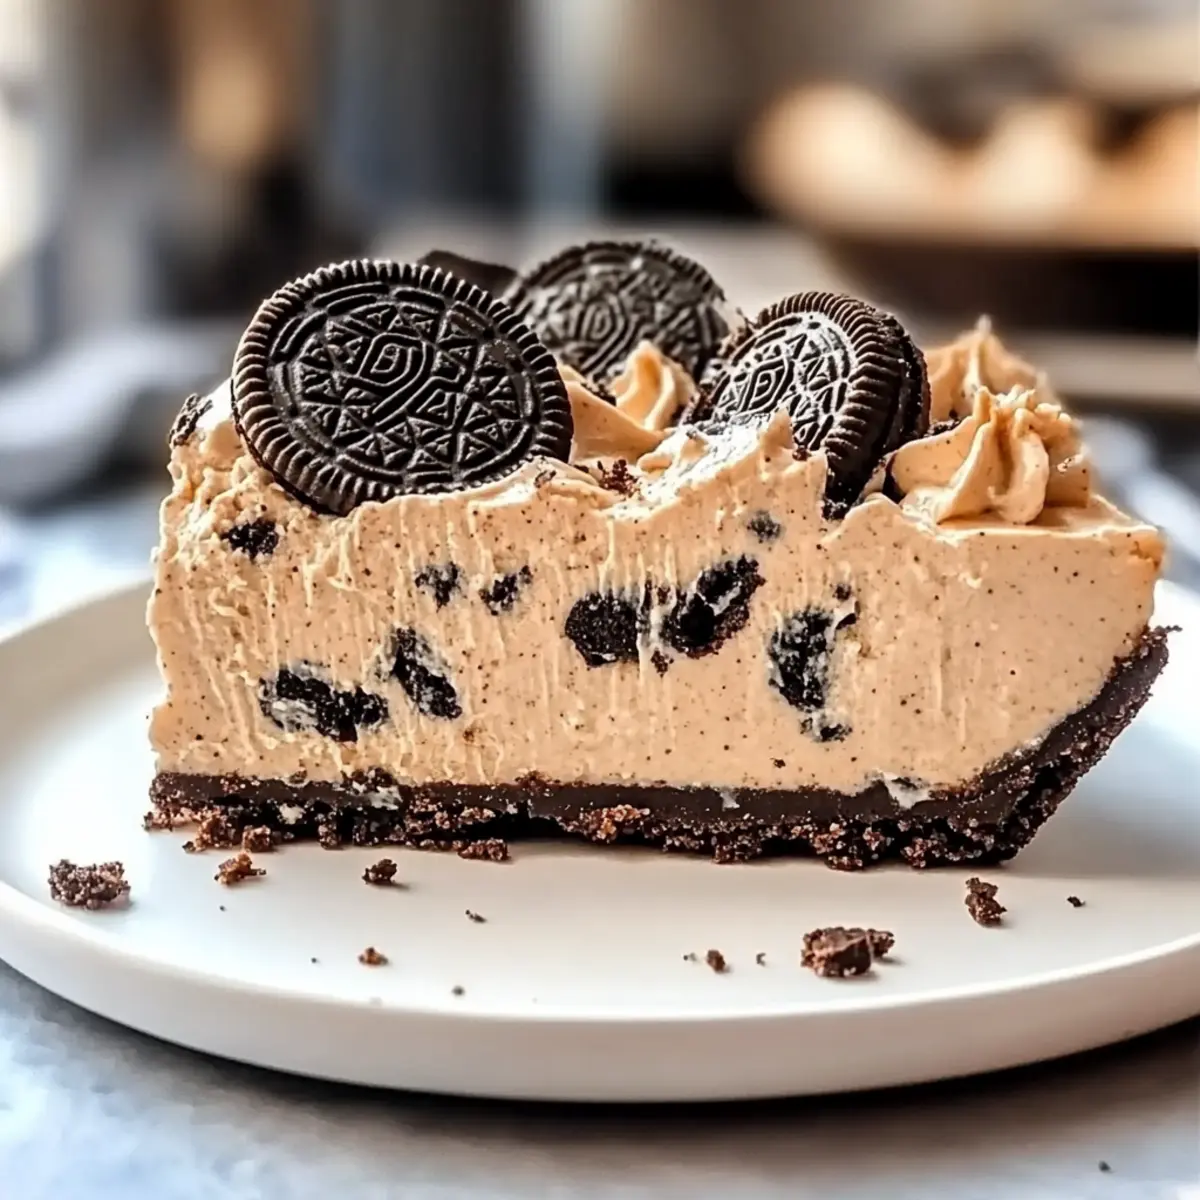
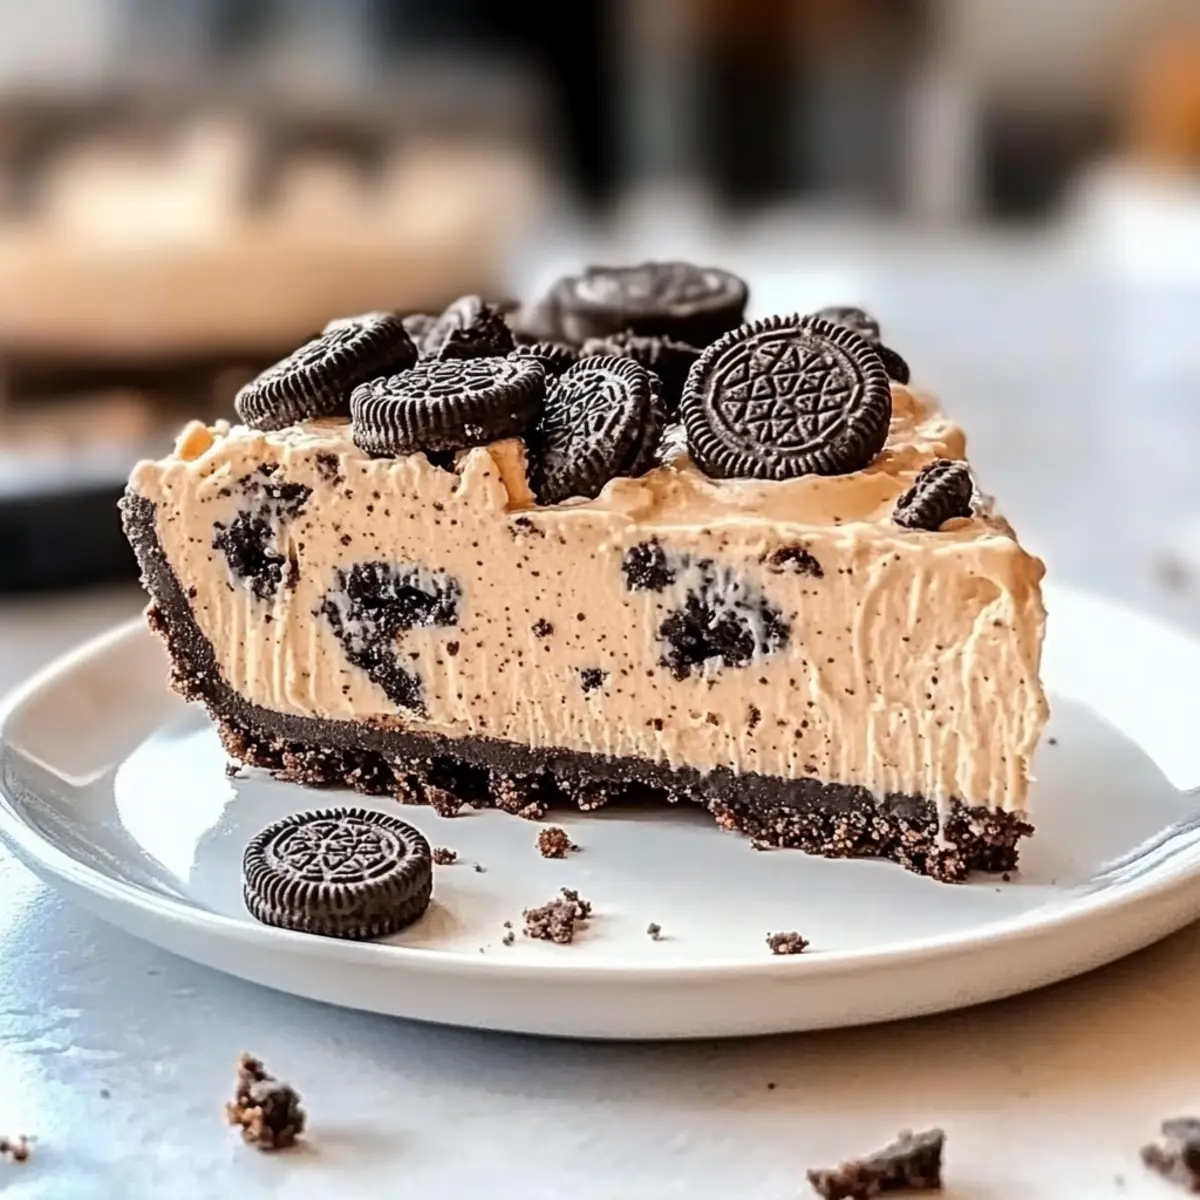
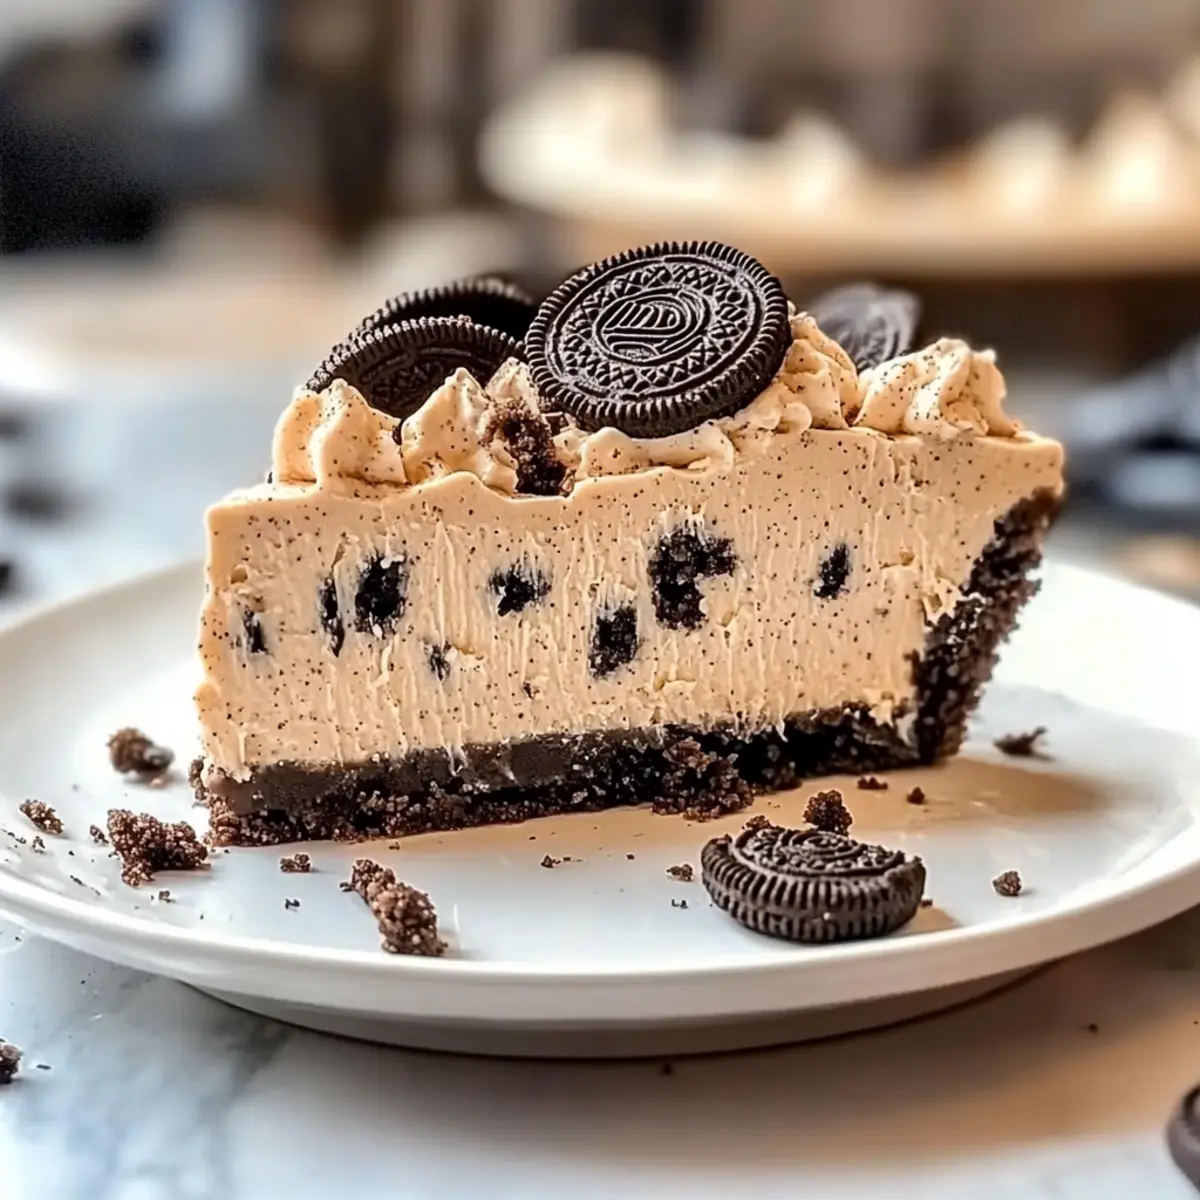
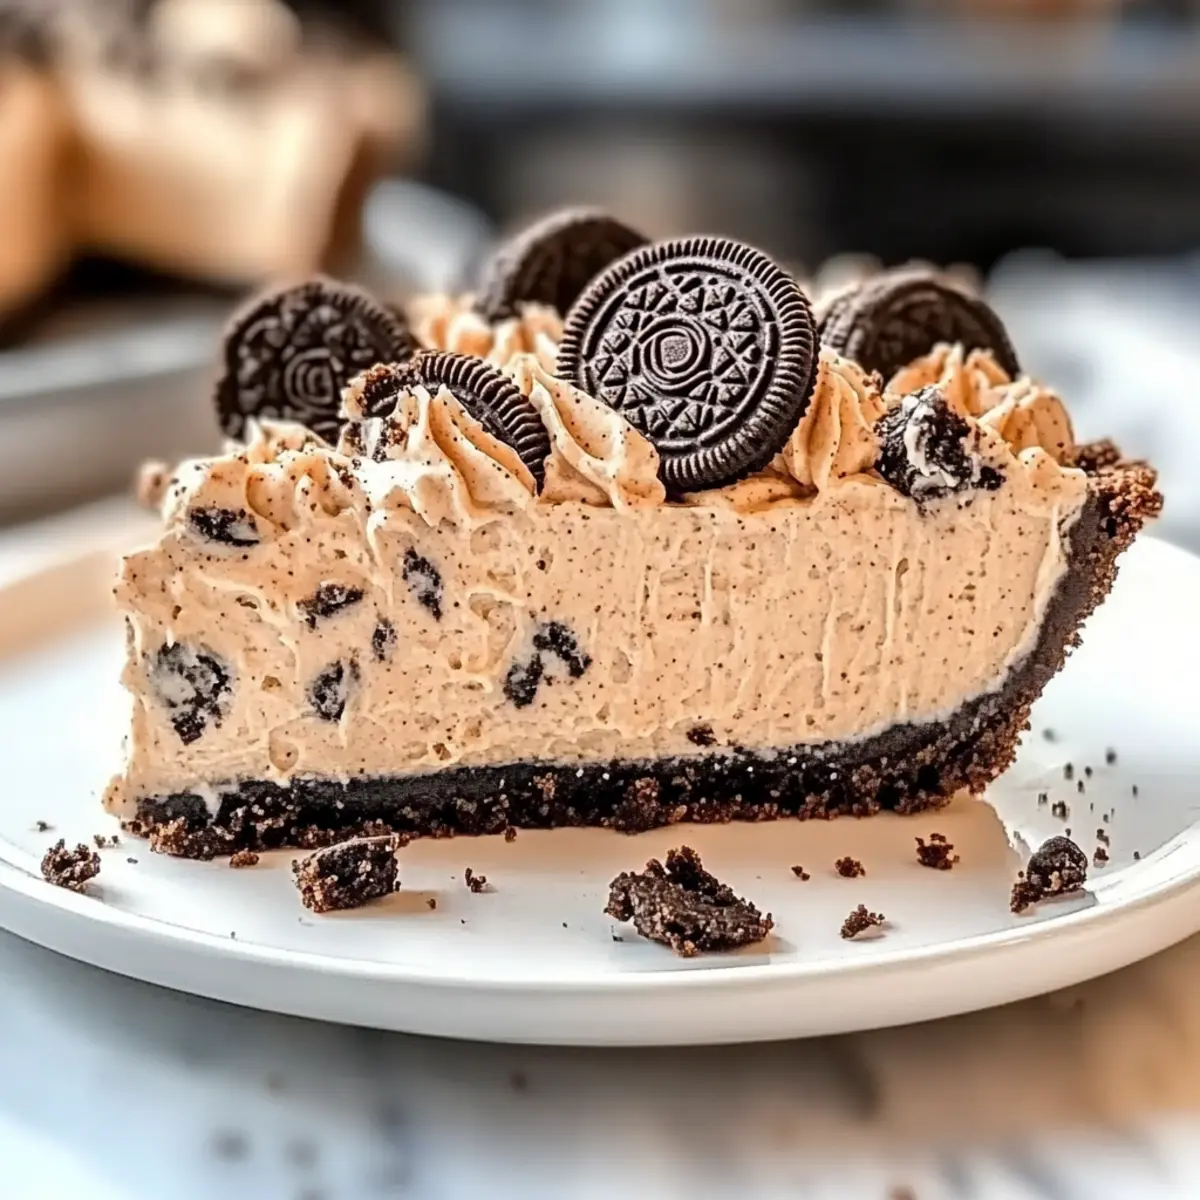
As I stood in my kitchen, the aroma of creamy peanut butter and sweet chocolate wafted through the air, immediately bringing a smile to my face. Today, I’m excited to share my recipe for the Decadent Peanut Butter Oreo Pie—a no-bake delight that feels like a celebration in every bite! Not only is this pie impressively quick to make, it’s also versatile enough to cater to various dietary needs, whether you prefer gluten-free, nut-free, or vegan options. Imagine serving this delightful crowd-pleaser at your next gathering or cozy family night, all without spending hours in the kitchen. With minimal prep time, we can all create a dessert that’s sure to impress without the stress. Are you ready to whip up this sweet sensation? Let’s dive in!
Why is this pie a must-try?
Decadent Flavors: The delightful mix of creamy peanut butter and crunchy Oreos creates a divine taste experience that will have everyone coming back for seconds.
No-Bake Convenience: With this quick and easy preparation, you can whip up an impressive dessert in no time—perfect for any occasion!
Dietary Flexibility: With simple adjustments, you can cater to various preferences, making it gluten-free or vegan without compromising on flavor.
Crowd-Pleaser: Whether it’s a family gathering or a cozy get-together, this pie is guaranteed to impress your guests, just like our Peanut Butter Chocolate Cookies.
Make-Ahead Appeal: Prepare up to a day in advance, freeing up your time for other important hosting duties!
Texture Delight: The creamy filling paired with a crunchy Oreo crust offers a delightful contrast that melts in your mouth—making it a standout dessert!
Decadent Peanut Butter Oreo Pie Ingredients
• Get ready to delight your taste buds!
For the Crust
- Oreo Cookies – Essential for that sweet, crunchy base; swap with gluten-free Oreos for a gluten-free option.
- Butter (6 tablespoons, melted) – Binds everything together with richness; let it cool slightly to avoid a gooey crust.
For the Filling
- Cream Cheese (8 oz, softened) – Creates a luscious texture; use dairy-free cream cheese for a lactose-free version.
- Powdered Sugar (1 cup) – Sweetens the filling while ensuring creaminess; no substitutes needed.
- Milk (¼ cup) – Helps achieve the perfect filling consistency; add more if it’s too thick.
- Vanilla Extract (1 teaspoon) – Elevates the flavor profile, balancing all the sweetness; no substitutes needed.
- Creamy Peanut Butter (½ cup) – The star of this pie, delivering that rich peanut flavor; substitute with Sunbutter for a nut-free dessert.
- Whipped Topping (8 oz) – Adds fluffiness to the filling; opt for vegan whipped topping for a vegan version.
- Chopped Oreos (8 cookies) – Perfect for topping, contributing extra texture and crunch; use remnants from the crust prep.
For Garnishing
- Hot Fudge Topping – Optional drizzle that enhances the pie’s overall deliciousness before serving.
With these ingredients, you’ll be on your way to creating a truly Decadent Peanut Butter Oreo Pie that will have everyone asking for more!
Step‑by‑Step Instructions for Decadent Peanut Butter Oreo Pie
Step 1: Prepare the Oreo Crust
In a food processor, crush 28 Oreo cookies until they resemble fine crumbs. In a separate bowl, mix the crushed Oreos with 6 tablespoons of melted butter until fully combined and the mixture holds together when pressed. This forms the base for your Decadent Peanut Butter Oreo Pie, so make sure it’s uniform in texture.
Step 2: Press the Crust into the Dish
Firmly press the Oreo mixture into the bottom and sides of a 9-inch pie dish or springform pan. Use the back of a measuring cup or your fingers to pack it evenly, creating a solid foundation for your pie. Once done, set aside and allow it to firm up while you prepare the filling.
Step 3: Chop Oreos for Topping
Take the remaining 8 Oreo cookies and chop them roughly into chunks. These will add a delightful crunch on top of your filling. Set the chopped Oreos aside, as you’ll fold them into the filling later and sprinkle them on top before serving.
Step 4: Mix the Filling Ingredients
In a large mixing bowl, beat together 8 ounces of softened cream cheese and 1 cup of powdered sugar until smooth and creamy. Gradually add in ¼ cup of milk, then mix in 1 teaspoon of vanilla extract and ½ cup of creamy peanut butter. Ensure the mixture is well-blended and velvety, creating the rich filling for your Decadent Peanut Butter Oreo Pie.
Step 5: Fold in Whipped Topping and Chopped Oreos
Gently fold in 8 ounces of whipped topping into the filling mixture until combined, being careful not to deflate the whipped cream. Once incorporated, add the chopped Oreos, folding them carefully into the mixture. This creates a light yet flavorful filling packed with that essential Oreo crunch.
Step 6: Pour the Filling Over the Crust
Pour the creamy filling over your prepared Oreo crust, using a spatula to smooth it out evenly. Make sure the filling is spread to the edges of the crust for a polished look. Once spread, sprinkle the remaining chopped Oreos on top, enhancing the visual appeal and crunch of your Decadent Peanut Butter Oreo Pie.
Step 7: Chill the Pie
Cover the pie with plastic wrap and place it in the freezer for at least 2 hours, or until fully set. Chilling helps the pie firm up, making it easier to slice and serve later. You’ll know it’s ready when the filling is firm to the touch and holds its shape.
Step 8: Serve with a Drizzle of Hot Fudge
Before serving, take the pie out of the freezer and let it sit for a few minutes to soften slightly for easier slicing. Drizzle hot fudge topping over the pie to elevate the dessert experience, and if desired, add extra whipped topping on each slice. This delicious addition will complement the rich flavors of the Decadent Peanut Butter Oreo Pie perfectly.
Variations for Decadent Peanut Butter Oreo Pie
Customize your peanut butter pie with these tasty twists that are sure to please every palate!
-
Gluten-Free: Use gluten-free Oreos for the crust and enjoy this dessert without worrying about gluten.
-
Nut-Free: Swap creamy peanut butter for Sunbutter, maintaining that rich flavor while ensuring it’s nut-free.
-
Vegan Delight: Replace cream cheese with dairy-free alternatives and use vegan whipped topping for a completely plant-based pie.
-
Chocolate Explosion: For an indulgent chocolate twist, drizzle dark chocolate ganache over the pie before serving.
-
Fruity Addition: Add fresh fruit like sliced strawberries or bananas before topping for a refreshing contrast.
-
Crunchy Pretzel Twist: Incorporate crushed pretzels into the filling for an irresistible salty-sweet combination.
-
Extra Creamy: Boost the whipped topping to 12 oz for an even fluffier filling that melts in your mouth.
-
Spicy Kick: Add a hint of cayenne pepper to the filling for a unique and unexpected flavor profile.
By making these variations, you can create a personalized version of the Decadent Peanut Butter Oreo Pie that suits your taste! And if you’re looking for more peanut butter-inspired delights, don’t forget to check out our Peanut Butter Energy Balls or the indulgent Peanut Butter Chocolate Cookies.
How to Store and Freeze Decadent Peanut Butter Oreo Pie
Fridge: Store your pie in the fridge for up to 3 days, covered tightly to maintain its creamy texture and prevent it from absorbing odors.
Freezer: For longer storage, freeze the pie for up to 2 months. Wrap it well in plastic wrap and then in aluminum foil to avoid freezer burn.
Thawing: When ready to enjoy, thaw the frozen pie in the refrigerator overnight. This ensures a perfectly smooth filling upon serving.
Reheating: There’s no need to reheat this no-bake pie; simply slice and serve chilled, with optional hot fudge drizzled on top for an extra treat!
Make Ahead Options
These Decadent Peanut Butter Oreo Pies are perfect for busy home cooks looking to save time! You can prepare the crust and filling up to 24 hours in advance. Start by making the crust and pressing it into your pie dish, then cover it tightly and refrigerate. For the filling, mix together cream cheese, powdered sugar, milk, vanilla, and peanut butter, folding in the whipped topping and chopped Oreos. Store the filling in an airtight container in the fridge. When you’re ready to serve, simply pour the filling over the crust, sprinkle with additional chopped Oreos, and chill for at least 2 hours. This way, you’ll have a flawless dessert nearly ready to go, just as delicious as if made fresh!
Tips for the Best Decadent Peanut Butter Oreo Pie
-
Cool Butter First: Always let your melted butter cool slightly before mixing; this prevents a gooey crust texture and ensures perfect consistency.
-
Room Temperature Cream Cheese: Softening the cream cheese at room temperature is essential for a smooth filling; skip this step and you may end up with lumps.
-
Gentle Folding: When incorporating whipped topping into the filling, fold gently to preserve airiness; over-mixing can lead to a dense texture.
-
Full Freezing Time: For the best slicing experience, allow the pie to freeze for the full 2 hours; this helps the filling set properly, making every slice a breeze.
-
Flavor Boosts: Consider adding a pinch of salt or a splash of nuttiness by mixing in some crushed pretzels for a delightful contrast in the filling.
-
Storage Tips: This Decadent Peanut Butter Oreo Pie can be made a day in advance, which is ideal for hosting; simply store it covered in the fridge!
What to Serve with Decadent Peanut Butter Oreo Pie
Serving a luscious dessert like this pie presents an ideal opportunity to create a delightful meal experience that will make everyone feel special.
-
Fresh Berries: Bright flavors from strawberries or blueberries add a refreshing contrast to the rich pie, enhancing its sweetness.
-
Vanilla Ice Cream: A scoop of creamy vanilla ice cream provides a deliciously cold pairing, enriching every decadent bite.
-
Espresso or Coffee: The bold notes in coffee or a simple espresso balance the dessert’s sweetness, offering a sophisticated finish.
-
Chocolate Drizzle: A swirl of chocolate sauce over each slice elevates the pie’s rich flavors and makes for a beautiful presentation.
-
Whipped Cream: Light, fluffy whipped cream adds an airy touch that complements the creamy filling, inviting everyone to take a bite.
-
Salted Caramel Sauce: A drizzle of salted caramel brings a delightful sweet-and-salty layer, contrasting beautifully with the pie’s flavors.
-
Chopped Nuts: For an added crunch, sprinkle chopped peanuts or almonds on top. This enhances the texture while staying true to the peanut butter theme.
-
Milkshake: A thick, creamy chocolate or vanilla milkshake can take your dessert indulgence to the next level, creating an ice cream parlor vibe.
Decadent Peanut Butter Oreo Pie Recipe FAQs
How do I select the right Oreos for this recipe?
Absolutely, when choosing Oreos, look for ones that are fresh and free from dark spots or cracks. If you’re aiming for a gluten-free version, ensure to select gluten-free Oreos; these can be found in most grocery stores.
What’s the best way to store leftovers?
Very! You can keep your Decadent Peanut Butter Oreo Pie in the fridge for up to 3 days. Just cover it tightly with plastic wrap or foil to maintain its creamy texture. If you’re looking to save it for longer, freezing is a great option—simply wrap the pie in plastic and then foil to prevent freezer burn.
Can I freeze this pie, and how should I do it?
Absolutely! This pie can be frozen for up to 2 months. Ensure it’s well-wrapped in plastic wrap, followed by aluminum foil to protect it from freezer burn. When you’re ready to enjoy it, simply thaw it in the refrigerator overnight for the best results!
What if my pie filling is too thick?
If you find that your filling is thicker than you’d like, don’t worry! Just gradually stir in a little extra milk, a tablespoon at a time, while mixing the filling until you reach the desired consistency. This will ensure it remains smooth and easy to spread.
Are there any considerations for allergies or dietary restrictions?
Yes! This recipe can easily cater to various dietary needs. For a nut-free version, substitute peanut butter with Sunbutter. To make it vegan, use dairy-free cream cheese and whipped topping. Just be sure to double-check labels on all ingredients to avoid any hidden allergens.
How long can I make this pie in advance?
You can prepare your Decadent Peanut Butter Oreo Pie up to 24 hours in advance, which is perfect for busy days. Just store it covered in the fridge until you’re ready to serve, freeing you up to enjoy the gathering or occasion!
Decadent Peanut Butter Oreo Pie That Melts in Your Mouth
Ingredients
Equipment
Method
- Prepare the Oreo Crust: Crush 28 Oreo cookies until fine crumbs. Mix with 6 tablespoons melted butter until combined.
- Press the Crust into the Dish: Firmly press the mixture into a 9-inch pie dish or springform pan.
- Chop Oreos for Topping: Roughly chop 8 Oreo cookies for topping.
- Mix the Filling Ingredients: Beat 8 oz. cream cheese with 1 cup powdered sugar. Gradually add ¼ cup milk, 1 teaspoon vanilla extract, and ½ cup peanut butter.
- Fold in Whipped Topping and Chopped Oreos: Gently fold in 8 oz. whipped topping and the chopped Oreos until combined.
- Pour the Filling Over the Crust: Pour the filling over the crust and smooth it out evenly.
- Chill the Pie: Cover with plastic wrap and freeze for at least 2 hours.
- Serve with a Drizzle of Hot Fudge: Let the pie soften slightly before serving and drizzle hot fudge over it.
Leave a Reply