
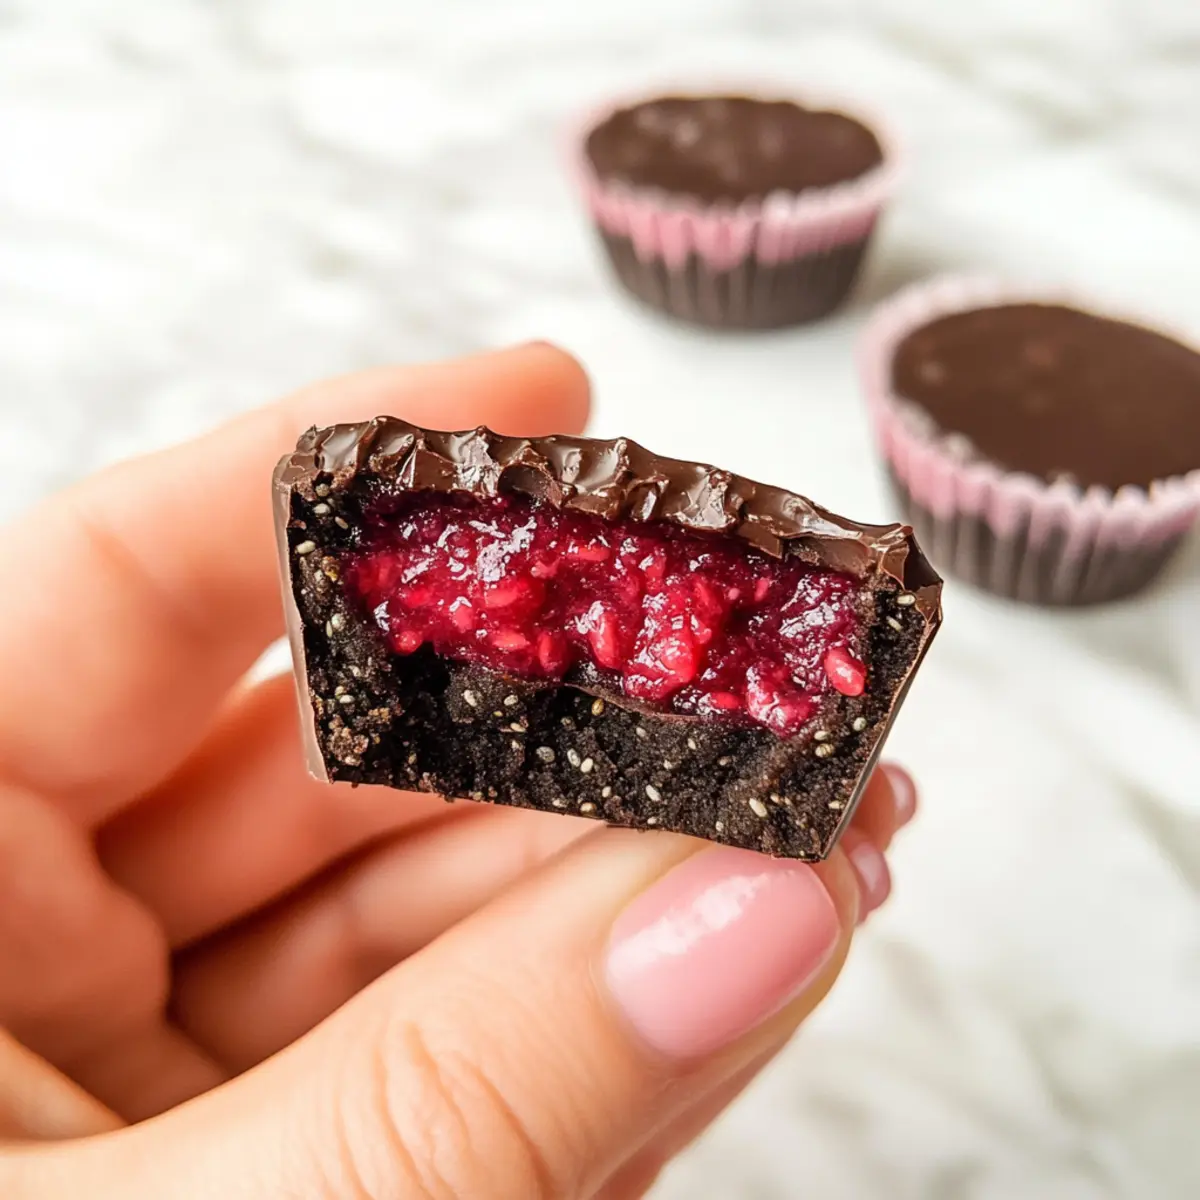
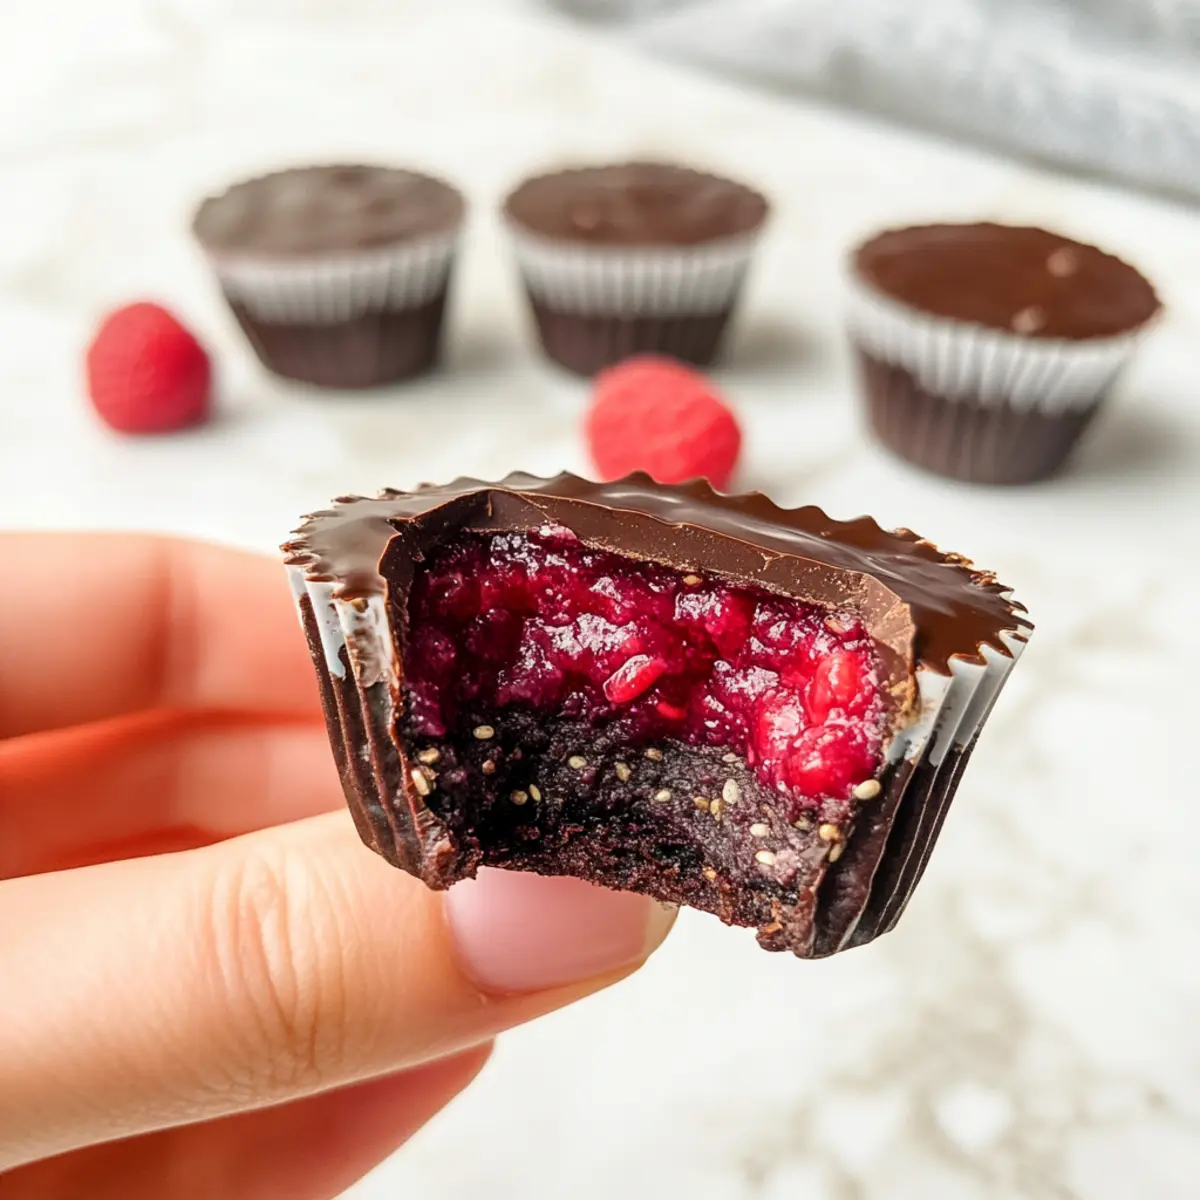
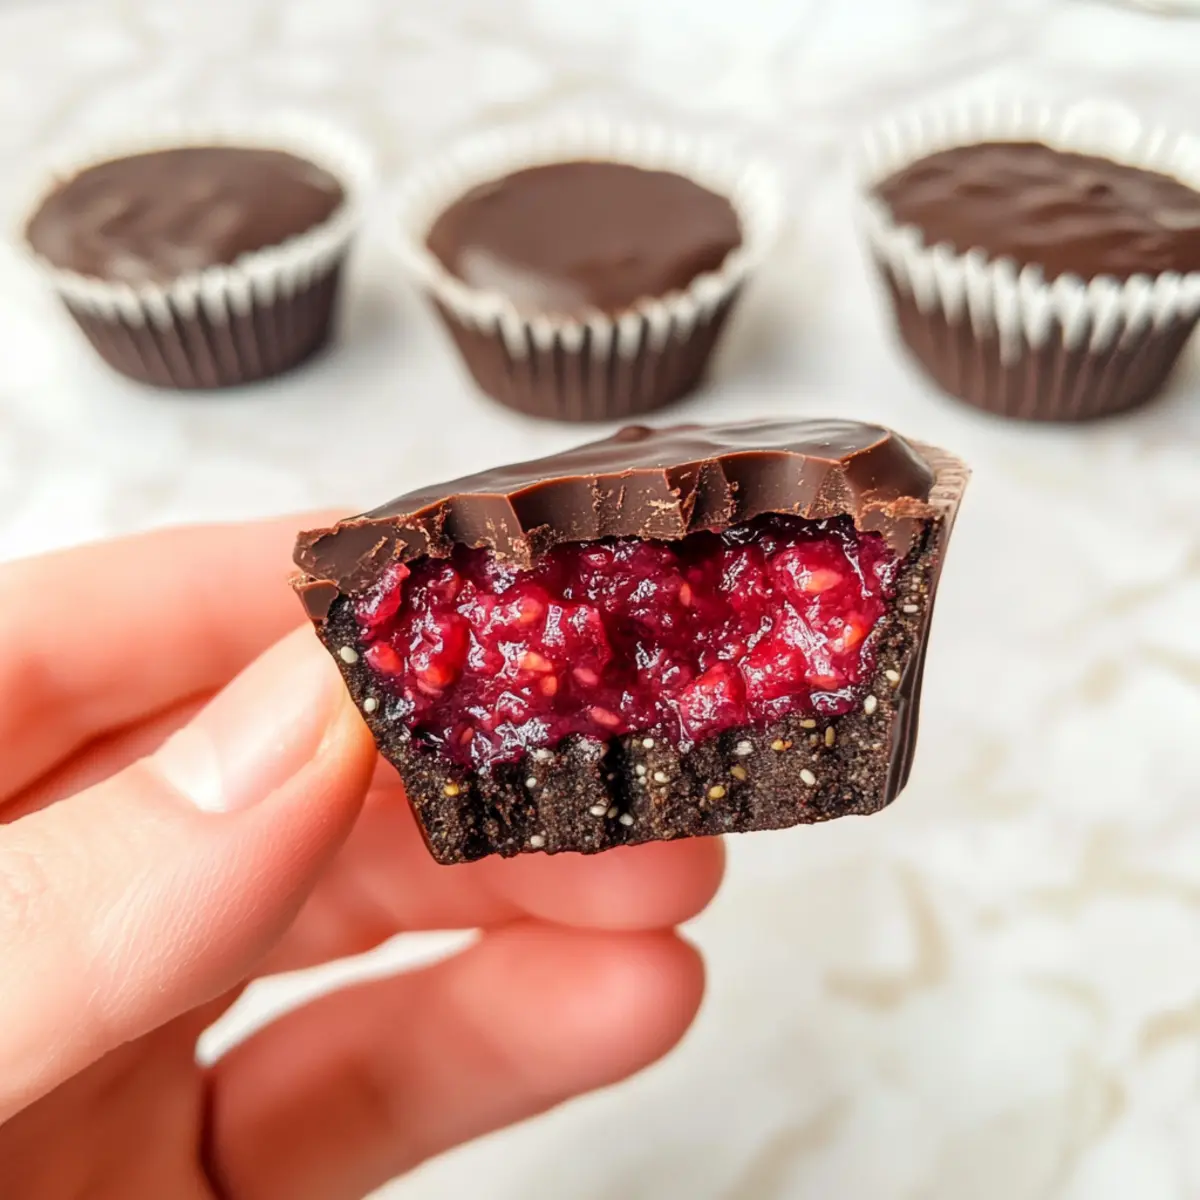
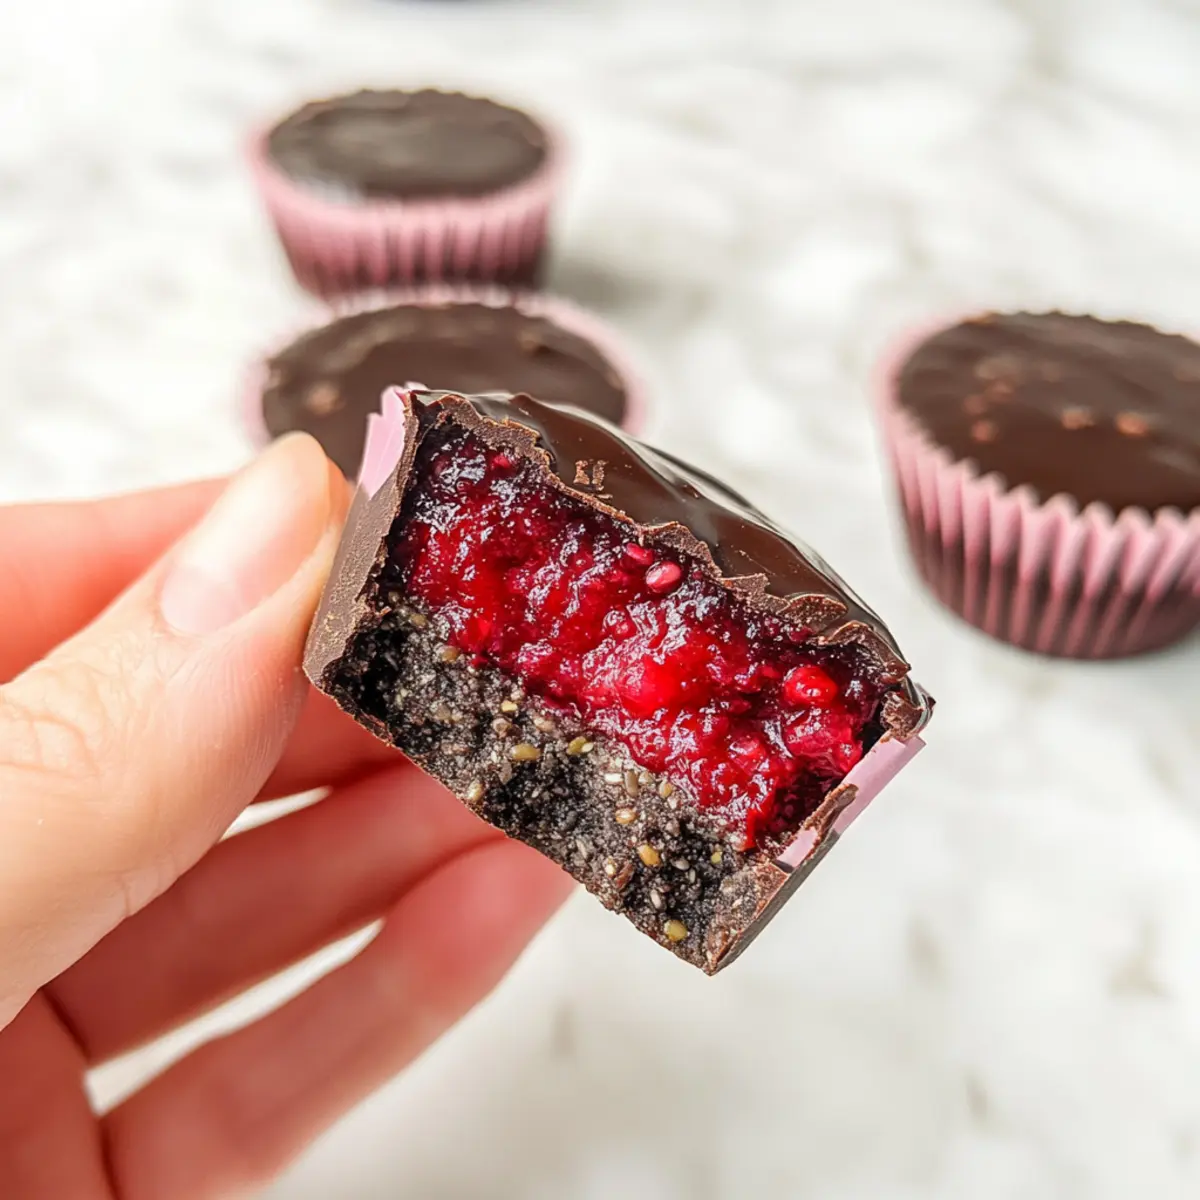
As I was rummaging through my fridge one afternoon, I stumbled upon a handful of vibrant raspberries and a pack of chia seeds, both begging for a purpose. That’s when the magic struck me! With just a few simple ingredients, I turned those forgotten items into irresistible Chocolate Raspberry Chia Cups—a no-bake vegan delight that’s gluten-free and refined sugar-free. These delightful treats not only satisfy my sweet tooth quickly, but they also boast the versatility of being adapted to your favorite fruits, whether it’s juicy blueberries or luscious strawberries. Whip them up for a party, a cozy night in, or whenever the cravings hit. Who’s ready to indulge in these delectable cups?
Why are Chocolate Raspberry Chia Cups amazing?
Indulgent flavors await you in these delightful treats! With a deliciously rich chocolate coating enveloping a sweet raspberry chia filling, you’ll find it hard to believe they’re vegan, gluten-free, and refined sugar-free. Quick to make, these no-bake cups enable you to satisfy your cravings in no time. Looking for interesting alternatives? Switch raspberries for strawberries or blueberries to create your own twist. Healthy indulgence has never been this easy – imagine serving them at your next gathering or enjoying as a snack! For more vegan dessert ideas, check out my delightful Sokolatina Chocolate Custard or try making Homemade Chocolate Milk for a drinkable treat!
Chocolate Raspberry Chia Cups Ingredients
• Get ready to create something delicious!
For the Raspberry Filling
- Raspberries – Adds natural sweetness and flavor; substitute with blueberries, strawberries, or mixed berries for variety.
- Maple Syrup – Serves as a natural sweetener; use agave syrup as an alternative if desired.
- Vanilla Extract – Enhances the flavor profile; though optional, it’s recommended for added depth.
- Chia Seeds – Provides texture and thickening for the raspberry filling; no direct substitute suggested.
For the Chocolate Layer
- Coconut Oil (melted) – Acts as the fat component in the chocolate coating; can be replaced with cocoa butter for a different flavor.
- Cocoa Powder – Adds richness and chocolate flavor; be sure to use unsweetened cocoa powder for best results.
- Dark Chocolate (melted) – Optional substitute for the cocoa and coconut oil mixture, intensifying the chocolate experience; choose dairy-free for a vegan option.
Now, let’s dive in and make these delightful Chocolate Raspberry Chia Cups!
Step‑by‑Step Instructions for Chocolate Raspberry Chia Cups
Step 1: Prepare Muffin Tin
Begin by lining a standard muffin tin with 4 silicone muffin liners, or opt for mini liners for smaller cups. Make sure that the cups are placed on a flat surface to prevent spills. This preparation sets the stage for your delicious Chocolate Raspberry Chia Cups.
Step 2: Make Raspberry Filling
In a medium pot, combine fresh raspberries and maple syrup. Heat over medium heat for about 8–10 minutes, stirring occasionally until the mixture simmers and the raspberries soften. Once softened, mash the mixture with a fork, then stir in vanilla extract and chia seeds. Allow this delightful filling to cool for about 10 minutes to thicken.
Step 3: Prepare Chocolate Layer
In a separate bowl, mix together melted coconut oil, cocoa powder, and maple syrup until fully combined and smooth. Alternatively, you may use melted dark chocolate for an extra chocolaty experience. This rich chocolate layer will coat the luscious raspberry filling in your Chocolate Raspberry Chia Cups.
Step 4: Assemble Cups
Pour 1 tablespoon of the chocolate mixture into each muffin liner, ensuring an even distribution across all cups. Place the muffin tin in the freezer for about 5 minutes, or until the chocolate layer starts to firm up. This initial freeze helps create a solid base for your raspberry filling.
Step 5: Add Raspberry Layer
Once the chocolate base has set, carefully spoon 1 tablespoon of the cooled raspberry mixture onto the hardened chocolate in each cup. Smooth the tops gently with the back of a spoon, then place the muffin tin back in the freezer for another 5 minutes. This layering creates a delightful contrast in your Chocolate Raspberry Chia Cups.
Step 6: Top with Remaining Chocolate
After the raspberry layer has set, add another tablespoon of the chocolate mixture on top of each cup. Ensure that the chocolate coats the filling completely. Return the muffin tin to the freezer and let the cups freeze until fully set, which should take about 2 hours.
Step 7: Serve
Once set, remove the Chocolate Raspberry Chia Cups from the muffin tin, gently peeling away the silicone liners. Store the cups in the freezer, but allow them to thaw slightly before serving for optimal texture. These delicious cups are perfect for a refreshing dessert or sweet snack!
How to Store and Freeze Chocolate Raspberry Chia Cups
Fridge: Store in an airtight container for up to 3 days; however, the texture may change slightly, and raspberry juice may release.
Freezer: Keep in a sealed container or freezer bag for up to 1 month. Allow to thaw for 10-15 minutes before enjoying for the best taste and texture.
Serving: Once removed from the freezer, let the Chocolate Raspberry Chia Cups sit at room temperature for a few minutes to soften slightly—perfect for a delightful treat!
Make Ahead Options
These Chocolate Raspberry Chia Cups are perfect for busy home cooks looking to streamline their meal prep! You can prepare the raspberry filling and the chocolate mixture up to 24 hours ahead. Simply make the filling, cool it, and store it in an airtight container in the refrigerator. The chocolate mixture can also be made in advance and kept at room temperature (away from heat). When you’re ready to assemble, just pour the chocolate layer into the muffin tin, freeze for about 5 minutes, add the raspberry layer, and top with the remaining chocolate before freezing until solid. This method ensures the cups are just as delicious when enjoyed later, making them an ideal treat for quick desserts or snacks!
What to Serve with Chocolate Raspberry Chia Cups
Elevate your dessert experience with these easy-to-pair options that perfectly complement the rich and fruity flavors of your cups.
- Fresh Berries: Juicy, vibrant berries enhance the fruity profile and provide a burst of freshness alongside the chocolate-rich cups.
- Coconut Whipped Cream: This light, airy topping adds a luscious texture and balances the sweetness, making every bite more indulgent.
- Nutty Granola: A sprinkle of crunchy granola adds a delightful textural contrast, making each chocolate cup feel like an adventure for your taste buds!
- Herbal Tea: Choose a calming peppermint or soothing chamomile tea, which can cleanse the palate and balance the sweetness of dessert.
- Chocolate Almond Milk: Creamy and rich, this dairy-free drink beautifully complements the chocolate flavor, making for a delicious pairing.
- Vegan Ice Cream: A scoop of dairy-free vanilla or chocolate ice cream creates a delightful mix of temperatures and textures, turning your dessert into a sundae!
- Dark Chocolate Dipped Fruit: Additional chocolate-dipped strawberries or bananas can elevate your dessert table, attracting guests with their irresistible appeal.
- Nut Butter Drizzle: A drizzle of almond or cashew butter not only adds a touch of savory richness but also enhances the creamy texture of the cups.
Expert Tips for Chocolate Raspberry Chia Cups
-
Use Silicone Liners: Silicone baking cups ensure easy removal of your Chocolate Raspberry Chia Cups once set, preventing any messy accidents.
-
Cool Properly: Allow your raspberry filling to cool for at least 10 minutes before layering. This thickens the mix and prevents the chocolate layer from melting.
-
Check Consistency: Ensure your chocolate mixture is smooth and properly melted. This helps achieve a perfect layering effect and prevents any graininess.
-
Don’t Overfill: When spooning in the layers, be careful not to overfill the cups. Leave some space to prevent overflow while freezing.
-
Experiment with Berries: Feel free to substitute raspberries with your favorite fruits, such as blueberries or strawberries, for a unique twist in your Chocolate Raspberry Chia Cups.
Chocolate Raspberry Chia Cups Variations
Feel free to play around with these chocolate raspberry chia cups to find your perfect match!
-
Berry Blend: Mix raspberries with blueberries or strawberries for a fruity twist that’ll tickle your taste buds.
-
Nutty Surprise: Add a tablespoon of almond or hazelnut butter into the raspberry filling for a rich, nutty flavor that will leave you craving more.
-
Minty Fresh: Stir in a few drops of peppermint extract into the chocolate layer for a refreshing, mint-chocolate experience.
-
Coconut Bliss: Top the chocolate layer with shredded coconut before freezing to add a tropical flair that pairs beautifully with raspberry.
-
Spicy Kick: Add a pinch of cayenne pepper to the chocolate mixture for an unexpected heat that beautifully contrasts with sweetness.
-
Crunch Factor: Fold in chopped nuts or seeds (like walnuts or sunflower seeds) into the raspberry filling for added crunch and texture.
-
Chocolate Lovers: Double the cocoa powder in the chocolate layer for a more intense chocolate experience. Who could resist rich chocolate goodness?
-
Fruit-Filled Mini Treats: Create mini versions of these cups by using smaller muffin liners and reducing the layers for a delightful bite-sized dessert fit for any occasion.
For even more delicious dessert options, don’t miss out on making my delightful Peanut Butter Chocolate or indulging in a slice of Sokolatina Chocolate Custard—both are sure to impress your family and friends!
Chocolate Raspberry Chia Cups Recipe FAQs
How do I choose the best raspberries for this recipe?
Absolutely! When selecting raspberries, look for plump, firm berries that are deep red in color. They should be free of dark spots or mold. If you spot any dark spots or if the berries feel mushy, they might be past their prime. Aim for fresh raspberries, but if you can only find frozen ones, they work just fine—just make sure they are unsweetened.
How should I store Chocolate Raspberry Chia Cups?
I recommend storing your Chocolate Raspberry Chia Cups in an airtight container in the freezer for optimal freshness. They can last up to a month this way. If you prefer keeping them in the fridge, place them in a sealed container for about 3 days, but be aware that the texture may become softer, and raspberry juice might separate.
Can I freeze the Chocolate Raspberry Chia Cups?
Very much so! For freezing, ensure the cups are completely set first. Once solid, remove them from the liners, place them in a sealed freezer bag or container, and they’ll keep well for up to 3 months. To enjoy, thaw them at room temperature for about 10-15 minutes before serving, as this will enhance the flavor and texture.
What if my chocolate layer is grainy or doesn’t set properly?
No worries! If your chocolate mixture ends up grainy, it’s likely the result of overheating the cocoa powder or not fully melting the coconut oil. To fix this, try reheating the mixture gently over low heat while stirring continuously until smooth. Ensure the oil is fully melted and combined before pouring into the muffin liners for a smooth and velvety finish.
Are these Chocolate Raspberry Chia Cups suitable for pets or individuals with food allergies?
Definitely! These cups are vegan and gluten-free, making them a safe dessert for those avoiding animal products and gluten. However, always check individual ingredient labels to ensure there are no allergens present, especially if you have a nut or seed allergy. Feel free to substitute ingredients as needed, but keep a close eye on chocolate and nut sources if you’re treating furry friends—chocolate is toxic to dogs!
Delicious Chocolate Raspberry Chia Cups for Guilt-Free Indulgence
Ingredients
Equipment
Method
- Line a standard muffin tin with 4 silicone muffin liners.
- In a medium pot, combine raspberries and maple syrup; heat over medium for 8–10 minutes, stirring occasionally.
- Mash the mixture with a fork, then stir in vanilla extract and chia seeds; cool for 10 minutes.
- In a bowl, mix melted coconut oil, cocoa powder, and maple syrup until smooth; alternatively use melted dark chocolate.
- Pour 1 tablespoon of chocolate mixture into each muffin liner, place in the freezer for 5 minutes.
- Add 1 tablespoon of cooled raspberry mixture onto the hardened chocolate; smooth the tops.
- Top with another tablespoon of chocolate mixture; freeze until fully set for about 2 hours.
- Remove from muffin tin and peel away silicone liners; allow to thaw slightly before serving.
Leave a Reply