
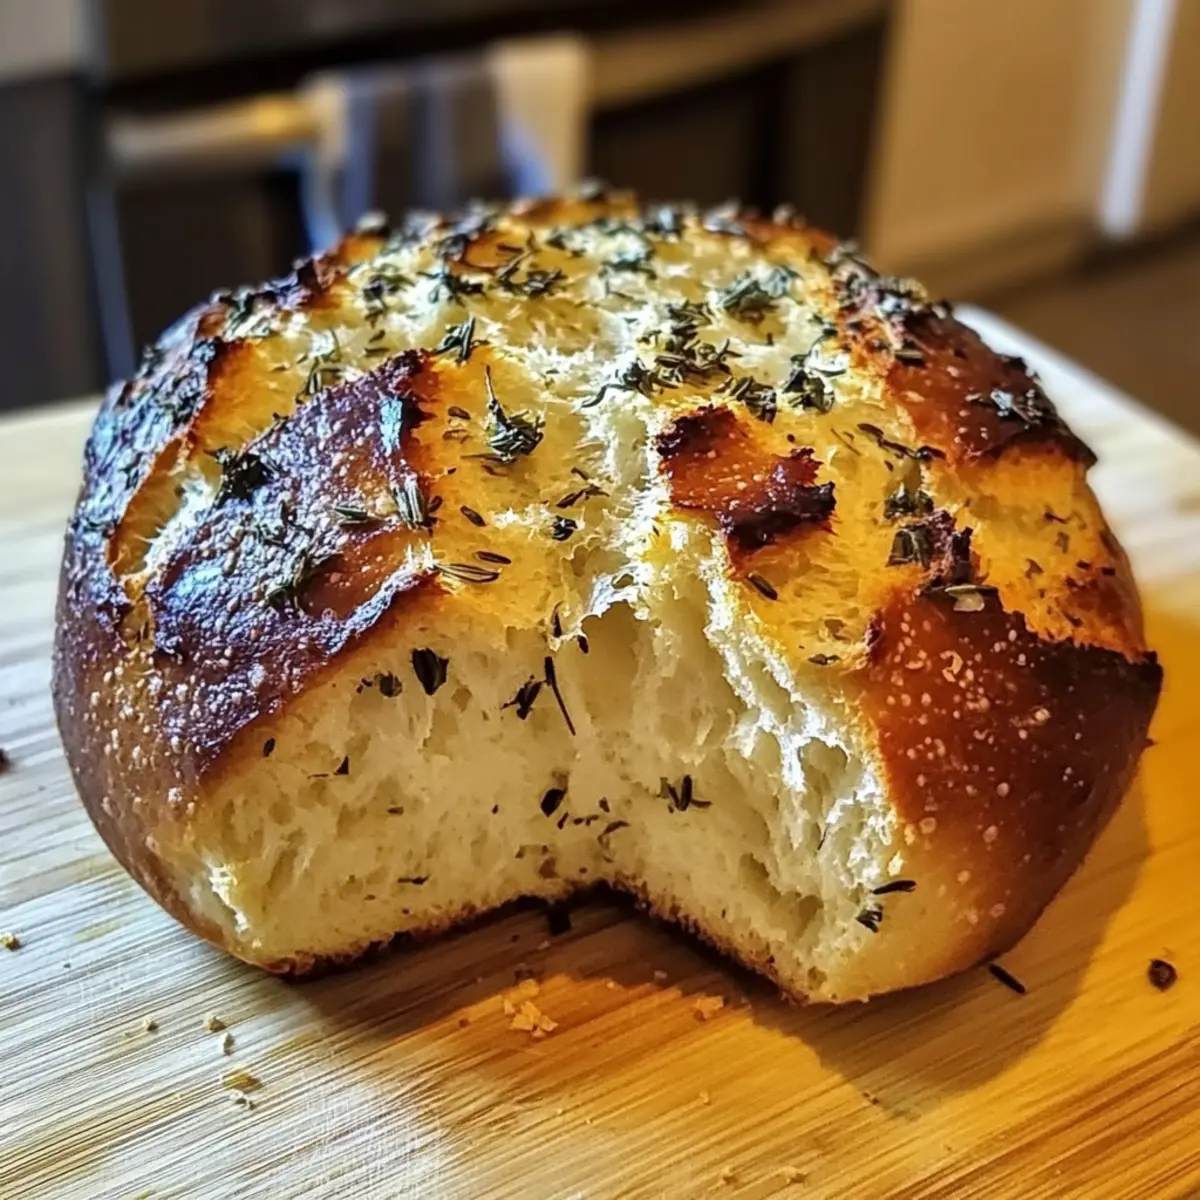
As I stood in my kitchen, the enticing scent of freshly baked bread filled the air, instantly transporting me to my favorite bakery. Today, I’m thrilled to share my recipe for Garlic Herb Dutch Oven Bread—a delightful blend of crispy crust and tender crumb that will have your taste buds dancing! This no-knead artisan-style bread offers you the joy of homemade baking with minimal effort, perfect for those long after-work evenings. With just a handful of simple pantry ingredients, you can whip up a loaf that’s not only a crowd-pleaser but also incredibly versatile. Serve it warm with a drizzle of olive oil, pair it with soups, or enjoy it as a fragrant accompaniment to your dinner table. So, ready to roll up your sleeves and indulge in the magic of baking? Let’s get started!
Why Is This Bread So Irresistible?
Simplicity at Its Core: This Garlic Herb Dutch Oven Bread is a no-knead masterpiece, requiring minimal effort while delivering maximum flavor.
Versatile Creations: Whether you’re in the mood for classic garlic herb or want to experiment with Cheese Garlic Herb Bread, this recipe welcomes creativity!
Perfect Texture: The result is a golden crust that crackles with each slice, revealing a soft and tender interior. You’ll be amazed at the bakery-quality right from your oven.
Time-Saving Delight: With an extended rise time, you can effortlessly go about your day while the dough works its magic!
Endless Pairings: From sandwiches to soup accompaniments, this bread elevates any meal—and let’s not forget the pleasure of simply enjoying it warm with olive oil.
Crowd-Pleasing Aroma: The heavenly scent of garlic and fresh herbs wafting through your kitchen will have everyone asking for seconds!
Garlic Herb Dutch Oven Bread Ingredients
• For the Bread
- All-Purpose Flour – Provides structure for the bread; substitute half with whole wheat flour for a nuttier flavor but may require more water.
- Salt – Enhances flavor and strengthens gluten; essential for balanced taste.
- Instant Yeast – Allows fermentation without prior activation; can substitute with active dry yeast by pre-dissolving it in warm water until foamy.
- Minced Garlic – Infuses flavor throughout the dough, mellowing during the rise; substitute with roasted garlic for a sweeter taste.
- Fresh Herbs – Offers vibrant flavor; or use dried herbs in half the amount.
- Lukewarm Water – Hydrates the dough and activates yeast for the perfect Garlic Herb Dutch Oven Bread.
- Olive Oil – Prevents sticking while adding richness to the loaf.
Use these ingredients and your creative flair to make a loaf that transforms your kitchen into a bakery every time!
Step‑by‑Step Instructions for Garlic Herb Dutch Oven Bread
Step 1: Mix Dry Ingredients
In a large mixing bowl, whisk together 3 cups of all-purpose flour, 1 teaspoon of salt, and 1 teaspoon of instant yeast. Then, stir in 3 tablespoons of minced garlic and 1 tablespoon of your favorite fresh herbs, such as rosemary or thyme. This blend will provide a solid flavor foundation for your Garlic Herb Dutch Oven Bread, and it’s beautiful to see the herbs and garlic evenly distributed.
Step 2: Combine Wet Ingredients
Pour in 1¾ cups of lukewarm water into your dry mixture, stirring vigorously until there are no dry flour pockets remaining. The dough will feel sticky and shaggy but that’s exactly what you want! This step is crucial for the no-knead technique, which will result in a light, airy crumb in your finished bread.
Step 3: Rise
Cover the bowl tightly with plastic wrap and leave it at room temperature for 12 to 18 hours. During this time, the dough will double in size and become bubbly—this indicates the fermentation is successful! When you peek beneath the plastic wrap after the resting period, you should see a beautifully risen dough ready for shaping.
Step 4: Shape the Dough
Lightly flour your work surface and your hands to prevent sticking. Gently turn the dough out onto the floured surface, taking care not to deflate it too much. With floured hands, fold the dough over on itself a couple of times without kneading, shaping it into a round loaf. Let it rest on a piece of parchment paper for 45 minutes to 1 hour.
Step 5: Preheat Dutch Oven
About 30 minutes before the second rise ends, place your Dutch oven (with the lid on) in the oven and preheat to 450°F (232°C). This step ensures that your Dutch oven is hot enough to create that crisp crust we adore in artisan breads. Make sure to give it enough time to heat properly as you don’t want to rush this process.
Step 6: Bake
Once your oven has reached the desired temperature, carefully remove the hot Dutch oven. Lift the parchment with your dough and place it into the Dutch oven. Score the top of the dough with a sharp knife to allow for expansion. Cover with the lid and bake for 30 minutes; then, uncover and bake for an additional 15 to 20 minutes until the crust is a deep golden brown and crackling.
Step 7: Cool
After baking, remove the bread from the Dutch oven and let it cool on a wire rack for at least 30 minutes. This cooling time allows the interior of the Garlic Herb Dutch Oven Bread to firm up, preventing a gummy center. As the enticing aroma fills your kitchen, you’ll be eagerly awaiting that first delightful slice!
Expert Tips for Garlic Herb Dutch Oven Bread
-
Preheat Properly: Ensure your Dutch oven is fully preheated; a hot pot creates the desired crust and helps with even baking.
-
Rising Time Matters: Don’t rush the 12-18 hour rise; this time develops flavor and creates the perfect airy texture in your Garlic Herb Dutch Oven Bread.
-
Embrace the Stickiness: Expect a sticky dough; avoid adding too much flour when shaping, as this can lead to a denser loaf.
-
Score for Success: Always score the dough before baking—it allows for expansion and creates a beautiful rustic look.
-
Cooling is Key: Let the bread cool for at least 30 minutes to prevent gumminess, allowing the interior to set properly.
How to Store and Freeze Garlic Herb Dutch Oven Bread
- Room Temperature: Store the Garlic Herb Dutch Oven Bread at room temperature tightly wrapped in a kitchen towel for up to 2-3 days to maintain its crispy crust.
- Fridge: Avoid refrigeration, as it can dry out the bread. Instead, keep it in a cool, dry place to preserve flavor and texture.
- Freezer: For longer storage, slice the bread and freeze it in airtight bags for up to 3 months. This allows you to enjoy freshly toasted slices any time!
- Reheating: To revive the texture, reheat frozen slices in a toaster or oven until warm and crisp, bringing back that delightful artisan quality!
What to Serve with Garlic Herb Dutch Oven Bread
As you savor every bite of this fragrant bread, consider these delightful pairings that will transform your meal into an unforgettable experience.
-
Savory Pasta Dishes: Pair with spaghetti in marinara or creamy Alfredo sauce for a delightful contrast of textures that complements the bread’s crusty exterior.
-
Garden-Fresh Salad: A vibrant mixed green salad dressed with balsamic vinaigrette adds brightness to the meal, balancing the richness of the Garlic Herb Dutch Oven Bread.
-
Homemade Soup: Serve alongside a warm bowl of roasted tomato basil soup, where the crusty bread is perfect for dipping into the rich, flavorful broth.
-
Classic Garlic Butter: Spread warm garlic herb butter on each slice for an indulgent treat. The buttery richness enhances the garlic flavor in the bread.
-
Hearty Stews: A robust beef stew or a vegetable curry creates a comforting meal, with the bread soaking up all the delicious juices for every last bite.
-
Cheese Board: Elevate your appetizer game by pairing with a selection of aged cheeses, olives, and charcuterie—a perfect match for the aromatic notes in your bread.
Imagine the warmth of this Garlic Herb Dutch Oven Bread bringing together flavors, creating a delightful feast that you and your loved ones will cherish!
Garlic Herb Dutch Oven Bread Variations
Feel the freedom to explore flavors and textures that make this bread even more delightful in your kitchen.
-
Cheese Twist: Incorporate 1 cup of shredded cheese, like parmesan or cheddar, into the dough for a rich, cheesy surprise. This variation creates a sumptuous blend that will delight cheese lovers!
-
Whole Wheat Upgrade: Substitute half of the all-purpose flour with whole wheat flour for added nuttiness and fiber. Just keep an eye on the water amount, as whole wheat requires a bit more hydration for the perfect texture.
-
Roasted Garlic Version: Amplify the flavor by using roasted garlic instead of raw. The roasting mellows the sharpness, offering a sweeter, richer persona to every slice.
-
Herb Infusion: Experiment with different herbs such as dill or basil in place of the usual parsley and thyme for a flavor-packed twist that can elevate any meal. Fresh herbs truly bring the bread to life!
-
Spicy Kick: Add red pepper flakes or chopped jalapeños for a surprising heat that contrasts perfectly with the savory garlic and herbs. This variation is sure to bring your taste buds to a whole new level!
-
Cinnamon Raisin Delight: For a sweet twist, include 1 cup of raisins and 1 tablespoon of cinnamon. Bake this delightful combination as a breakfast treat or snack option. The smell of cinnamon baking will be irresistible!
-
Olive Oil Drizzle: Enhance the richness by adding a few tablespoons of your favorite flavored olive oil directly into the dough. This subtle addition will give extra depth to the flavor profile and a hint of indulgence.
While you’re at it, you might also enjoy pairing your Garlic Herb Dutch Oven Bread with a hearty soup or a delicious homemade dip. If you love experimenting, check out my recipes for Roasted Garlic White pizza or a delicious dip to complement your warm, crusty bread!
Make Ahead Options
These Garlic Herb Dutch Oven Bread loaves are perfect for meal prep enthusiasts! You can mix the dry ingredients and combine them with the wet ingredients up to 24 hours in advance, allowing you to ferment the dough overnight, making it taste even better. Once the dough has risen and doubled in size, cover it tightly with plastic wrap and refrigerate for up to 3 days. When you’re ready to bake, simply shape the dough and let it rest for about 1 hour before preheating your Dutch oven and baking. For a freshly baked aroma and flavor that’s just as delightful, be sure not to rush the resting times. Enjoy the ease of meal planning while savoring the pleasure of homemade bread!
Garlic Herb Dutch Oven Bread Recipe FAQs
How do I choose ripe and fresh ingredients for my Garlic Herb Dutch Oven Bread?
Absolutely! For the best flavor, choose all-purpose flour that feels soft and has no lumps. Fresh herbs should be vibrant green and fragrant; avoid those that look wilted or discolored. For garlic, select cloves that are firm and free from dark spots. These fresh ingredients will make a noticeable difference in taste!
What’s the best way to store Garlic Herb Dutch Oven Bread?
I recommend wrapping your Garlic Herb Dutch Oven Bread in a kitchen towel and storing it at room temperature for about 2-3 days. This keeps the crust nice and crispy. Avoid plastic wrap, as it traps moisture and can make the crust chewy.
Can I freeze Garlic Herb Dutch Oven Bread?
Yes! This bread freezes beautifully. Slice it into your preferred thickness, then place the slices in airtight bags. You can store them in the freezer for up to 3 months. When you’re ready to enjoy, simply toast them directly from frozen for a quick and delicious treat!
What should I do if my dough doesn’t rise properly?
Very! If your dough doesn’t rise after the recommended time, it could be due to inactive yeast or the temperature being too cold. To troubleshoot, ensure your yeast is fresh by checking the expiration date. You can also create a warmer environment for your dough by placing it in an oven with just the light on, or near a warm spot in your kitchen.
Are there any dietary considerations or allergies I should keep in mind?
For those with wheat sensitivity, you can use half whole wheat flour; just keep an eye on the hydration as it might need a bit more water. Additionally, if you’re cooking for pets, avoid feeding them bread as some dogs and cats can have issues with yeast and high-carb foods.
How can I enhance the flavor of my Garlic Herb Dutch Oven Bread?
To amp up the taste, consider adding ingredients like sun-dried tomatoes, olives, or cheese into the dough. You can also experiment with different herb combinations, like using dill for a fresh twist. Just make sure to balance the moisture content if you add wet ingredients!
Garlic Herb Dutch Oven Bread: The Easiest Artisan Delight
Ingredients
Equipment
Method
- In a large mixing bowl, whisk together the all-purpose flour, salt, and instant yeast. Stir in the minced garlic and fresh herbs.
- Pour in the lukewarm water into your dry mixture, stirring vigorously until there are no dry flour pockets remaining.
- Cover the bowl tightly with plastic wrap and leave it at room temperature for 12 to 18 hours.
- Lightly flour your work surface and gently turn the dough out onto it. Fold the dough over on itself a couple of times without kneading, shaping it into a round loaf.
- About 30 minutes before the second rise ends, place your Dutch oven (with the lid on) in the oven and preheat to 450°F (232°C).
- Once your oven has reached the desired temperature, carefully remove the hot Dutch oven. Lift the parchment with your dough and place it into the Dutch oven. Score the top of the dough and cover with the lid. Bake for 30 minutes; then uncover and bake for an additional 15 to 20 minutes until golden brown.
- Remove the bread from the Dutch oven and let it cool on a wire rack for at least 30 minutes before slicing.
Leave a Reply