
As I sat on the couch, the faint sound of a familiar jingle filled the room, taking me back to my childhood. Homemade Fudge Rounds have a special place in my heart, reminiscent of those irresistible treats I used to grab from the store shelves. But let me tell you, this recipe elevates those nostalgic memories even further! Not only do these homemade delights offer a healthier twist—no artificial ingredients here—but they also boast a chewy, fudgy texture that satisfies even the fiercest chocolate cravings. Plus, with quick prep time, they’re perfect for treating friends and family or indulging in a cozy night in. Ready to take a trip down memory lane and whip up your own batch of Homemade Fudge Rounds? Let’s get started!
Why are Homemade Fudge Rounds a Must-Try?
Nostalgic Delight: This recipe captures the essence of your favorite childhood treat, transforming classic flavors into a wholesome delight without the guilt.
Easy to Make: With just a few simple ingredients and steps, whipping up these fudge rounds is a breeze, even for beginner bakers.
Chewy & Fudgy: Expect an ultra-soft texture that melts in your mouth, packed with rich chocolate flavor.
Customizable Options: Want to make it gluten-free? Swap the flour! Prefer a unique twist? Try different fillings like mint buttercream!
Crowd-Pleaser: Serve alongside a glass of cold milk or coffee at your next gathering and watch them disappear.
Storage Friendly: These fudge rounds are perfect for making ahead of time and can be stored or frozen, making them a convenient tasty treat anytime. You’ll find it hard not to indulge!
Homemade Fudge Rounds Ingredients
For the Cookies
- Unsalted Butter – 140g (10 tbsp): Adds richness and moisture for a soft texture; substitute with margarine or coconut oil for a dairy-free version.
- Granulated Sugar – 150g (3/4 cup): Sweetens the cookies and contributes to their chewy texture.
- Large Egg – Acts as a binder, essential for holding the cookie together; no substitutes recommended.
- Light Corn Syrup – 1 tbsp: Prevents crystallization for a chewy texture; golden syrup can be used as a substitute.
- Vanilla Extract – 1 tsp: Elevates flavors; opt for pure extract for the best results.
- All-Purpose Flour – 159g (1 1/4 cups): Provides structure; swap for a 1:1 gluten-free flour blend for gluten-free homemade fudge rounds.
- Natural Cocoa Powder – 32g (6 tbsp): Infuses chocolate flavor and color; opt for Dutch-process cocoa for richer taste.
- Cornstarch – 1 tsp: Ensures a tender, soft texture in the cookies.
- Baking Soda – 1/2 tsp: Acts as a leavening agent, creating a light texture.
- Fine Sea Salt – 1/4 tsp: Balances sweetness and enhances flavor.
- Milk Chocolate Chips – 85g (1/2 cup): Boosts chocolate flavor; dark chocolate or vegan chips can be used for a different twist.
For the Filling
- Unsalted Butter – 113g (1 stick): Serves as the base for the buttercream filling; margarine or vegan butter works as dairy-free options.
- Unsweetened Cocoa Powder – 11g (2 tbsp): Adds richness to the filling; ensure it’s sifted to prevent lumps.
- Powdered Sugar – 188g (1 1/2 cups): Sweetens the filling; substitute with coconut powdered sugar for a healthier option.
- Warm Water – 2 tbsp: Adjusts filling consistency; milk can be used for a creamier buttercream.
- Vanilla Extract – 1/2 tsp: Flavors the buttercream filling, enhancing its taste.
Step‑by‑Step Instructions for Homemade Fudge Rounds
Step 1: Preheat the Oven
Begin by preheating your oven to 350°F (175°C). While the oven warms up, line two baking sheets with parchment paper to prevent sticking and facilitate easy cleanup. This prep step is crucial for ensuring your Homemade Fudge Rounds bake evenly and achieve that perfectly soft, chewy texture.
Step 2: Cream Butter and Sugar
In a large mixing bowl, combine 140g of unsalted butter and 150g of granulated sugar. Using an electric mixer, beat them together on medium speed for about 2-3 minutes until the mixture is light, fluffy, and pale in color. This process incorporates air into the butter, which contributes to the delightful texture of the cookies.
Step 3: Add Wet Ingredients
With the mixer running, add one large egg, 1 tablespoon of light corn syrup, and 1 teaspoon of vanilla extract to the creamed butter and sugar. Beat the mixture on medium speed for another 1-2 minutes until everything is well combined, creating a smooth and glossy mixture that will hold the homemade fudge rounds together beautifully.
Step 4: Combine Dry Ingredients
In a separate bowl, whisk together 159g of all-purpose flour, 32g of natural cocoa powder, 1 teaspoon of cornstarch, 1/2 teaspoon of baking soda, and 1/4 teaspoon of fine sea salt. Make sure the dry ingredients are well-incorporated and free of lumps, as this will ensure an even distribution of flavors throughout your cookies.
Step 5: Mix Wet and Dry Ingredients
Gradually add the dry mixture to the wet mixture, using a spatula or wooden spoon to fold them together. Mix until just combined, being careful not to overmix, as this can lead to tough cookies. Finally, gently fold in 85g of milk chocolate chips, which will add an extra layer of chocolatey goodness to your homemade fudge rounds.
Step 6: Scoop and Shape the Dough
Using a 1 ½-tablespoon spring-loaded scoop, portion out the cookie dough onto the prepared baking sheets, spacing them about 2 inches apart. This spacing allows the cookies to spread slightly while baking. You should be able to fit about 12 to 15 cookie dough balls per sheet, ensuring ample room for expansion.
Step 7: Bake the Cookies
Place the baking sheets in the preheated oven and bake for 8 to 9 minutes. Look for the cookies to be slightly puffed with set edges but still soft in the middle. This visual cue indicates that they will retain a wonderful chewiness, perfect for those nostalgic Homemade Fudge Rounds.
Step 8: Cool the Cookies
Once baked, remove the cookies from the oven and allow them to cool on the baking sheets for a few minutes. Then, carefully transfer them to a wire rack to cool completely. This cooling time is essential, as it allows the cookies to firm up and makes them easier to handle when you’re ready to assemble the fudge rounds.
Step 9: Prepare the Filling
For the filling, beat together 113g of unsalted butter, 11g of unsweetened cocoa powder, and 188g of powdered sugar using an electric mixer on medium speed. Mix until the mixture becomes light and fluffy, about 2-3 minutes. Then, add 2 tablespoons of warm water and 1/2 teaspoon of vanilla extract, blending until the filling reaches a smooth consistency.
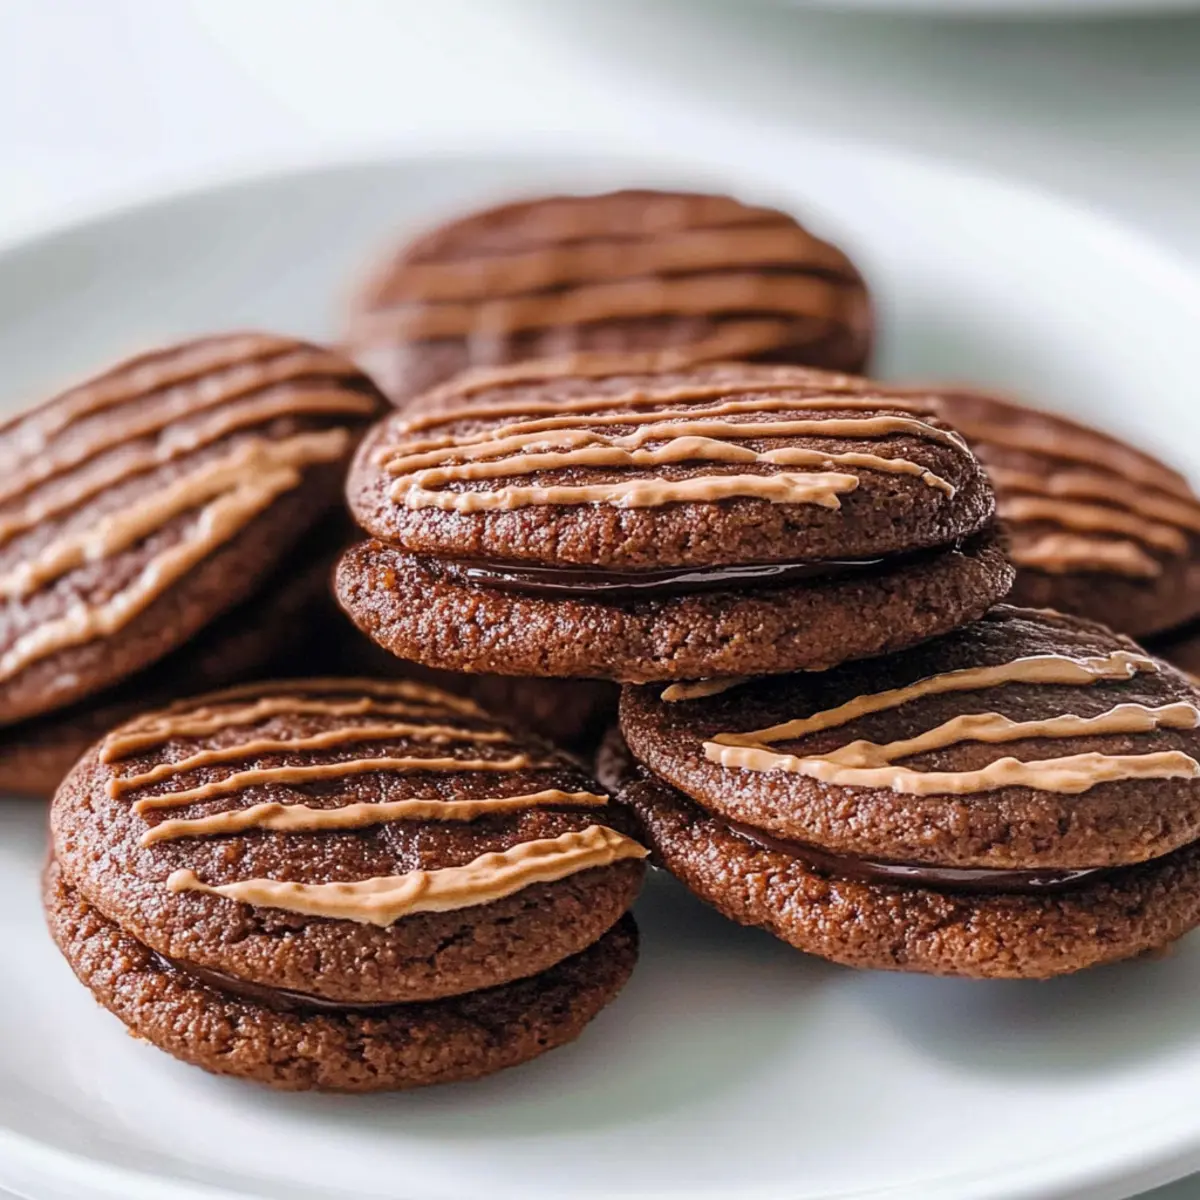
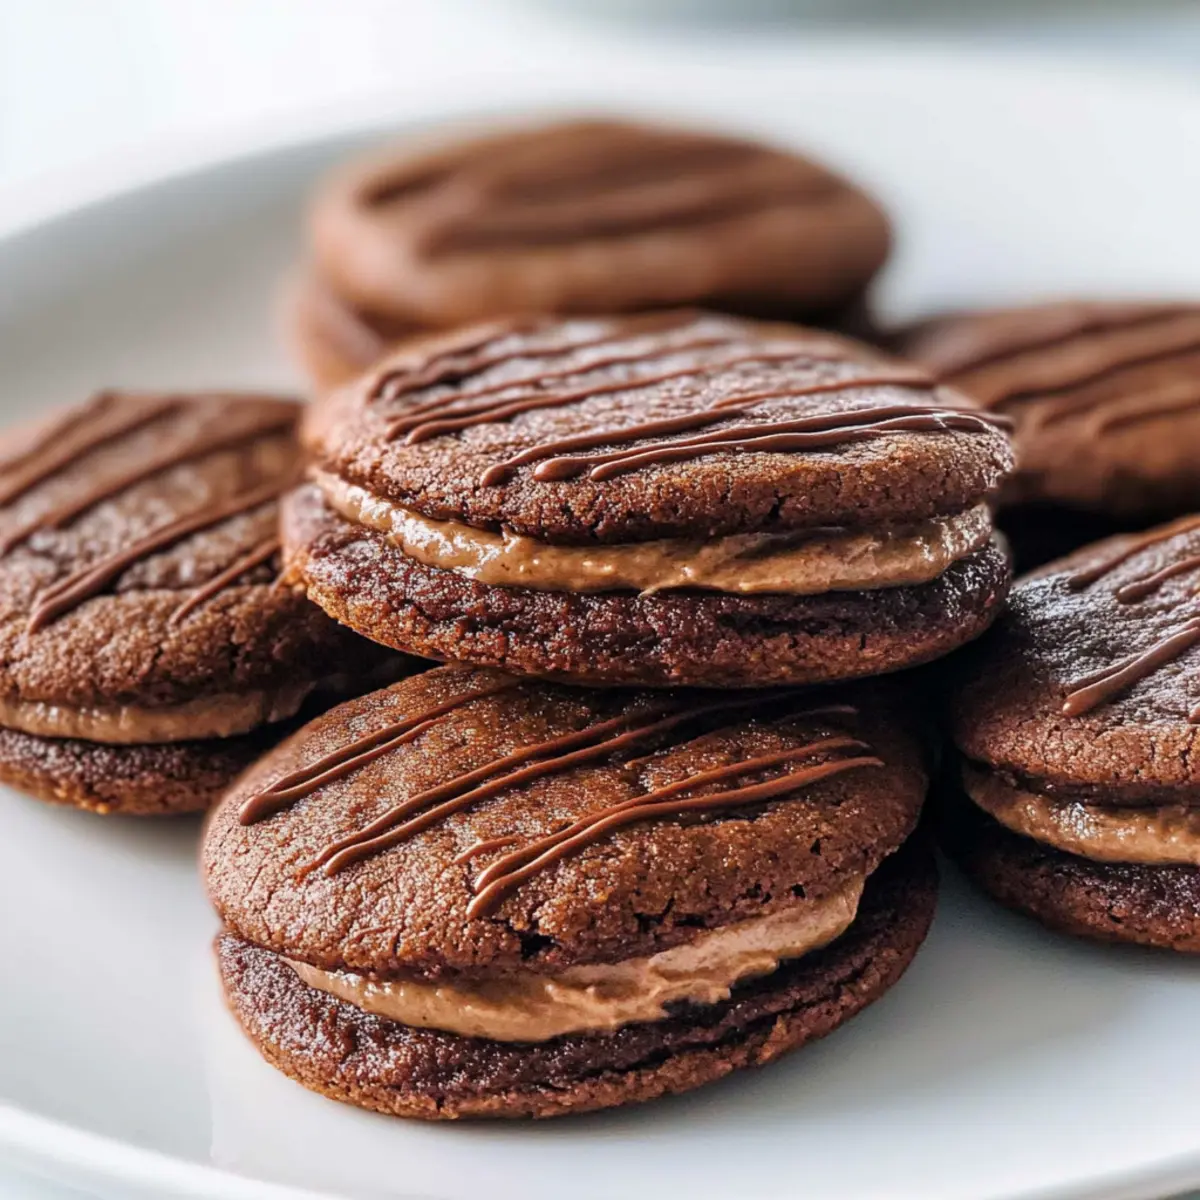
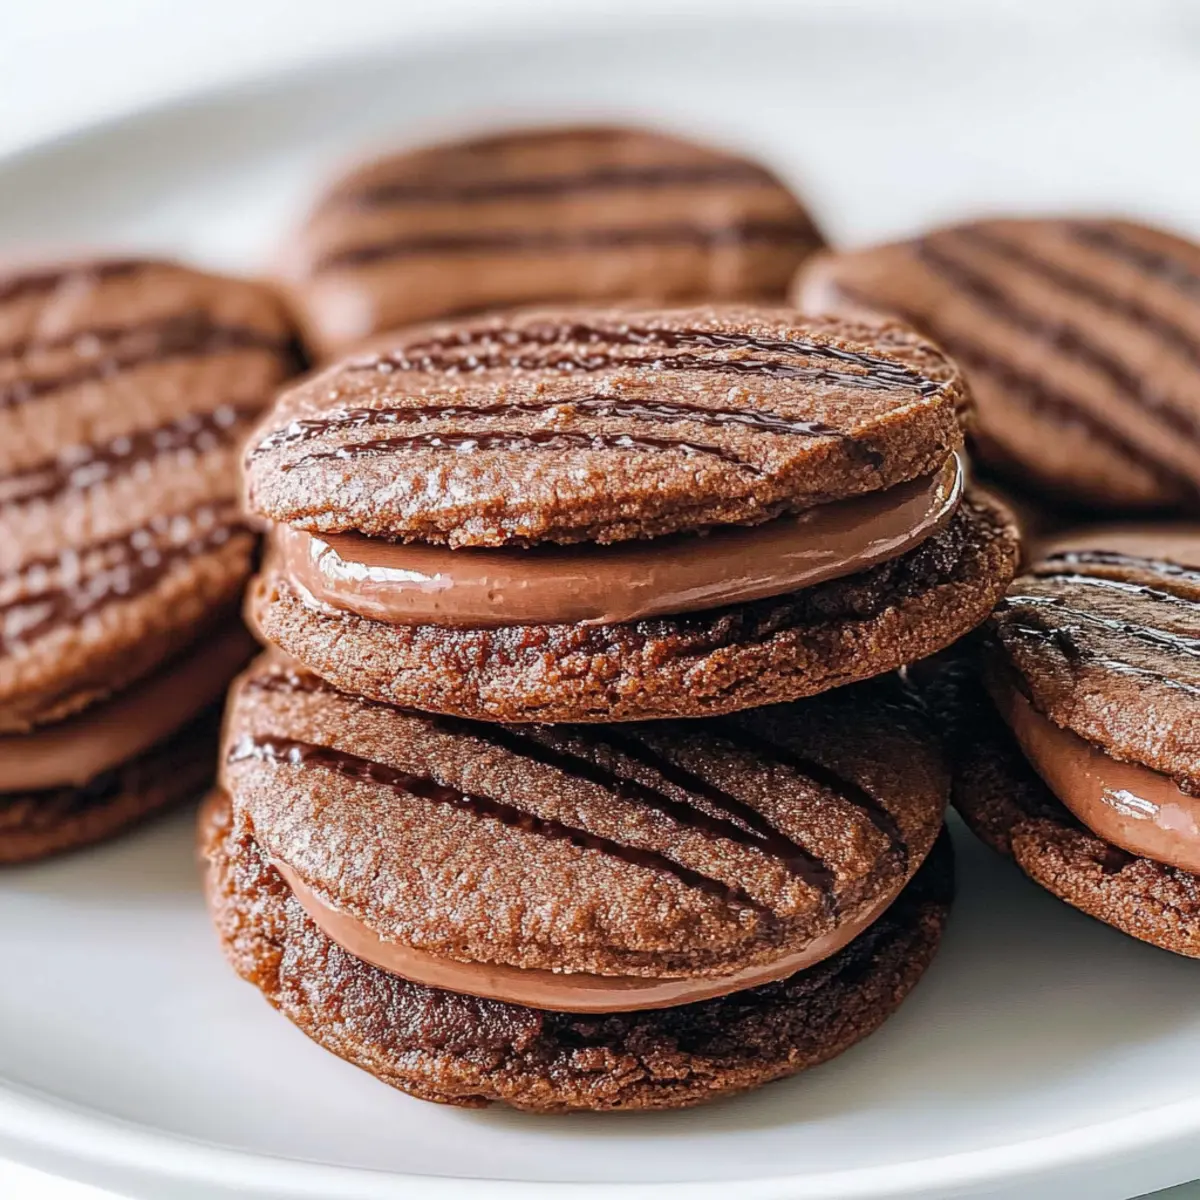
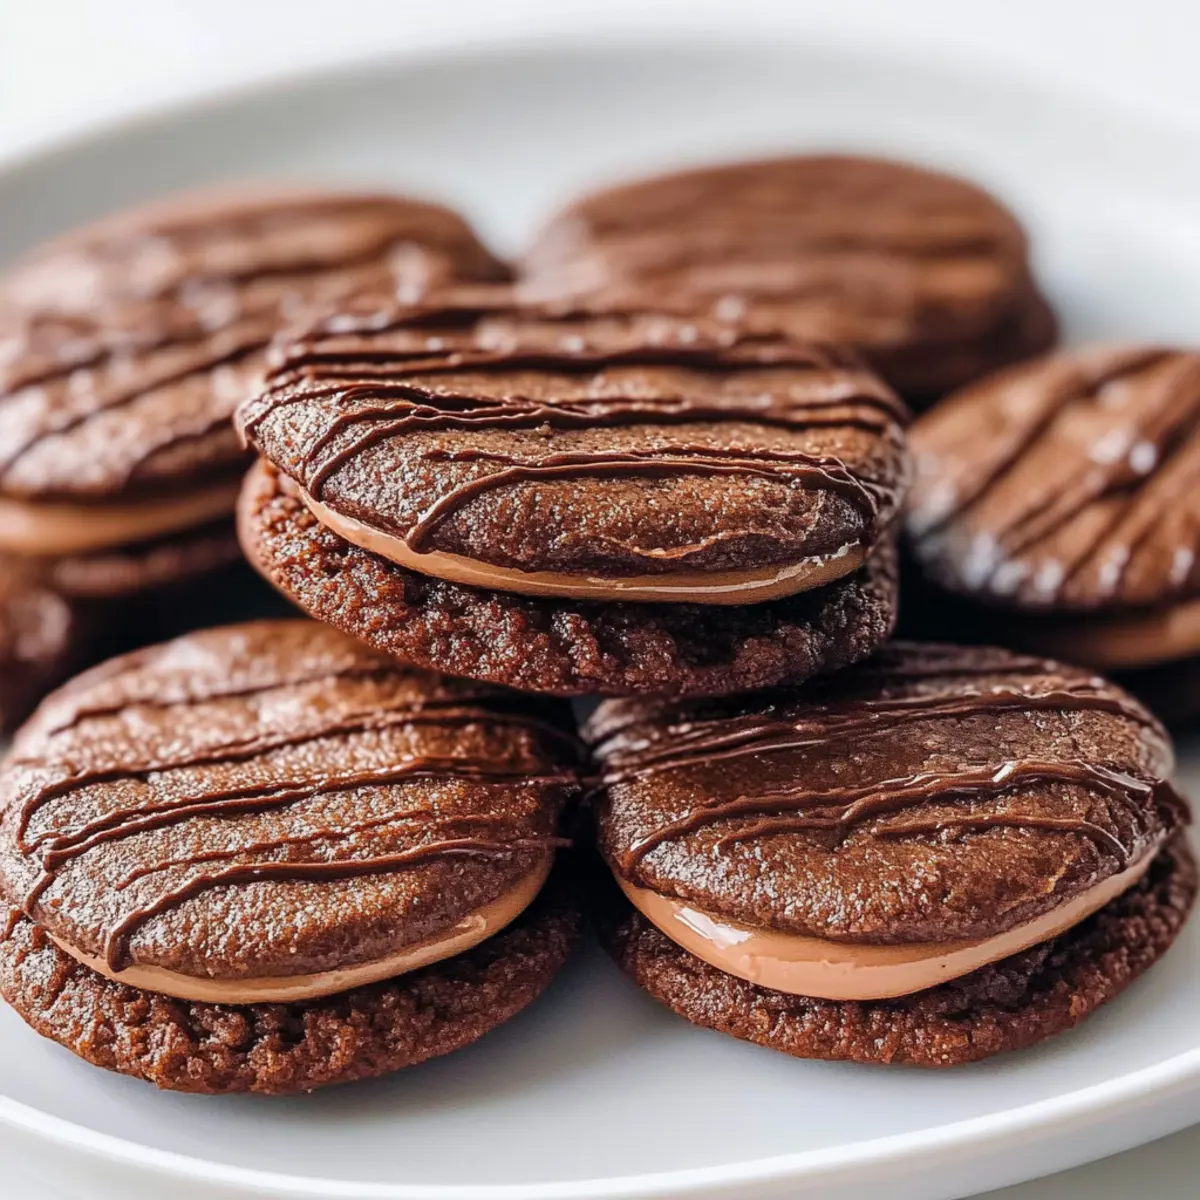
Step 10: Assemble the Homemade Fudge Rounds
Once the cookies are completely cool, spread or pipe a generous amount of the chocolate filling between two cookies to create a delightful sandwich. Use about 1 to 2 tablespoons of filling for each sandwich, ensuring the decadent layers of creaminess harmonize beautifully with the chewy cookie texture. Enjoy your homemade fudge rounds!
Homemade Fudge Rounds Variations & Substitutions
Feel free to explore your creativity while making these delectable treats and discover new flavor profiles that will take your Homemade Fudge Rounds to the next level!
-
Gluten-Free: Swap all-purpose flour with a 1:1 gluten-free flour blend for those with gluten sensitivities. This ensures everyone can enjoy the fun!
-
Dairy-Free: Use coconut oil or a plant-based margarine instead of unsalted butter and opt for almond or coconut milk in the filling. Dairy-free fudge rounds are just as delicious!
-
Different Sweeteners: Replace granulated sugar with coconut sugar or pure maple syrup for a more natural sweetness. Just adjust the quantity to achieve your desired sweetness!
-
Chocolate Lovers: For a richer chocolate experience, use dark chocolate chips in place of milk chocolate or blend some cocoa powder into your cookie dough. You won’t regret it!
-
Flavor Twists: Experiment by adding flavored extracts like peppermint or almond instead of vanilla for a refreshing change. This can transform your fudge rounds into something special for holidays or gatherings!
-
Nutty Surprise: Fold in some chopped nuts like walnuts or pecans into the cookie dough for an added crunch factor. This can provide a delightful contrast to the soft fudge!
-
Creative Fillings: Feel free to change up the filling! Swap the chocolate buttercream for other flavors like peanut butter or even a fruit-flavored cream. The possibilities are endless!
-
Mini Delights: For a fun twist, create mini fudge rounds instead of traditional-sized ones. These bite-sized treats are perfect for parties and sharing!
Looking for something to pair these fudge rounds with? Try enjoying them with a glass of Homemade Chocolate Milk or some warm slices of Homemade Garlic Rosemary bread to bring balance to your sweet indulgence!
Expert Tips for Homemade Fudge Rounds
-
Room Temperature Butter: Ensure your butter is at cool room temperature for easier creaming, contributing to the delicate texture of your homemade fudge rounds.
-
Don’t Overmix: Avoid overmixing the dough; this keeps cookies tender and prevents them from becoming tough.
-
Precise Measurements: Use a digital scale for accurate ingredient measurements, especially with flour, for perfectly textured cookies.
-
Chill the Dough: Chilling the dough for about 30 minutes can result in thicker cookies; you can flatten them slightly if you prefer a different shape.
-
Sift Cocoa Powder: Always sift unsweetened cocoa powder before adding it to your filling to avoid lumps, ensuring a smooth and creamy texture.
What to Serve with Homemade Fudge Rounds?
There’s nothing quite like indulging in sweet nostalgia, and pairing these delightful fudge rounds can elevate your treat experience even further.
- Cold Milk: Nothing beats the classic combination of milk and cookies. The creamy texture balances the rich fudginess beautifully.
- Vanilla Ice Cream: Serve a scoop alongside for a luxurious dessert. The cold, creamy ice cream complements the chewy rounds perfectly—pure bliss!
- Fresh Berries: A burst of freshness from strawberries or raspberries adds vibrant color and flavor, cutting through the sweetness.
- Coffee: Enjoy your fudge rounds with a warm cup of coffee. The rich flavors combine, making for a perfect afternoon pick-me-up.
- Whipped Cream: Top your fudge rounds with a dollop of whipped cream for an extra touch of indulgence and a beautiful presentation.
- Chocolate Drizzle: Drizzle some melted chocolate over the assembled rounds for a decadent finish that any chocolate lover will adore.
- Mint Tea: For a refreshing after-dinner drink, mint tea is a delightful lighter pairing that contrasts well with the rich chocolatey flavors.
- Shaved Coconut: Sprinkle some toasted coconut on top for a tropical twist, adding a delightful crunch and complementary flavor.
- Lemonade: A tall glass of homemade lemonade brings a refreshing, tangy touch that cuts through the sweetness perfectly.
Each of these pairings enhances the experience of homemade fudge rounds, making your treat time even more delightful!
How to Store and Freeze Homemade Fudge Rounds
Room Temperature: Store assembled fudge rounds in an airtight container at room temperature for up to 1 day to maintain their chewy texture.
Fridge: Keep them in the refrigerator for up to 5 days. The cool environment preserves freshness while slightly firming the filling.
Freezer: For longer storage, freeze assembled fudge rounds in an airtight container or freezer bag for up to 1 month. Thaw overnight in the fridge before serving.
Reheating: If you prefer them warm, gently heat the fudge rounds in the microwave for about 10–15 seconds, bringing back that freshly baked goodness!
Make Ahead Options
These Homemade Fudge Rounds are perfect for busy home cooks looking to save time during the week! You can prepare the cookie dough up to 24 hours in advance by covering it tightly and refrigerating it, which will enhance the flavors and maintain the chewy texture. You can also bake the cookies and freeze them for up to 3 months. Simply cool them completely, place them in an airtight container, and freeze. The filling can be made ahead as well and stored in the fridge for up to 3 days. When you’re ready to serve, just spread the filling between the cookies, and you’ll have fresh, delicious fudge rounds that taste just as delightful as when you first made them!
Homemade Fudge Rounds Recipe FAQs
How do I choose the right cocoa powder for my fudge rounds?
For the richest chocolate flavor, I recommend using Dutch-process cocoa powder. It has a deeper and more intense chocolate taste compared to natural cocoa powder. However, if you can only find natural cocoa powder, that works too! Just remember that it might create a slightly different flavor profile.
How should I store my homemade fudge rounds to keep them fresh?
Absolutely! After assembling, store your fudge rounds in an airtight container at room temperature for up to 1 day. If you’re planning to enjoy them later, refrigerate them for up to 5 days. They’ll actually taste wonderful straight from the fridge as the coolness enhances the fudgy filling!
Can I freeze homemade fudge rounds and how do I do it?
Yes, you can freeze your homemade fudge rounds! To do so, place them in an airtight container or a freezer bag, ensuring to separate layers with parchment paper. They can be frozen for up to 1 month. When you’re ready to indulge, simply thaw them overnight in the fridge or let them sit at room temperature for about 30 minutes.
What if my cookies spread too much while baking?
If you notice your fudge rounds spreading excessively, it might be due to the butter being too soft or melted. To prevent this, ensure your butter is at a cool room temperature when mixing—firm yet soft enough to cream nicely with sugar. Also, consider chilling the dough for about 30 minutes before baking to help them maintain their shape.
Are there any allergy considerations for this recipe?
Very! If you’re baking for someone with dietary restrictions, you can certainly adapt the recipe. For a dairy-free option, use margarine or coconut oil in place of butter, and use a dairy-free milk chocolate alternative for the chips. Always check the ingredient labels to ensure they meet your dietary needs!
How long will the filling stay fresh?
Typically, the filling should stay fresh for about 5 days in the fridge. However, if you notice any changes in texture or an off smell, it’s best to discard it. To enjoy that ultra-creamy texture longer, make just enough for immediate use, or proceed to freeze leftover filling in a separate container for up to a month!
Decadent Homemade Fudge Rounds for Ultimate Chocolate Bliss
Ingredients
Equipment
Method
- Preheat your oven to 350°F (175°C) and line two baking sheets with parchment paper.
- In a large mixing bowl, cream together 140g of unsalted butter and 150g of granulated sugar until light and fluffy.
- Add in one large egg, 1 tablespoon of light corn syrup, and 1 teaspoon of vanilla extract, and mix until well combined.
- Whisk together 159g of all-purpose flour, 32g of cocoa powder, 1 teaspoon of cornstarch, 1/2 teaspoon of baking soda, and 1/4 teaspoon of sea salt in a separate bowl.
- Gradually fold the dry mixture into the wet mixture until just combined, then gently fold in 85g of milk chocolate chips.
- Scoop the dough onto prepared baking sheets, leaving 2 inches between each cookie.
- Bake for 8 to 9 minutes until edges are set but centers are still soft.
- Allow cookies to cool on baking sheets for a few minutes before transferring to a wire rack.
- For the filling, beat together 113g of unsalted butter, 11g of cocoa powder, and 188g of powdered sugar until fluffy, then mix in 2 tablespoons of warm water and 1/2 teaspoon of vanilla extract.
- Spread or pipe filling between two cooled cookies to serve.
Leave a Reply