
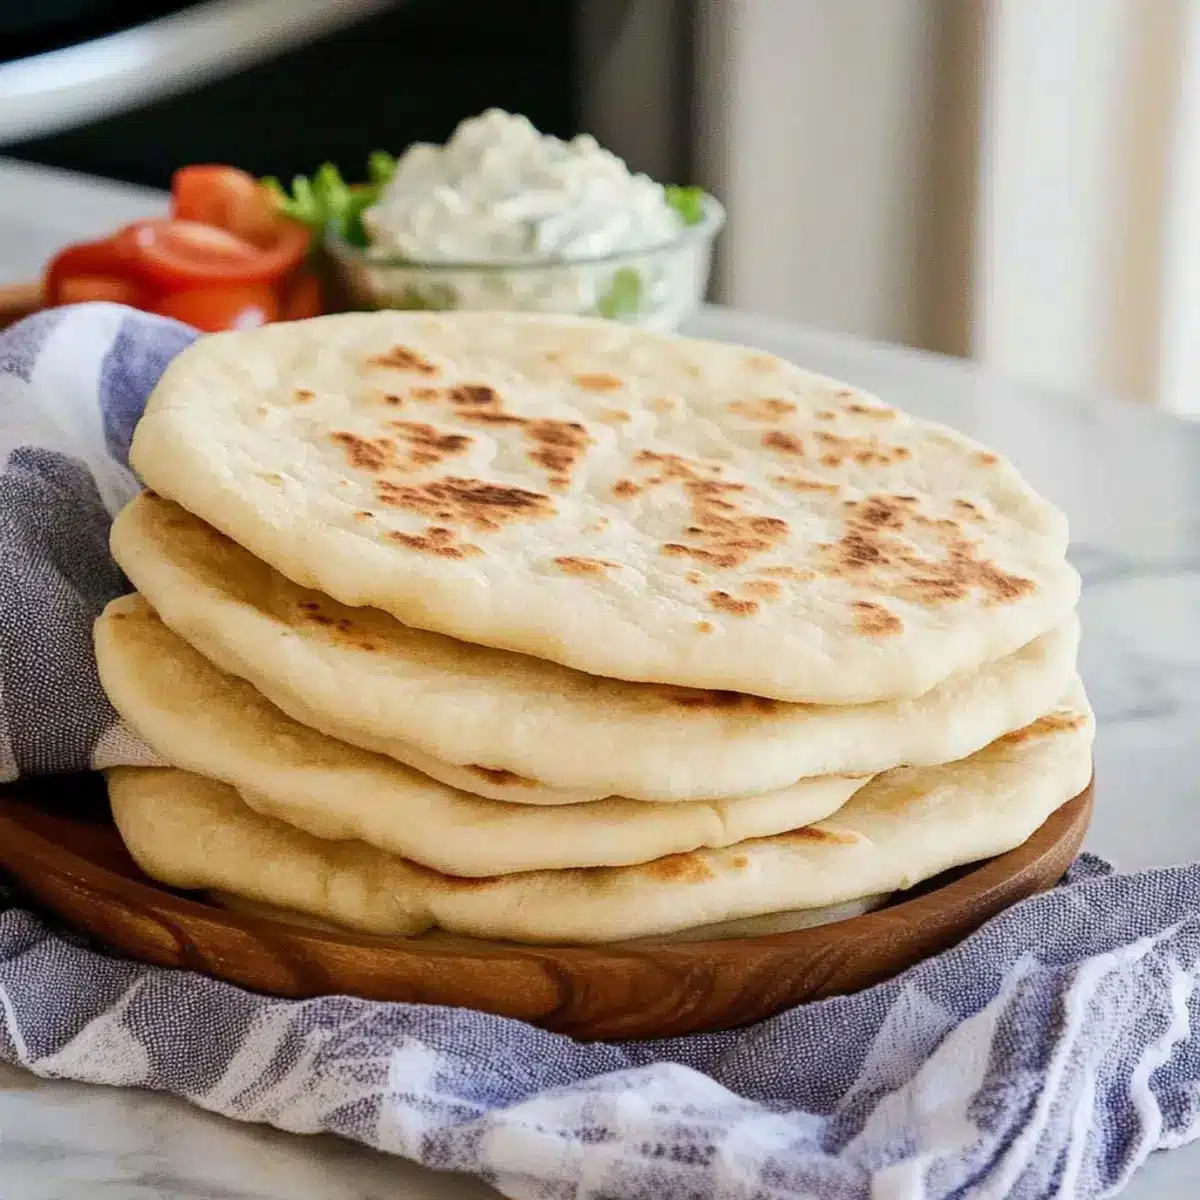
As the warm aroma of bread envelops my kitchen, I can’t help but feel a tingle of excitement. Homemade Gyro Bread is more than just a fluffy flatbread; it’s a delightful canvas for your culinary creativity. Whether you’re filling it with juicy rotisserie meats or vibrant veggies and zesty tzatziki sauce, this recipe is perfect for casual lunches or lively dinner gatherings. Plus, it’s incredibly easy to prepare in advance, streamlining your meal prep while adding a generous touch of variety to your weeknight menus. If you’re ready to transform your cooking routine with this versatile flatbread, wait until you see how many delicious options await you—fancy a falafel twist or perhaps a savory chicken gyro? Let’s dive into this delightful homemade adventure together!
Why is Gyro Bread so special?
Fluffy Texture: This homemade Gyro Bread features a deliciously soft and pillowy interior, perfect for enveloping your favorite fillings.
Endless Variations: Flexibility is key! Substitute with falafel or chicken, making it fun to experiment and cater to your cravings.
Meal-Prep Superstar: Make your weeknight cooking a breeze, as you can prepare these flatbreads in advance and store them!
Crowd-Pleasing Appeal: Whether for family dinners or casual gatherings, everyone will love customizing their wraps with fresh veggies, meats, and zesty sauces.
Don’t miss out on pairing this with delicious sides like Cornbread Casserole Cozy for a balanced meal!
Gyro Bread Ingredients
For the Dough
- Warm Water – Activates yeast; ensure it’s around 105°F for optimal proofing.
- Sugar – Feeds yeast for rising; no essential substitutions needed.
- Active Dry Yeast – The secret to fluffy bread; check for freshness for the best results.
- All-Purpose Flour – Provides the right structure; substitute with gluten-free all-purpose flour with xanthan gum for a lighter option.
- Salt – Enhances flavor; it’s essential for balancing the taste.
- Olive Oil – Adds richness and moisture; a little extra for brushing helps with browning.
For Cooking
- Olive Oil – A light brush helps the pitas cook evenly and achieve that lovely golden-brown color.
Embrace the delightful world of Gyro Bread and use these ingredients to explore a range of savory fillings that satisfy every craving!
Step‑by‑Step Instructions for Gyro Bread
Step 1: Prepare Yeast Mixture
In a mixing bowl, combine 1 cup of warm water (around 105°F), 1 tablespoon of sugar, and 2 teaspoons of active dry yeast. Stir gently, then let it sit for about 5 minutes until it becomes foamy on top, indicating the yeast is active. This bubbly mixture is the foundation for your light and fluffy Gyro Bread.
Step 2: Mix Dough
Once your yeast is foamy, add 3 cups of all-purpose flour, 1 teaspoon of salt, and 2 tablespoons of olive oil to the bowl. Mix the ingredients together with a spoon or your hands until a shaggy dough forms. The dough should pull away from the sides of the bowl, creating a cohesive mass.
Step 3: Knead Dough
Transfer the shaggy dough onto a lightly floured surface. Knead it for 3-4 minutes, applying pressure with the palms of your hands until it feels smooth and elastic. This step is crucial for developing the gluten, which will give your Gyro Bread that wonderful chewy texture.
Step 4: Rest Dough
Place the kneaded dough in a lightly oiled bowl, covering it with a clean kitchen towel or plastic wrap. Let it rest in a warm area for about 30 minutes, or until it doubles in size. This resting period allows the dough to rise and will result in the fluffy texture you want from your Gyro Bread.
Step 5: Shape Pitas
After the dough has risen, gently punch it down to release any excess air. Divide the dough into 6 equal pieces, rolling each into a ball. On a floured surface, flatten each ball into a 6-inch circle. Ensure they are even and about ¼ inch thick, so they cook evenly in the skillet.
Step 6: Cook Pitas
Heat a cast iron skillet over medium heat and lightly brush it with olive oil. Place your first pita in the skillet and cook for 2-3 minutes until it begins to puff up and turn golden brown. Flip it over for another 2-3 minutes on the second side. Repeat this process for remaining dough rounds, keeping the cooked pitas warm in a towel.
Step 7: Keep Warm
As each pita is cooked, wrap them in a clean kitchen towel to keep them warm and soft until you’re ready to serve. This step not only retains the warmth but also helps maintain the delicious, pliable texture of your freshly made Gyro Bread, making it perfect for wrapping around your favorite fillings.
Gyro Bread: Flavorful Variations
Feel free to explore your creative side and customize your Gyro Bread with these delightful variations!
-
Vegetarian Twist: Swap in Falafel for a hearty veggie option that pairs perfectly with tangy tahini sauce.
-
Lean & Flavorful: Try Chicken Gyro with marinated grilled chicken for a light yet satisfying wrap experience. The savory taste is sure to delight!
-
Spicy Kick: Add sliced Jalapeños for a zesty touch that’ll spice up your wraps. Heat lovers will adore this fiery twist!
-
Cheesy Delight: Incorporate Feta Cheese crumbles into your fillings for a creamy burst of flavor that complements your fresh veggies beautifully.
-
Herb Infusion: Make the dough more aromatic by adding Oregano or Dill to the mixture. This little twist will elevate the taste and authenticity of your bread.
-
Mediterranean Platter: Serve with dips like Baked Feta or Melitzanosalata for a fabulous mezze spread! Your guests will be captivated by this delightful spread.
-
Whole Wheat Option: For a healthier alternative, use whole wheat flour in the dough. It adds a nutty flavor and boosts the nutritional value of your Gyro Bread.
-
Nutty Crunch: Toss in some Sesame Seeds to your dough for added texture. They bring delightful crunchiness that introduces another layer of flavor in every bite.
Don’t hesitate to mix and match these delicious variations to create your very own signature Gyro experience!
Make Ahead Options
These homemade Gyro Bread are not only delightful but also a meal prep dream! You can prepare the dough up to 24 hours in advance. Simply follow the steps until the resting period (Step 4) and then refrigerate the dough. This keeps it fresh and helps to develop flavor. When you’re ready to cook, just let the dough sit at room temperature for about 20-30 minutes before proceeding with shaping and cooking the pitas (Steps 5 and 6). If you want to go further, cooked Gyro Bread can be wrapped and stored in an airtight container for 3-5 days in the fridge or frozen for up to 3 months. Reheat briefly in a dry skillet before serving to restore their fluffy, wonderful texture, and enjoy a quick, tasty addition to your meals!
What to Serve with Homemade Gyro Bread?
Indulge in the experience of creating a meal that dances with flavors and textures, bringing smiles to your table as your family gathers around.
-
Tzatziki Sauce: A refreshing cucumber-yogurt blend that adds a cool contrast to the warmth of the bread. Perfect for drizzling or dipping!
-
Greek Salad: Crisp lettuce, juicy tomatoes, and briny olives create a fresh, vibrant side that pairs perfectly with savory gyro fillings.
-
Roasted Vegetables: Seasoned seasonal veggies provide a hearty, nutritious complement, enhancing every bite’s flavor and creating a colorful plate.
-
Falafel Filling: For a delightful meat-free twist, crispy falafel adds protein and texture with vibrant spices that enhance the warm bread.
-
Grilled Chicken Strips: Tender, marinated chicken adds a satisfying protein option that brings decadent flavors, easily wrapped in your gyro bread.
-
Lemon Rice Pilaf: Fluffy, lemon-infused rice serves as a zesty counterpoint, offering a burst of citrus flavor that brightens the meal.
-
Pita Chips with Hummus: Crunchy and satisfying, these make for a delightful appetizer before reveling in the wraps, providing textural variety.
-
Feta Cheese Crumbles: Salty, crumbly feta enhances any filling choice and provides creamy, tangy bites that elevate the overall experience.
-
Herbal Tea: Sip on a soothing herbal tea for a relaxing finish—a delightful addition that complements the Mediterranean flavors beautifully.
Expert Tips for Perfect Gyro Bread
-
Warm Water Matters: Always use warm water around 105°F to activate the yeast properly; too hot can kill it, leading to dense bread.
-
Check Yeast Freshness: Ensure your active dry yeast is fresh by checking the expiration date; stale yeast can hinder your dough from rising.
-
Knead with Care: Don’t skimp on kneading! Aim for a smooth, elastic dough to ensure a delightful chew in your Gyro Bread.
-
Resting Time is Key: Allow the dough to rise until doubled in size; this step is crucial for achieving that airy texture in your flatbread.
-
Use a Cast Iron Skillet: For evenly cooked bread and that pleasant char, a cast iron skillet is your best friend! It helps develop flavor too.
-
Experiment with Fillings: Don’t hesitate to try various fillings—it’s all about making the Gyro Bread your own, so let your creativity shine!
How to Store and Freeze Gyro Bread
Room Temperature: Wrap cooked Gyro Bread in a clean kitchen towel to keep warm. It will stay fresh for up to 2 hours at room temperature.
Fridge: Store cooled Gyro Bread in plastic wrap or an airtight container for up to 3-5 days. This will keep it soft and ready for your next meal.
Freezer: For longer storage, freeze the Gyro Bread in a single layer, separated by parchment paper, for up to 3 months. This keeps them from sticking together.
Reheating: To reheat, thaw in the fridge overnight, then warm in a skillet over medium heat for 1-2 minutes per side or in a microwave for quick enjoyment!
Gyro Bread Recipe FAQs
What kind of warm water should I use for the Gyro Bread?
Absolutely! Use water that’s around 105°F to activate the yeast without killing it. Using a meat thermometer can help ensure the perfect temperature for optimal proofing.
How can I store my Gyro Bread?
To keep your Gyro Bread fresh, you can wrap it in plastic wrap or place it in an airtight container. It will last in the fridge for 3-5 days, maintaining that soft texture you love.
Can I freeze Gyro Bread for later use?
Very! To freeze, arrange the cooled Gyro Bread in a single layer with parchment paper between each piece to prevent sticking. Store them in an airtight container or freezer bag for up to 3 months. When ready to enjoy, simply thaw overnight in the fridge and reheat!
What should I do if my dough isn’t rising?
If your dough isn’t rising as expected, check the freshness of your yeast—expired yeast can prevent dough from rising. Ensure you’ve used water that’s warm but not hot, and place your dough in a warm environment, like an oven with just the light on. If it still doesn’t rise, consider giving it a little extra time to see if it starts to double in size.
Can I make Gyro Bread gluten-free?
Yes, you can! I recommend using a gluten-free all-purpose flour that includes xanthan gum for better texture. It’s important to follow the same measurements but remember that the dough might behave a little differently, so adjust as needed.
How long can I keep leftover Gyro Bread?
Leftovers can be a great treat! Properly stored in the fridge, Gyro Bread can last for 3-5 days. If you’d rather freeze any extras, follow the freezing instructions I mentioned earlier to enjoy at a later time.
Fluffy Gyro Bread Recipe for Perfect Homemade Wraps
Ingredients
Equipment
Method
- In a mixing bowl, combine warm water, sugar, and active dry yeast. Stir gently and let sit for 5 minutes until foamy.
- Add all-purpose flour, salt, and olive oil to the yeast mixture. Mix until a shaggy dough forms.
- Transfer dough to a floured surface and knead for 3-4 minutes until smooth and elastic.
- Place the kneaded dough in an oiled bowl, cover, and let rest in a warm area for about 30 minutes until doubled in size.
- Punch down the risen dough, divide into 6 equal pieces, and flatten each piece into a 6-inch circle.
- Heat a skillet over medium heat and brush with olive oil. Cook each pita for 2-3 minutes until puffed and golden, flipping halfway.
- Wrap cooked pitas in a kitchen towel to keep warm until serving.
Leave a Reply