
The tantalizing aroma of crispy chicken wafted through my kitchen as I whipped up a delightful Chicken Katsu Bento Box—a feast that promises to transport you straight to the heart of Japan. This easy Japanese lunch idea not only showcases the crunch of panko-breaded chicken but also balances beautiful layers of fluffy rice and fresh vegetables, making it a perfect solution for busy days. In under 40 minutes, you’ll have a satisfying meal that’s not just quick to prepare but also visually captivating—a real crowd-pleaser. Whether you stick to the classic chicken or switch it up with pork or even tofu for a vegetarian twist, this recipe is sure to become a staple in your culinary repertoire. So, what do you think you’ll add to your bento box to make it uniquely yours?

Why is Chicken Katsu Bento Box Amazing?
Simplicity at its Core: Preparing this bento box is a breeze; just a few steps and simple ingredients, making it perfect for home cooks of all levels.
Crispy, Crunchy Perfection: Enjoy the satisfying crunch of panko-breaded chicken that adds an irresistible texture to each bite!
Versatile Options for Everyone: Whether you’re a meat lover or a vegetarian, you can easily switch chicken for pork or try eggplant/tofu for a delicious twist.
Nutritious Ingredients: Packed with lean protein and fresh veggies, this meal is not just tasty but also nourishes your body.
Perfect for Meal Prep: Make it ahead and store components separately, so you can enjoy a fresh, delicious lunch any day of the week!
Crowd-Pleasing Appeal: The vibrant colors and enticing flavors are sure to impress family and friends, making it ideal for gatherings. For a complete meal experience, consider pairing your bento box with some tasty street corn from my Street Corn Chicken recipe!
Chicken Katsu Bento Box Ingredients
For the Chicken
• Boneless, Skinless Chicken Breasts – A lean protein source that ensures tenderness when tenderized.
• All-Purpose Flour – Helps in dredging chicken so that egg and panko adhere properly, ensuring a crunchy coating.
• Beaten Eggs – Acts as a binder, adding richness and moisture to the chicken.
• Panko Breadcrumbs – Provides the signature crispy texture that makes the Chicken Katsu Bento Box unforgettable.
For the Frying
• Cooking Oil – Choose a neutral oil for frying to achieve that perfect crispy exterior; check the heat for optimal frying.
For the Base
• Fluffy Rice – A hearty base balancing the meal; Japanese short-grain rice is preferred for the best texture.
For the Vegetables
• Cabbage (fresh and crunchy) – Adds color, texture, and freshness to the bento box, making each bite delightful.
For the Sauce
• Tonkatsu Sauce – Offers a savory and slightly sweet flavor, enhancing the overall taste of the Chicken Katsu Bento Box.
Step‑by‑Step Instructions for Chicken Katsu Bento Box
Step 1: Prep Ingredients
Start by gathering all your ingredients for the Chicken Katsu Bento Box. Tenderize the boneless, skinless chicken breasts with a meat mallet for even cooking. Wash and chop the fresh cabbage into thin strips, and cook Japanese short-grain rice according to package instructions, usually about 15 minutes in boiling water. Once cooked, fluff the rice with a fork and set it aside to cool slightly.
Step 2: Bread the Chicken
To create that signature crispy texture, set up a breading station. Dredge each tenderized chicken breast in all-purpose flour, ensuring an even coating—this helps the egg and panko stick. Next, dip the floured chicken into the beaten eggs, allowing any excess to drip off. Finally, coat the chicken thoroughly with panko breadcrumbs, pressing gently to help them adhere. This classic technique is essential for achieving that crunchy finish.
Step 3: Fry Chicken
Heat about an inch of neutral cooking oil in a large skillet over medium heat until it reaches 350°F (175°C). Carefully add the breaded chicken to the hot oil, frying for about 4-5 minutes per side until each piece is golden brown and crispy. Avoid overcrowding the pan, as this can lower the oil temperature and compromise texture. Once cooked, transfer the chicken to a paper towel-lined plate to drain excess oil.
Step 4: Assemble Bento Box
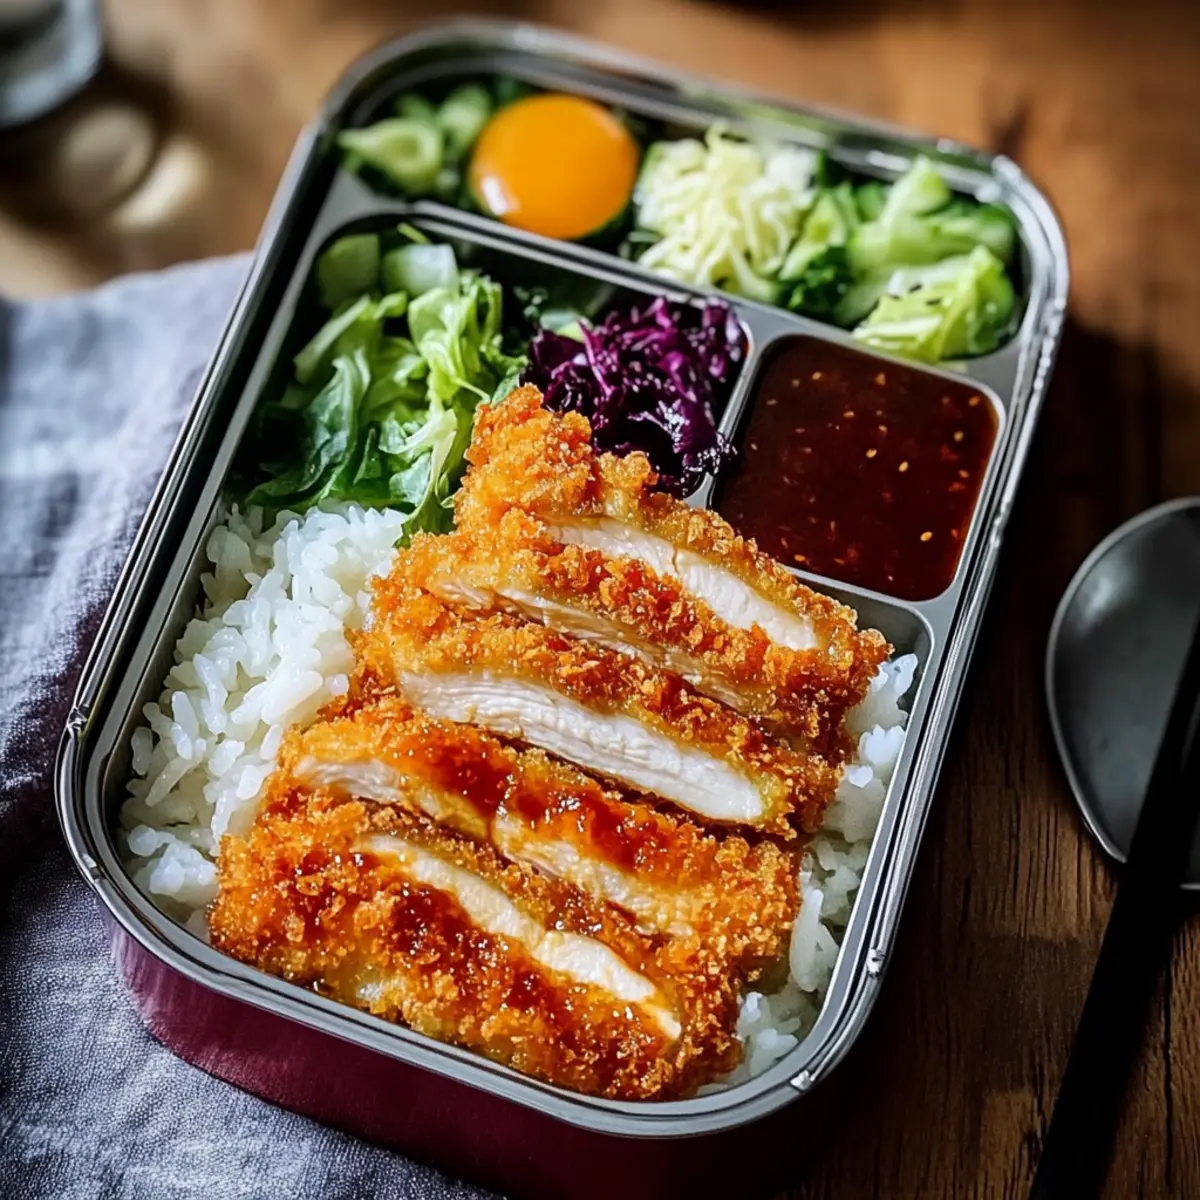
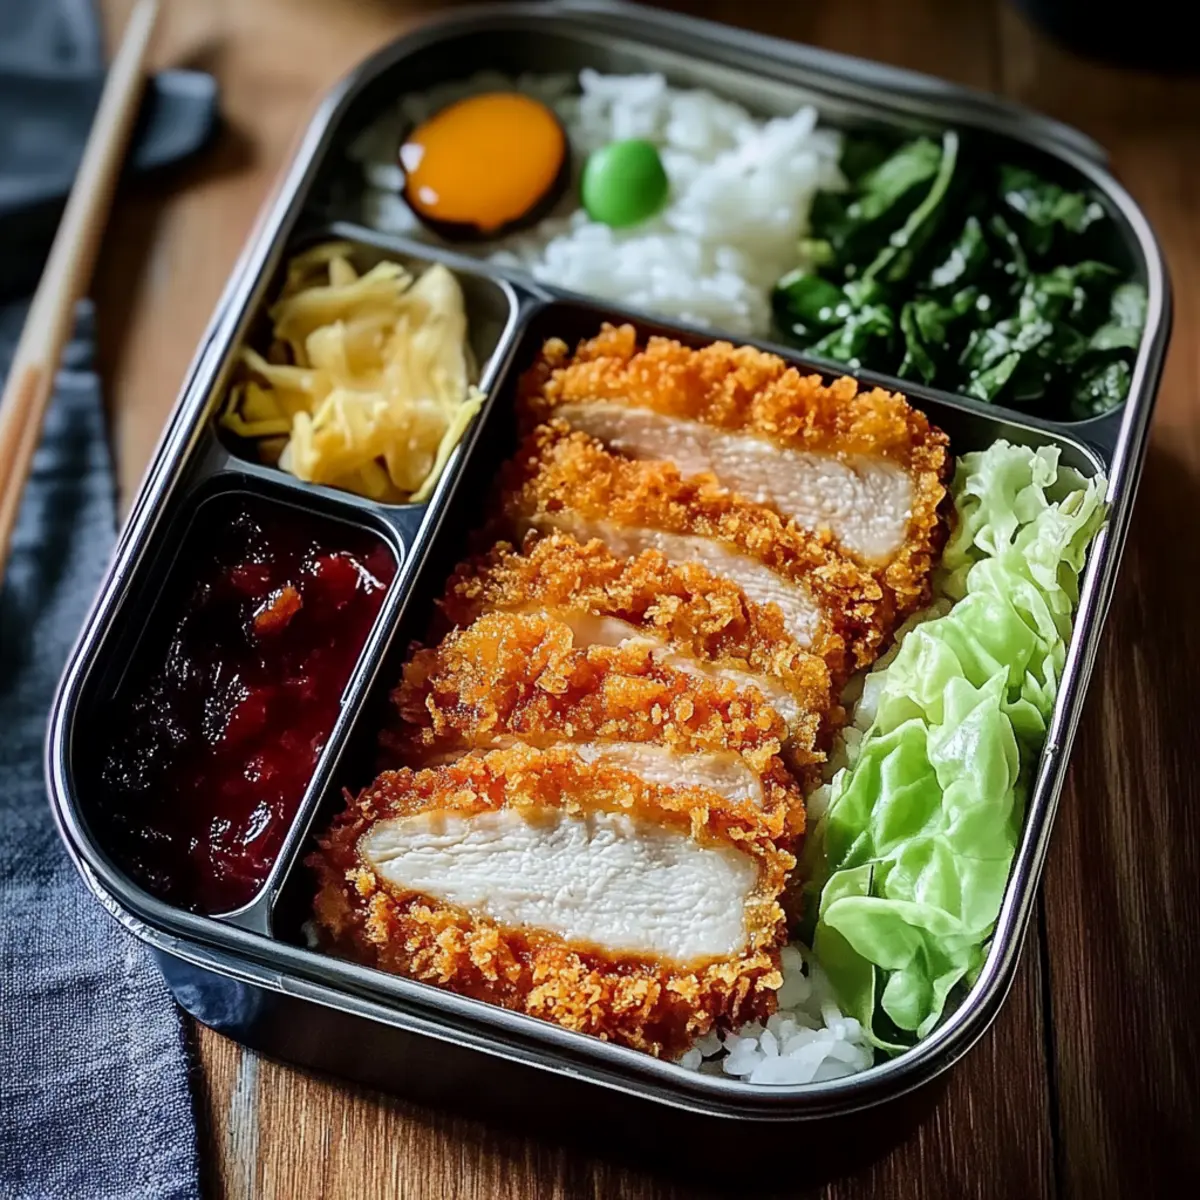
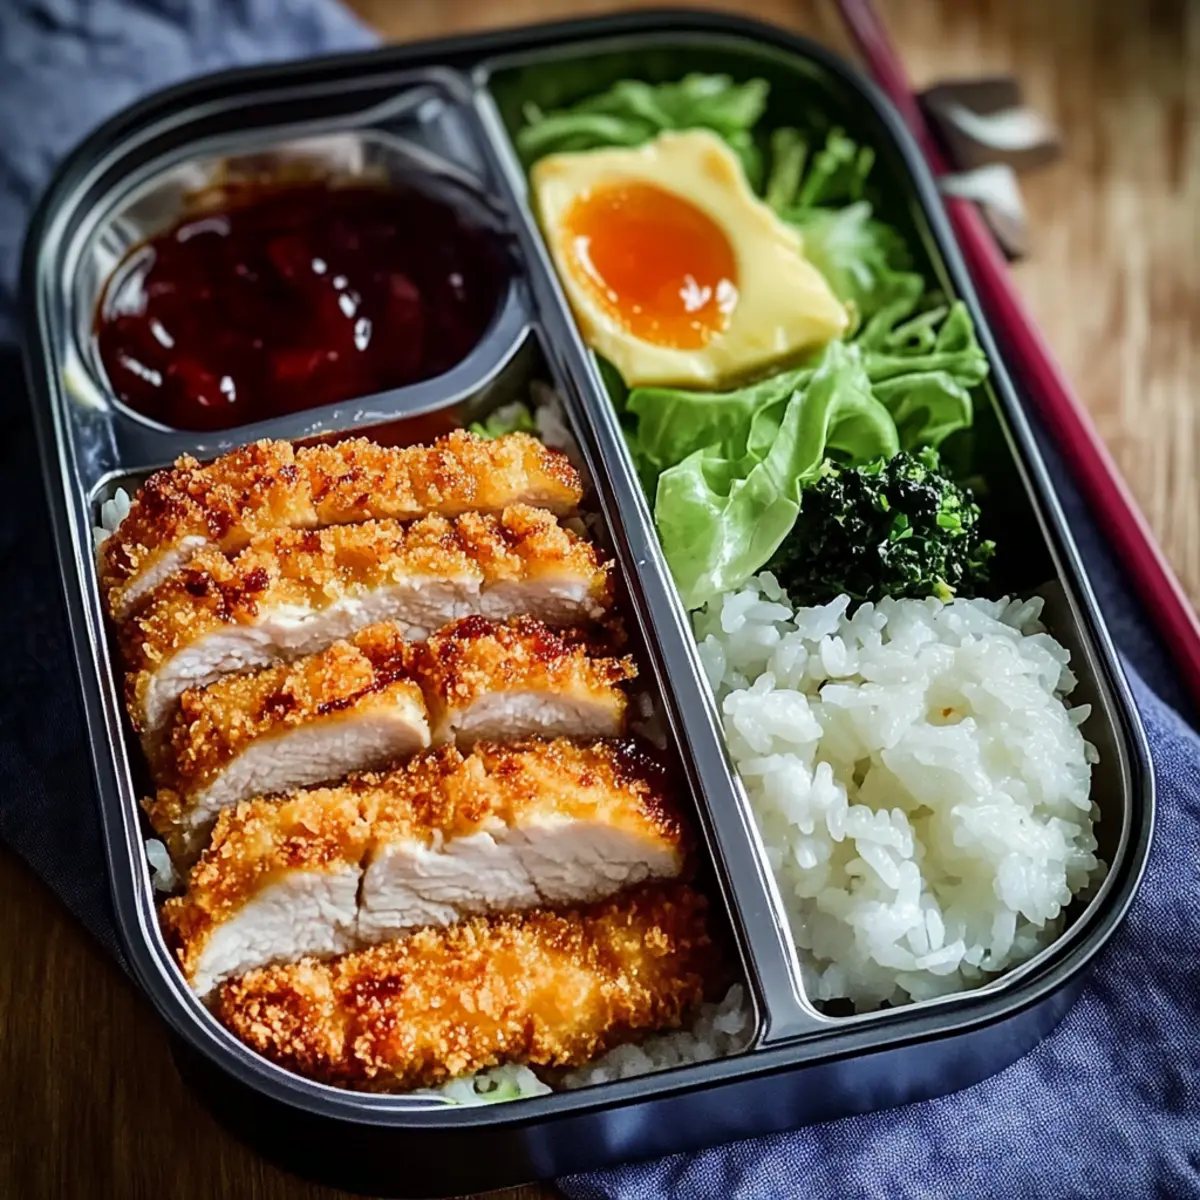
Now, it’s time to assemble your Chicken Katsu Bento Box. Start by spooning a generous portion of fluffy rice into the bottom of your bento box. Next, slice the fried chicken into strips and elegantly arrange them on top of the rice, creating a vibrant contrast. Finally, add the fresh cabbage alongside the chicken, filling any remaining gaps to enhance the visual appeal and freshness of your meal.
Step 5: Serve
Drizzle the sliced chicken with tonkatsu sauce for that perfect savory touch. You can adjust the amount to your taste; some enjoy a light drizzle, while others prefer it generously glazed. Feel free to get creative by adding any extra sides or garnishes to your Chicken Katsu Bento Box, such as pickled vegetables or steamed broccoli, elevating the meal to new heights!
Chicken Katsu Bento Box Variations
Feel free to put your own twist on this delightful creation by exploring these tasty variations!
-
Pork Katsu: Substitute chicken with pork cutlets for a deliciously tender Pork Katsu, keeping the same crispy breadcrumbs and frying method.
-
Vegetarian Delight: Use eggplant or tofu instead of meat, both of which can be panko-breaded and fried to perfection for a satisfying crunch.
-
Gluten-Free Option: Swap all-purpose flour with a gluten-free flour blend and use gluten-free panko breadcrumbs to enjoy this dish without compromise.
-
Flavor Boost: Add a sprinkle of chili powder or garlic powder to the panko breadcrumbs before coating the chicken for an extra layer of flavor that will tantalize your taste buds.
-
Veggie Power: Enhance your bento box by including colorful veggies like steamed broccoli or edamame, adding nutritional value and vivid colors to your meal.
-
Brown Rice Twist: Replace white rice with brown rice for a nuttier flavor and added fiber, creating a healthier base for your bento box.
-
Crispy Onions: For an additional crunch, sprinkle crispy fried onions on top of the chicken and rice before serving—it’s a game changer!
-
Spicy Sauce: Mix sriracha or a touch of wasabi into your tonkatsu sauce to bring a delightful kick to your Chicken Katsu Bento Box, perfect for those who love a little heat!
As you experiment, don’t forget to check out some other easy Japanese lunch ideas like my Loaded Chicken Club or Herb Chicken Mashed.
Make Ahead Options
These Chicken Katsu Bento Boxes are perfect for busy home cooks looking to save time without sacrificing quality! You can prep the chicken by breading it up to 24 hours in advance; simply keep the breaded cutlets covered in the refrigerator to maintain their crispiness. Additionally, you can cook the rice and store it in an airtight container for up to 3 days. When it’s time to serve, fry the chicken fresh for that irresistible crunch and reheat the rice gently. Assembling your bento box just before mealtime ensures you enjoy a fresh, restaurant-quality meal with minimal effort any day of the week!
What to Serve with Chicken Katsu Bento Box
Imagine setting the table with vibrant colors and delightful aromas, making your Chicken Katsu Bento Box even more enticing.
-
Steamed Broccoli: A light, nutritious side that adds a crunchy texture and bright green color to your meal.
-
Miso Soup: The warm, umami-rich flavor of miso soup beautifully complements the crispy chicken while adding a cozy element.
-
Japanese Pickles: These tangy and refreshing bites not only enhance flavor but also provide a zesty contrast to the savory chicken.
-
Edamame: These protein-packed, lightly salted pods are a tasty snack and a pop of green that pairs perfectly with your bento box.
-
Quinoa Salad: Light and nutty, quinoa salad can be tossed with fresh vegetables for a nutritious, fiber-rich addition to the meal.
-
Chilled Soba Noodles: Tossed in a sesame dressing, these noodles add a cool element to balance the warm chicken and rice.
-
Green Tea: A soothing beverage that enhances the meal’s overall experience, adding a refreshing touch between bites.
-
Fresh Fruit: End with a refreshing fruit salad or sliced citrus, offering a sweet contrast that cleanses the palate.
How to Store and Freeze Chicken Katsu Bento Box
Fridge: Store components separately in airtight containers for up to 3 days to maintain freshness and texture. Keep fried chicken crisp by avoiding contact with rice.
Freezer: For longer storage, freeze baked or fried chicken without the rice for up to 2 months. Wrap it tightly in plastic wrap and freeze in a freezer bag.
Reheating: To enjoy your Chicken Katsu Bento Box after freezing, bake chicken in the oven at 375°F (190°C) for about 15-20 minutes until heated through and crispy.
Meal Prep: If preparing ahead, it’s best to keep ingredients separate until ready to serve, maintaining the integrity of each component for the ideal homemade bento experience.
Expert Tips for Chicken Katsu Bento Box
-
Oil Temperature Check: Ensure your oil reaches 350°F for the perfect crispy chicken—overheating can lead to burnt breading.
-
Avoid Overcrowding: Fry the chicken in batches to maintain oil temperature, ensuring each piece turns out golden and crunchy.
-
Storage Savvy: If making ahead, store chicken separately from rice to prevent sogginess; reheat chicken in the oven or air fryer for best results.
-
Customize Your Sauce: Feel free to adjust the amount of tonkatsu sauce based on personal preference—some love it extra saucy, while others keep it light.
-
Fresh Ingredients Matter: Use fresh cabbage and quality panko breadcrumbs to elevate the flavors and textures of your Chicken Katsu Bento Box.
Chicken Katsu Bento Box Recipe FAQs
What type of chicken is best for Chicken Katsu?
Absolutely! Boneless, skinless chicken breasts are ideal for making Chicken Katsu. They provide a lean protein source and staying tender when tenderized properly. Always choose fresh, high-quality chicken for the best results.
How long can I store my Chicken Katsu Bento Box in the fridge?
You can store the components of your Chicken Katsu Bento Box separately in airtight containers for up to 3 days. This helps maintain the freshness of both the chicken and the rice, ensuring they don’t lose their delightful textures.
Can I freeze my Chicken Katsu for later?
Yes, you can! For freezing, wrap the fried chicken tightly in plastic wrap and place it in a freezer bag. It can stay frozen for up to 2 months. Just remember to freeze the chicken without the rice as it does not freeze well.
How should I reheat Chicken Katsu when frozen?
To reheat, bake the frozen chicken at 375°F (190°C) for about 15-20 minutes, or until it’s heated through and crispy again. This method restores the crunchy texture that we all love!
Are there any allergen considerations for Chicken Katsu?
Yes, Chicken Katsu typically includes gluten due to the panko breadcrumbs and can also contain eggs. For gluten-free options, try using gluten-free breadcrumbs. Always double-check your ingredient labels if you have any food allergies—keeping your loved ones safe is a priority!
What should I do if my breading isn’t sticking to the chicken?
Very! If your breading isn’t adhering well, ensure the chicken is thoroughly dredged in flour first. The flour creates a slight barrier that allows the beaten eggs and panko to stick better. If you find that it’s still not sticking, you might also want to press the panko firmly onto the chicken to improve adhesion.
Delicious Chicken Katsu Bento Box: Easy Homemade Lunch Joy
Ingredients
Equipment
Method
- Start by gathering all your ingredients for the Chicken Katsu Bento Box. Tenderize the boneless, skinless chicken breasts with a meat mallet for even cooking. Wash and chop the fresh cabbage into thin strips, and cook Japanese short-grain rice according to package instructions, usually about 15 minutes in boiling water. Once cooked, fluff the rice with a fork and set it aside to cool slightly.
- To create that signature crispy texture, set up a breading station. Dredge each tenderized chicken breast in all-purpose flour, ensuring an even coating—this helps the egg and panko stick. Next, dip the floured chicken into the beaten eggs, allowing any excess to drip off. Finally, coat the chicken thoroughly with panko breadcrumbs, pressing gently to help them adhere.
- Heat about an inch of neutral cooking oil in a large skillet over medium heat until it reaches 350°F (175°C). Carefully add the breaded chicken to the hot oil, frying for about 4-5 minutes per side until each piece is golden brown and crispy. Avoid overcrowding the pan, as this can lower the oil temperature and compromise texture.
- Now, it’s time to assemble your Chicken Katsu Bento Box. Start by spooning a generous portion of fluffy rice into the bottom of your bento box. Next, slice the fried chicken into strips and elegantly arrange them on top of the rice, creating a vibrant contrast. Finally, add the fresh cabbage alongside the chicken.
- Drizzle the sliced chicken with tonkatsu sauce for that perfect savory touch. You can adjust the amount to your taste.
Leave a Reply